


LaCie 324 LCD Monitor
Getting Connected
User Manual
page 4
2.1. Connecting the Monitor to Your Computer
To attach the LCD monitor to your system, follow these instruc-
tions:
Power off your computer.
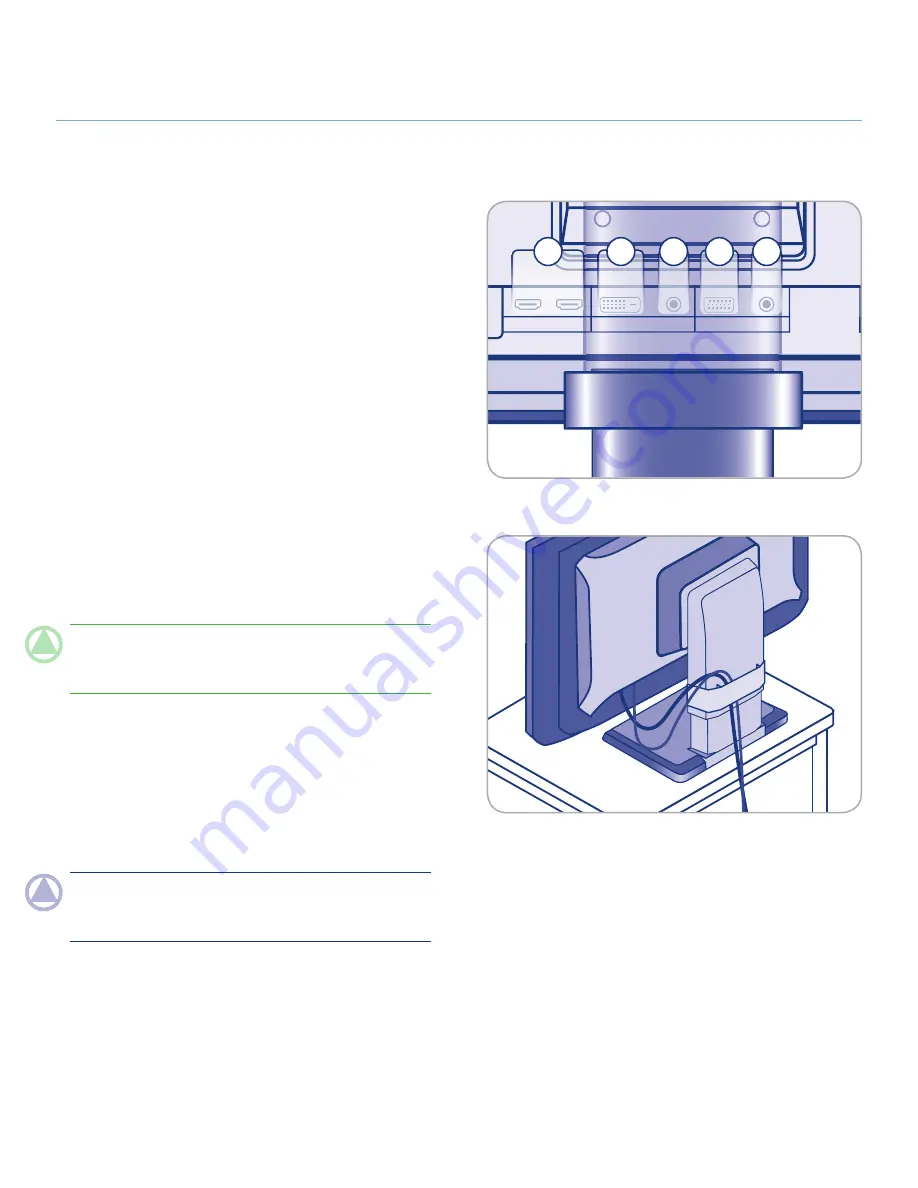
Connect the signal cable (see Fig. 2.1-A):
2a. For a PC or MAC with DVI digital output:
Connect the DVI signal cable to the DVI connector on your
computer. Connect the other end of the DVI cable to the mon-
itor’s DVI input. Tighten all screws.
2b. For a PC or MAC with Analog output:
Connect a 15-pin mini D-SUB to D-SUB signal cable (not in-
cluded) to the 15-pin mini D-SUB connector on your computer.
Connect the other end of this cable to the monitor’s D-SUB
(VGA) input.
2c. For a video source with HDMI output:
Connect the HDMI signal cable to the HDMI connector on your
computer. Connect the other end of this cable to the monitor’s
HDMI 1 or HDMI 2 input.
TeChNICAl NOTe:
Up to 4 video sources can be connected
to the monitor at the same time using the DVI, VGA, HDMI 1
and HDMI 2 input ports.
Connect the included audio cable to the monitor’s AUDIO
IN port. If you are connecting two computers to the monitor,
you can connect two audio cables to the monitor’s AUDIO
IN ports. Video sources connected through HDMI require no
additional audio cable.
Connect the other end of the audio cable to the AUDIO OUT
terminal on your PC or Mac.
NOTe:
To keep the cables neatly organized, place them into
the cable management accessory that clips into place on the
back of the LCD stand (Fig. 2.1-B).
Connect one end of the power cord to the AC inlet on the
back of the monitor and the other end to a power outlet.
Push the power key to turn on the monitor, and turn on your
computer.
1.
2.
3.
4.
5.
6.
HDMI
AC IN
PC-DIGITAL
PC-ANALOG
1
2
DVI-D
AUDIO IN
D-SUB
AUDIO IN
LINE OUT
USB
Figure 2.1-A
Figure 2.1-B
2a
2b
3
3
2c


