BA_008_2019-11_10.01 Pressure gauges
Page 4/5
4
Operation
During operation, take care that the device remains within its intended pressure and tem-
perature ranges. No other monitoring is necessary.
The permissible ambient and media temperature depends on the type of device and its
design. This information can be found in the relevant data sheet.
4.1 Zero-point correction
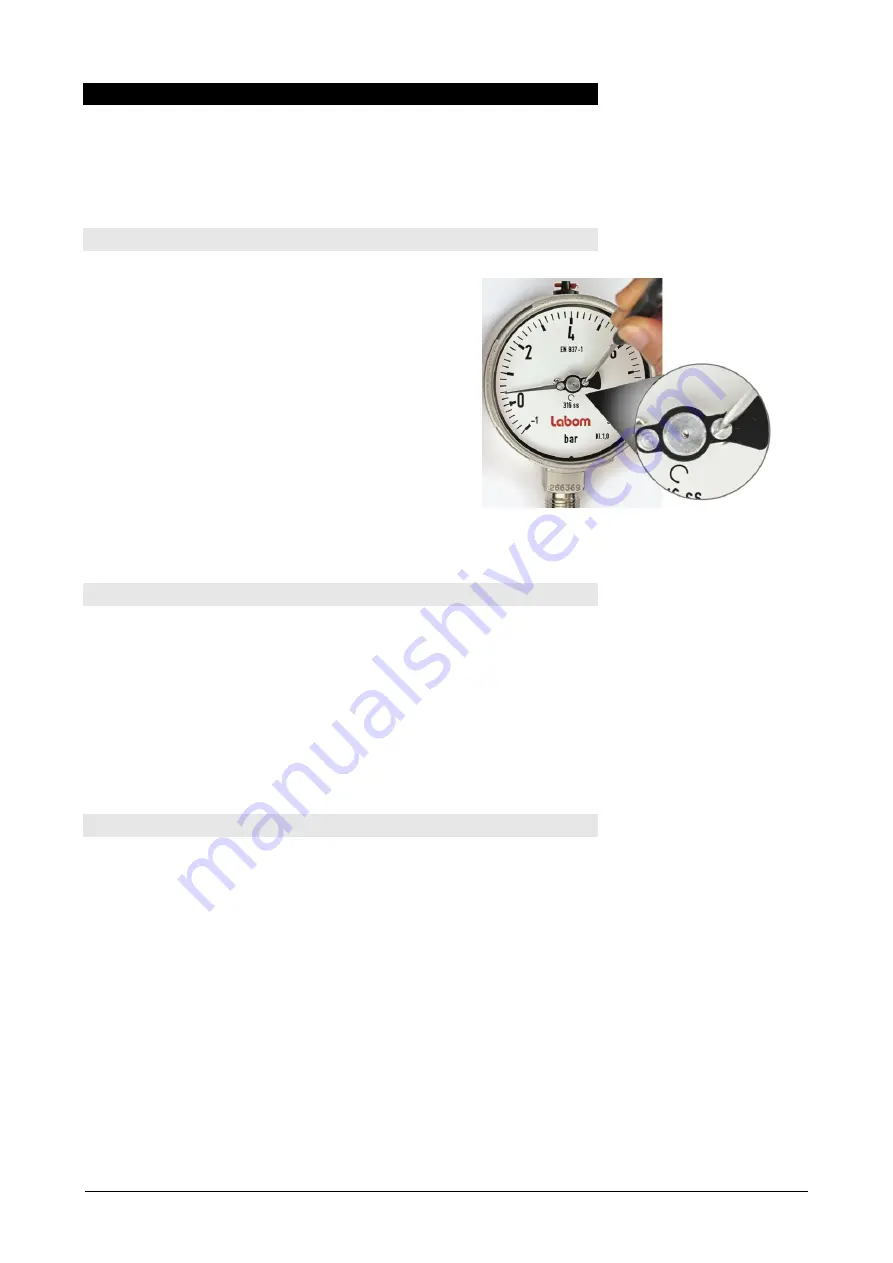
Small measuring errors or deviations
caused by difference in level between pres-
sure gauge and point of measurement can
be corrected on measuring devices with
micro control position pointers. To do so
turn the adjusting screw on the pointer hub
(see figure 4).
Similarly, a displacement of the zero point
caused by use and long service life can be
corrected if necessary.
You can find further information about zero-
adjustment of pressure gauge with micro
adjustment pointer in the document TA_029
on www.labom.com.
Figure 4: Zero-point correction
4.2 Devices with Diaphragm Seal
Remove the protective cap or protective wrapping from the diaphragm only just before in-
stallation to prevent contamination or damage.
The diaphragm must not be touched. Do not place the device on its diaphragm. Even
small scratches or deformations may negatively influence the zero point or other charac-
teristics of the device.
Pressure transmitter and diaphragm seal are a closed system that must not be separated.
You can find further information about diaphragm seals in the document TA_031 on
www.labom.com.
4.3 Maintenance / Service
When properly installed in accordance with applicable specifications, this device is
maintenance-free. However, we recommend an annual recalibration of the device.
In the event of any damage or defect the customer cannot replace or repair any compo-
nents or assemblies.


