background image

Projection Brightness & Rotation

Brightness:

Press the      button to change the Projection Brightness (High, Low, or Off).

Rotation:

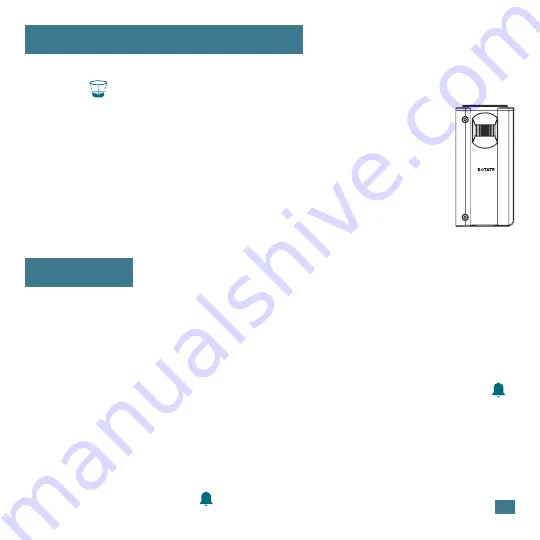
Use the 

Rotation Wheel

 on the back of the projection arm                          

to change the projection orientation 270 degrees.

Tilt The Projection Arm:

The Projection Arm can tilt forward and backward to adjust the 
location of the projection image on a wall or ceiling.

Time Alarm

Set Alarm:

 1. Hold the 

ALARM

 button to enter the Alarm Settings Menu.

2. Use the 

+/-

  buttons to adjust the flashing values. 

3. Press the 

ALARM


button to confirm and move forward.

Note: 

The alarm will activate after being set, indicated by the Alarm Icon    . 

The Alarm Time will also remain on screen until the 

CALENDAR

 button is 

used to switch back to a calendar display. 

Activate/Deactivate Alarm:

Press the 

ALARM 

button to activate or deactivate the alarm and view your 

alarm time. The Alarm Icon     will show only when alarm is active.

6

Содержание 616-12667

Страница 1: ...SET UP GUIDE MODEL 616 1410 616 12667 616 1410v2 616 12667v2 Atomic Projection Clock with Indoor Outdoor Temperature ...

Страница 2: ...The clock will search for the Atomic Time Signal at power up and at UTC 7 00 8 00 9 00 10 00 and 11 00 The Atomic Time Signal Icon will flash while searching and be solid when it has connected From the normal time display press the SET button to manually start or stop a search for the WWVB time signal For information about WWVB visit bit ly AtomicTime Note The Backlight will be off temporarily whi...

Страница 3: ...ttons to adjust values 3 Press and release SET to confirm values 4 Press and release the SNOOZE LIGHT button at any time to save and exit Settings Menu Order Language English Spanish French German Beep ON OFF Atomic ON OFF DST Settings DST AUTO ON Changes Spring and Fall DST ALWAYS OFF No change in Spring DST ALWAYS ON No change in Fall Time Zone 12 24 Format Hour Minutes Year Month Date Month Dat...

Страница 4: ...ected times 1 Hold the SNOOZE LIGHT button to enter the Auto Dim Settings Menu 2 Press the buttons to turn the Auto Dim feature on or off Press SNOOZE LIGHT to confirm 3 Press the buttons to adjust the starting hour Press SNOOZE LIGHT to confirm 4 Press the buttons to adjust the stopping hour Press SNOOZE LIGHT to confirm and exit The icon will appear on the LCD when the Auto Dim feature activated...

Страница 5: ...bbreviated weekday with date or alarm time Projection Image 1 Hold the button to enter the Projection Settings 2 Use the buttons to change projection selection 3 Projection image will stay on last option selected Projection Options Time only Indoor Temp only Outdoor Temp only Alternate Time Indoor Temp Outdoor Temp ...

Страница 6: ...on a wall or ceiling Time Alarm Set Alarm 1 Hold the ALARM button to enter the Alarm Settings Menu 2 Use the buttons to adjust the flashing values 3 Press the ALARM button to confirm and move forward Note The alarm will activate after being set indicated by the Alarm Icon The Alarm Time will also remain on screen until the CALENDAR button is used to switch back to a calendar display Activate Deact...

Страница 7: ...utton press or time out after 2 minutes GOOD DAY will show briefly then return to normal time display Temperature Trend Arrows Both the Indoor and Outdoor temperature have Trend Arrows to indicate temperature changes 2 F 1 C over the past one hour period Temperature has risen over the past one hour Temperature has been steady over the past one hour Temperature has fallen over the past one hour 7 ...

Страница 8: ...y and remove power from both the sensor and clock 3 Press any button on the clock 20 times and leave the parts sit for a few moments with the power off 4 Install a new set of alkaline batteries into the sensor then into your clock For additional help visit bit ly basic_restart 5 If your outdoor data is still not appearing after these steps please contact our support staff via the links below Low B...

Страница 9: ...6 batteries not included Battery Life Over 12 months Dimensions 1 57 L x 0 79 W x 5 12 H 4 0cm L x 2 0cm W x 13 0 H cm 9 Designed in La Crosse Wisconsin Made in China Printed in China DC 060122 Stay in Touch Follow La Crosse Technology on YouTube Twitter Facebook and Instgram Ask questions watch setup videos and provide feedback on our social media outlets If you require additional support get in ...

Страница 10: ...plicated or processed using electronic mechanical or chemical process without the written permission of the publisher This booklet may contain errors or misprints The information it contains is regularly checked and corrections are included in subsequent editions We disclaim any responsibility for any technical error or printing error or their consequences All trademarks and patents are recognized...

Отзывы: