background image

GB

P.8

GB

P.9

GB

P.6

GB

P.7

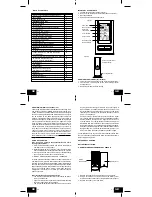
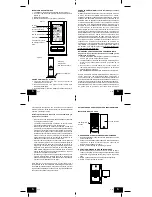
B. INDOOR WEATHER STATION
1. Remove the battery cover. To do this, insert a solid object in

the space provided at the lower-central position of the battery
cover, then push up and pull out on the battery cover.

2. Observe the correct polarity, and install 3 AA batteries.
3. Replace the battery cover.

Note:  Immediately after the batteries have been installed, the
LCD (Liquid Crystal Display) will flash. Within 15 seconds the
indoor temperature, indoor relative humidity, and the weather icons
(sun and clouds) will be displayed. If not, remove batteries for 10
seconds and reinstall. If the outdoor temperature is not displayed
within four minutes, remove batteries from both units, wait 30
seconds, and reinstall making sure to install batteries into the
remote temperature sensor first. The time will show 12:00 and
start searching for the WWVB signal. If it successfully receives
the time signal (usually at night), it will display the correct time
(default time-zone is Eastern). You will need to adjust the time
zone to match your local time.

PROGRAM MODE
Programming Note:
 If 15 seconds are allowed to pass, or the
SNZ/CH button is pressed during the programming mode, the unit
will confirm/set the last information entered-the display will stop
flashing and return to normal time-date readings. If you don’t leave
the program mode during the programming of sections III through
XI, you can advance to step 4 of the next program setting. If you
do leave the program setting (or want to program a specific setting)
follow each instructional step to program that setting.

I. PROGRAMMING SEQUENCE AND DEFAULT SETTINGS
The programming sequence and default (factory) settings are as
follows:

LCD Contrast

5

Time Zone

-5 (Eastern)

Daylight Saving Time

ON

Radio-controlled time reception

ON

12/24-hour time

12

Time - Hour

12

Time - Minute

:00

Year

2003

Month

1

Day

1

Snooze

10 minutes

Forecast Sensitivity

2

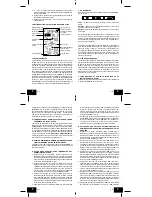
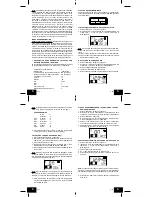
II. FUNCTION KEYS
The function keys are located on the front of the unit directly below
the LCD (Liquid Crystal Display).

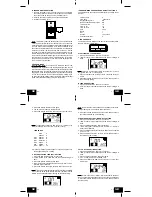
III. SETTING THE LCD CONTRAST
1. Press and hold the SET button for 3 seconds.
2. “LCD” will show in the TIME LCD and the number setting will

flash.

Note: There are 8 LCD contrast levels to choose from ”Lcd 0" is
the lightest, and “Lcd 7” is the darkest.
3. Press and release the ALM/+ button to select the level you

desire.

4. Press and release the SET button to confirm and advance to

the Time Zone setting.

IV. TIME ZONE SETTING
1. Press and hold the SET button for 3 seconds.
2.  “LCD” will show in the TIME LCD and the number setting will

flash.

3. Press and release the SET button again.
4. The time zone will flash in the DATE LCD.
5. Press and release the ALM/+ button to select your time zone.

Note:  It is possible to select any time zone from -12 GMT to +12
GMT (for example to see the time in another country).

TIME ZONES

GMT

0

Atlantic

-4

EST

Eastern

-5

CST

Central

-6

MST

Mountain -7

PST

Pacific

-8

ALA

Alaska

-9

HAW

Hawaii

-10

6. Press and release the SET button to confirm and advance to

the Daylight Saving Time setting.

V. DAYLIGHT SAVING TIME (DST) SETTING
1. Press and hold the SET button for 3 seconds.
2. “LCD” will show in the TIME LCD and the number setting will

flash.

3. Press and release the SET button twice.
4. “DST” will appear in the DATE LCD and either “ON” or “OFF”

will flash in the TIME LCD.

5. Press and release the ALM/+ button to select DST on or off.

Note:  “DST OFF” indicates that the feature is off and the WWVB
will not change times automatically. “DST ON” indicates that the
feature is on and the WWVB will change times automatically.

Note:  Some locations (Arizona and parts of Indiana) do not follow
Daylight Saving Time, and should select “DST OFF”.

6. Press and release the SET button to confirm and advance to

the radio-controlled time on/off setting.

VI. RADIO-CONTROLLED TIME ON/OFF SETTING
1. Press and hold the SET button for 3 seconds.
2. “LCD” will show in the TIME LCD and the number setting will

flash.

3. Press and release the SET button three times.
4. “RCC” will appear in the DATE LCD and “ON” or “OFF” will

flash in the TIME LCD.

5. Press and release the ALM/+ button to select radio-controlled

time on or off.

6. Press and release the SET button to confirm and advance to

the 12/24-hour time setting.

VII. 12 OR 24 HOUR TIME SETTING
1. Press and hold the SET button for 3 seconds.
2. “LCD” will show in the TIME LCD and the number setting will

flash.

3. Press and release the SET button four times.
4. “12h” or “24h” will flash in the DATE LCD.
5. Press and release the ALM/+ button to select 12 or 24-hour

time format.

Note:  When in the 12-hour format “P.M.” will appear to the left of
the hour in the time LCD between the hours of noon and midnight.
6. Press and release the SET button to confirm and advance to
the time setting.

Содержание WS-9118U

Страница 1: ...h 53 FCC DISCLAIMER FCC ID OMO 01RX Receiver OMO 01TX transmitter This device complies with part 15 of the FCC rules Operation is subject to the following two conditions 1 This device may not cause harmful interference 2 This device must accept any interference received including interference that may cause undesired operation R ...

Страница 2: ...emperature humidity sensor should be placed in a dry shaded area Fog and mist will not harm your remote temperature humidity sensor but direct rain must be avoided The remote temperature humidity sensor has a range of 330 TABLE OF CONTENTS Topic Page Inventory of Contents Additional Equipment 3 About WWVB 4 Quick Set Up Guide 4 Detailed Set Up Guide Battery installation 5 Program Mode Program Sequ...

Страница 3: ...is the darkest 3 Press and release the ALM button to select the level you desire 4 Press and release the SET button to confirm and advance to the Time Zone setting IV TIME ZONE SETTING 1 Press and hold the SET button for 3 seconds 2 LCD will show in the TIME LCD and the number setting will flash 3 Press and release the SET button again 4 The time zone will flash in the DATE LCD 5 Press and release...

Страница 4: ...he SET button for 3 seconds 2 LCD will show in the TIME LCD and the number setting will flash 3 Press and release the SET button ten times 4 Sn will appear in the DATE LCD and a number will be flashing next to it 5 Press and release the ALM button to select the duration of the snooze Note The snooze can be set for 0 to 30 minutes in 5 minute increments If 0 minutes is selected pressing the SNZ CH ...

Страница 5: ...EAT INDEX AND DEW POINT RECORDS 1 Press and release the OUT MIN button once MAX appears with the outdoor temperature indicating that the maximum temperature and the time and date of occurrence are displayed The maximum record will display for 30 seconds before returning to the normal display mode 2 Press and release the OUT MIN button again once while MAX temperature is still displayed twice other...

Страница 6: ...hat the indoor weather station is able to receive WWVB signals from the desired location Also extreme and sudden changes in temperature will decrease the accuracy of the indoor weather station and changes in elevation will result with inaccurate weather forecasting for the next 12 to 24 hours These changes will require a 12 to 24 hour wait before obtaining reliable data To achieve a true temperatu...

Страница 7: ...nology Ltd provides a 1 year limited warranty on this product against manufacturing defects in materials and workmanship This limited warranty begins on the original date of purchase is valid only on products purchased and used in North America and only to the original purchaser of this product To receive warranty service the purchaser must contact La Crosse Technology Ltd for problem determinatio...

Страница 8: ...rieure 4 N APPUYEZ SUR AUCUNE TOUCHE PENDANT 15 MINUTES Pendant ce temps la station météo intérieure et le capteur hygrothermique commenceront à dialoguer la station affichant la température et l humidité intérieures et extérieures ainsi que l indice thermique et le point de rosée Si la station météo n affiche pas toutes ces informations dans les 15 minutes répétez la procédure de paramétrage déta...

Страница 9: ...L heure affiche 12 00 et la recherche du signal WWVB commence En cas de réception réussie d habitude la nuit l heure correcte sera affichée le fuseau horaire par défaut est EST Vous devrez alors régler le fuseau horaire à votre fuseau horaire local MODE PROGRAMMATION Remarque sur la programmation Après que 15 secondes se sont écoulées ou si la touche SNZ CH est pressée en mode Programmation l appa...

Страница 10: ...remplacé 1 Appuyez sur la touche SET pendant 3 secondes 2 LCD s affiche à la section HEURE de l écran LCD et le chiffre clignote 3 Appuyez encore cinq fois sur la touche SET 4 Les chiffes de l heure clignotent à la section HEURE de l écran LCD 5 Appuyez sur la touche ALM pour faire avancer les chiffes de l heure 6 Appuyez sur la touche SET pour confirmer le réglage de l heure et passer au réglage ...

Страница 11: ...rosée sont alors calculés à partir des relevés de température et d humidité reçus IV RELEVÉS MINIMUM ET MAXIMUM DETEMPÉRATURE DE L INDICE THERMIQUE ET DU POINT DE ROSÉE La station WS 9118U enregistre les températures MINIMUM et MAXIMUM et le jour et l heure de relevé pour les deux modes intérieur et extérieur A AFFICHAGE DES RELEVÉS DE TEMPÉRATURE ET HUMIDITÉ INTÉRIEURES 1 Appuyez sur la touche IN...

Страница 12: ...es distants différents le s modèle s de capteur thermo hygrométrique que vous choisirez seront accompagnés d une fiche d instructions qui vous guidera dans l installation complète des capteurs Les instructions simplifiées suivantes concernent l installation de base des capteurs distants avec la station WS 9118U Ces capteurs distants supplémentaires sont disponibles chez le revendeur de cet apparei...

Страница 13: ...n météo intérieure de façon à ce que la trajectoire en ligne droite du signal ne traverse pas plus de deux ou trois murs Problème Les températures ne s accordent pas lorsque les deux unités sont placées côte à côte Solution Chaque capteur thermo hygrométrique est conçu avec une précision de 2 degrés de plus ou de moins dans des conditions normales Il est possible de constater une différence de tem...

Страница 14: ...e pas les frais d installation ou de désinstallation d une installation fixe le paramétrage normal ou les réglages les litiges basés sur les malversations du vendeur ou les variations de performance résultant des circonstances relatives à l installation LA CROSSE TECHNOLOGY N ACCEPTE AUCUNE RESPONSABILITÉ POUR LES DOMMAGES FORTUITS CONSÉCUTIFS PUNITIFS OU AUTRES DOMMAGES SIMILAIRES RELATIFS À L UT...

Страница 15: ...evamente con los pasos para la puesta en funcionamiento descritos anteriormente Después de que los datos sean visualizados durante 15 minutos usted puede colocar sus sensores afuera al aire libre y ajustarles la hora Notas Importantes para la Puesta en Funcionamiento y la Operación de la unidad El sensor remoto de temperatura humedad debe ser colocado en un lugar sombreado y seco La niebla y la br...

Страница 16: ...eado 4 Pulse y suelte el botón SET para confirmar y pasar al programa de ajuste de la Zona Horaria IV AJUSTE DE LA ZONA HORARIA 1 Pulse el botón SET durante 3 segundos 2 El símbolo LCD será visualizado en la pantallita de la HORA TIME LCD y el número empezará a relampaguear 3 Pulse y suelte nuevamente el botón SET 4 La zona horaria titilará en el DATE LCD 5 Pulse y suelte la tecla ALM para selecci...

Страница 17: ... de ajuste de la función del snooze X AJUSTE DE LA FUNCION DEL SNOOZE 1 Pulse el botón SET durante 3 segundos 2 El símbolo LCD será visualizado en la pantallita de la hora TIME LCD y el número a ser ajustado empezará a relampaguear 3 Pulse diez veces el botón SET 4 El símbolo Sn aparecerá en la pantallita DATE LCD y el numeró aparecerá titilando al lado de este símbolo 5 Pulse el botón ALM para se...

Страница 18: ...te 30 segundos antes de que la pantalla se devuelva al modo de visualización normal 2 Pulse nuevamente el botón IN HR una sola vez mientras que el símbolo MAX continúe siendo visualizado sino dos veces más El símbolo MIN aparecerá visualizado con la temperatura interior indicando que la mínima temperatura y la hora y fecha de su grabación están siendo visualizadas en la pantalla Los registros de l...

Страница 19: ...na Esta luz se iluminara durante 10 segundos cada vez que se pulse cualquiera tecla 2 La iluminación E L no puede ser encendida constante porque se agotaran las pilas VIII AGREGANDO MÁS SENSORES REMOTOS DE LA TEMPERATURA HUMEDAD OPCIONAL La estación WS 9118U es capaz de recibir señales de 3 diferentes sensores remotos de la temperatura humedad El modelo s de los sensores es remotos que usted haya ...

Страница 20: ...eteorológica en interiores este ubicada al menos a 6 pies 2 metros de distancia de cualquier aparato eléctrico como televisores ordenadores o cualquier otro reloj controlado por señales de radio 3 Retire las pilas durante cinco minutos reinsértelas y deje la unidad sola toda la noche entera sin tocar ninguno de sus botones 4 Si aun así persisten los problemas contacte a La Crosse Technology Proble...

Страница 21: ...n o inspección del aparato le será cobrado al cliente El propietario deberá pagar los costos de envío para enviar su producto de La CrosseTechnology Ltd hasta un centro de servicio autorizado de La Crosse Technology Ltd La Crosse Technology Ltd le pagará los costos razonables de envío de retorno al propietario del producto Su garantía de La Crosse Technology Ltd cubre todos los defectos del materi...

Отзывы: