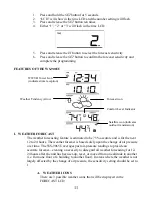
6.
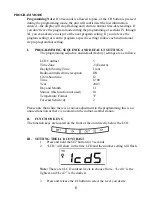
Press and release the
SET
button to confirm and advance to the day/month
setting.
7.
The day and month will flash in the date
LCD.
8.
Press and release the
IN
button to advance the day.
9.
Press and release the
OUT
button to advance the month.
10. Press and release the
SET
button to confirm and advance to the snooze
setting.
X.
SETTING THE SNOOZE
Note:
This is an unused function of the indoor weather station and should be
disregarded. The setting has no bearing on the operation. Please press and release
the
SET
button to advance to select the temperature format.
XI. SELECTING
°
F OR
°
C
1.
Press and hold the
SET
button for 5 seconds.
2.
“LCD” will show in the time LCD and the number setting will flash.
3.
Press and release the
SET
button nine times.
4. Either
”
°
F” or “
°
C” will flash in the time LCD.
5.
Press and release the
IN
button to select the temperature format.
6.
Press and release the
SET
button to confirm and advance to the forecast
sensitivity setting.
XII. SETTING THE FORECAST SENSITIVITY
Note:
The forecast sensitivity can be adjusted to allow for areas that have
a higher or lower sensitivity to changing air pressure (for example coastal
areas have more pressure change than areas such as southern Arizona).
The numbers correspond to the amount of air pressure change necessary to
trigger a change in the forecast icon. Areas that tend to have more air
pressure change would set the sensitivity to 3, while areas that experience
lower than normal air pressure change would set the sensitivity to 1.
10


