La Crosse Technology WS-8054U Скачать руководство пользователя страница 2

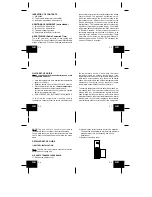
INVENTORY OF CONTENTS

1) WS-8054U
2) TX6U remote temperature transmitter
3) Instruction manual and warranty card.

ADDITIONAL EQUIPMENT (not included)

1) Two fresh 1.5V AA batteries.
2) Two fresh 1.5V AA batteries.
3) Three wall-hanging screws.
4) Appropriate screwdriver for screws.

ABOUT WWVB (Radio Controlled Time)

The NIST (National Institute of Standards and
Technology-Time and Frequency Division) WWVB radio
station is located in Ft. Collins, Colorado, and transmits

the exact time signal continuously throughout the United
States at 60 kHz.  The signal can be received up to 2,
000 miles away through the internal antenna in the
Temperature Alarm.  However, due to the nature of the
Earth's Ionosphere, reception is very limited during
daylight hours.  The Temperature Alarm will search for a
signal every night when reception is best.  The WWVB
radio station derives its signal from the NIST Atomic clock
in Boulder, Colorado.  A team of atomic physicists is
continually measuring every second, of every day, to an
accuracy of ten billionths of a second per day.  These
physicists have created an international standard,
measuring a second as 9,192,631,770 vibrations of a
Cesium-133 atom in a vacuum.

QUICK SET-UP GUIDE

Hint

: Use good quality Alkaline Batteries and avoid

rechargeable batteries.

1. Have the temperature clock and remote temperature

sensor 3 to 5 apart.

2. Batteries should be out of both units for 10 minutes.
3. Place the batteries into the remote temperature

sensor first then into the temperature clock.
(All remote temperature sensors must be started
before the temperature clock)

4. DO NOT PRESS ANY BUTTONS FOR 10 MINUTES.

In this time the temperature clock and remote
temperature sensor will start to talk to each other and

the temperature clock will show both the indoor
temperature and an outdoor temperature. If the
temperature clock does not display both temperatures
after the 10 minutes please retry the set up as stated
above. After both indoor and outdoor temperatures are
displayed for 10 minutes you can place your remote
temperature sensor outdoors and set your time.

The remote temperature sensor should be placed in a
dry, shaded area.  The remote temperature sensor has
a range of 80 feet.  Any walls that the signal will have to
pass through will reduce distance.  An outdoor wall or
window will have 20 to 30 feet of resistance and an interior
wall will have 10 to 20 feet of resistance. Your  distance
plus resistance should not exceed 80 ft. in a straight line.

NOTE

Fog and mist will not harm your remote

temperature sensor but direct rain must be avoided.
To complete the set up of your temperature clock after
the 10 minutes have passed please follow the steps
below.

DETAILED SET-UP GUIDE

I) BATTERY INSTALLATION

Note

: To avoid start-up problems make sure that the

batteries do not spring free.

A) REMOTE TEMPERATURE SENSOR
1) Remove the battery cover.

2) Observing the correct polarity, install 2 AA batteries.

The batteries will fit tightly (to avoid start-up problems
make sure that they do not spring free during
installation).

3) Replace the battery cover.

SIZE AA LR6

SIZE AA LR6

Temp. Transmitter

433 MHz

GB

P.5

GB

P.4

GB

P.7

GB

P.6

GB

P.9

GB

P.8

Содержание WS-8054U

Страница 1: ...ION R Contents Language Page English 2 French 44 Spanish 88 TABLE OF CONTENTS Topic Page Inventory of Contents Additional Equipment 4 About WWVB 4 Quick Set Up Guide 6 Detailed Set Up Guide Battery In...

Страница 2: ...the temperature clock All remote temperature sensors must be started before the temperature clock 4 DO NOT PRESS ANY BUTTONS FOR 10 MINUTES In this time the temperature clock and remote temperature se...

Страница 3: ...ock will search again at 12 00 am the next night PROGRAM MODE To enter the program mode hold down the SET button for 2 seconds until 5EST flashes in the date LCD The program mode is laid out in a mann...

Страница 4: ...ess and release the button to select the hour Note when setting the hour PM will appear to the left of the hour display if it is AM nothing will be displayed 3 Press and release the SET button to conf...

Страница 5: ...d release the ALARM button to confirm the hour and to set the alarm minutes d The alarm minutes will now flash e Press and release the button to set the alarm minutes f Press and release the ALARM but...

Страница 6: ...ion the remote temperature sensor in the desired location ensuring that the temperature alarm can receive the signal VII MAINTENANCE CARE Extreme temperatures vibrations and shock should be avoided to...

Страница 7: ...oof of purchase to La Crosse Technology Ltd or La Crosse Technology Ltd s authorized service center La Crosse Technology Ltd will repair or replace this product at our option and at no charge as stipu...

Страница 8: ...om information on other products web www lacrossetechnology com Questions Please see instruction video at www lacrossetechnology info 8054 All rights reserved This handbook must not be reproduced in a...

Страница 9: ...reils pendant au moins 10 minutes 3 Mettre les piles d abord dans le capteur de temp rature distance PUIS dans l alarme temp rature Tous les capteurs distance doivent tre lanc s avant l alarme temp ra...

Страница 10: ...lanc e automatiquement toutes les nuits minuit Si le signal est capt minuit l ic ne tour reste affich e sinon une autre recherche est effectu e toutes les heures jusqu 6h00 jusqu ce qu un signal soit...

Страница 11: ...le fuseau horaire s lectionn se mettra clignoter appuyer bri vement sur SET deux fois de plus jusqu ce que la langue par d faut US anglais clignote sur le LCD 2 Appuyer bri vement sur pour s lectionn...

Страница 12: ...de programmation CARACTERISTIQUES ET FONCTIONS I CHANGEMENT DU MODE D AFFICHAGE JOUR SECONDES ET TEMPERATURE Il y a trois modes d affichage possibles pour les jour secondes et temp rature Le r glage p...

Страница 13: ...de temp rature distance Il doit se d gager facilement 2 Installer le support l endroit d sir Marquer l emplacement des vis sur le mur avec un crayon 3 Planter les vis l endroit indiqu 4 Visser le sup...

Страница 14: ...on Alarme Temp rature 2 x AA LR6 1 5V alcalines Emetteur 2 x AA LR6 1 5V alcalines Dur e des piles 12 mois environ Dimensions L x l x H Alarme Temp rature 95 x 50 x 81 mm 3 74 x 1 96 x 3 18 Emetteur 4...

Страница 15: ...nces relatives l installation LA CROSSE TECHNOLOGY N ACCEPTE AUCUNE RESPONSABILIT POUR LES DOMMAGES FORTUITS CONS CUTIFS PUNITIFS OU AUTRES DOMMAGES SIMILAIRES RELATIFS L UTILISATION OU AU MAUVAIS FON...

Страница 16: ...s de la antena interna de la Alarma de la Temperatura Sin embargo debido a la naturaleza de la Ion sfera de la Tierra la recepci n est muy limitada durante las horas del d a El Sensor de la Alarma de...

Страница 17: ...te la instalaci n de las mismas 3 Vuelva a colocar la tapa de la bater a B ALARMA TERMOMETRO SENSOR DE LA TEMPERATURA 1 Quite la tapa de la bater a localizada en la parte trasera de la unidad y direct...

Страница 18: ...III Presione el bot n SNOZE en cualquier momento para salir del Modo de Programaci n o espere aproximadamente 15 segundos para que la Alarma se devuelva autom ticamente al modo de funcionamiento norma...

Страница 19: ...nada 3 Presione y suelte el bot n SET para confirmar la hora puesta y para cambiar a la selecci n de los minutos 4 Presione y suelte el bot n para seleccionar los minutos 5 Presione y suelte el bot n...

Страница 20: ...undos Despu s de cada uno de los dos primeros periodos de 25 segundos la velocidad de la alarma se incrementar a Sostenga el bot n ALARMA durante 5 segundos El icono del TIEMPO al lado d e r e c h o d...

Страница 21: ...ontura con un l piz 3 Donde haya marcado empiece a hacer los agujeros en la superficie de montura 4 Atornille el travesa o de montaje en la superficie de montura Aseg rese de que los tornillos queden...

Страница 22: ...uier pregunta que no este contestada por favor contacte a La Crosse Technology a la direcci n anotada al final de este manual de instrucci n ESPECIFICACIONES Temperatura Rango o escala de medici n 32...

Страница 23: ...es contenidas en el manual de instrucciones del usuario 5 da os ocasionados por la reparaci n o modificaci n efectuadas por personal distinto al del centro de servicio autorizado de La Crosse Technolo...

Страница 24: ...Este manual puede contener errores t cnicos y errores de impresi n La informaci n contenida en este manual se verifica regularmente y las correcciones se har n en la pr xima edici n Nosotros no acept...

Отзывы: