

16
Note:
When setting up multiple sensors it is important to remove the
batteries from all existing units in operation, then to insert batteries first
into all the sensors, and in numeric sequence. Second install batteries
into the Weather Center. Transmission problems will arise if this is not
done correctly and if the total time for set-up exceeds 6 minutes
A.
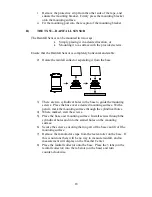
SET-UP OF MULTIPLE SENSORS
Note: The first sensor signal that the Weather Center receives is
automatically assigned as the “boxed #1.” The 2
nd
to be received is the
“boxed #2,” and the 3
rd
is the “boxed #3.”
1.
It is necessary to remove the batteries from all units currently in
operation.
2.
Remove the battery covers to all sensor units (new and old).
3.
Place all sensors in a numeric sequential order.
4.
In sequential order, install batteries into the sensors (follow the
same battery installation procedures seen in section I.
5.
Install batteries into the Weather Center.
6.
Follow the Programming Mode instructions to program and set-up
the Weather Center.
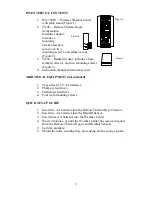
B. SELECTING WHICH SENSOR DATA TO DISPLAY
1.
To view the outdoor temperature and humidity from a different
sensor, press the
+
button. A shift from a “boxed #1” to a “boxed
#2” should be observed under the “MIN” icon in LCD 6.
2.
Press the
+
button a second time to shift from the “boxed #2” to
the “boxed #3”. (Information will display only if you have three
sensors in operation).
3.
To view information from the first sensor again, press the
+
button.
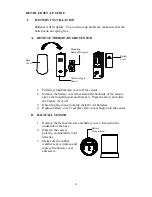
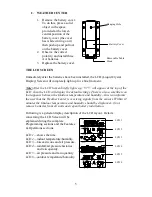
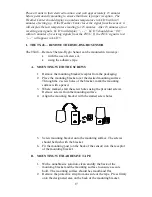
MOUNTING
Note: Before permanently mounting, ensure that the Weather Center is able to
receive signals from the sensors at the desired location. Extreme and sudden
changes in temperature will decrease the accuracy of the Weather Center, and
changes in elevation will result with inaccurate weather forecasting for the next
12 to 24 hours. These changes will require a 12 to 24 hour wait before
obtaining reliable data. To achieve a true temperature reading, avoid mounting
the TX4U—Remote Thermo-Hygro (or any sensor) where direct sunlight can
reach the sensor. We recommend that you mount the sensor on a North-facing
wall. The sending range of the TX4U and the TX5U is 80-ft (25m) however
obstacles such as walls, concrete, and large metal objects can reduce the range.


