

10
1.
Press the
INDOOR
button. The Current Indoor temperature in
LCD 2 shifts to a display of the minimum recorded indoor
temperature, with a “MIN” between the temperature and humidity.
The recorded time simultaneously displays. Press the
INDOOR
button to display the recorded date in LCD 1.
2.
Press the
INDOOR
button a third time. The minimum temperature
in LCD 2 shifts to the recorded maximum temperature, with the
recorded time in LCD 1. Press the
INDOOR
button a fourth time
to view the recorded date. Press the
INDOOR
button to exit this
mode.
3.
Press the
OUTDOOR
button. The Current Outdoor temperature in
LCD 6 shifts to a display of the minimum recorded outdoor
temperature, with a “MIN” between the temperature and humidity.
The recorded time simultaneously displays. Press the
OUTDOOR
button to display the recorded date in LCD 1.
4.
Press the
OUTDOOR
button a third time. The minimum
temperature in LCD 6 shifts to the recorded maximum
temperature, with the recorded time in LCD 1. Press the
OUTDOOR
button a fourth time to view the recorded date. Press
the
OUTDOOR
button to exit this mode.
B.
RESETTING THE MINIMUM & MAXIMUM RECORDS
Hold down the
INDOOR
button for 3 seconds. This will reset the
recorded minimum and maximum temperatures for the Indoor records.
Hold down the
OUTDOOR
button for 3 seconds. This will reset the
recorded minimum and maximum temperatures for the Outdoor
records.
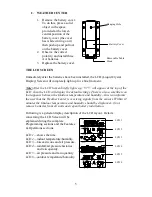
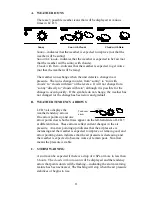
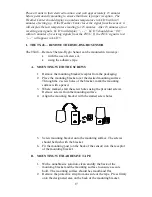
III.
WEATHER FORECAST & WEATHER ICONS
The weather forecasting feature is estimated to be 75% accurate, and is
based solely upon the change of air pressure over time. The WS-7058U
averages past air-pressure readings to provide an accurate forecast—
creating a necessity to disregard all weather forecasting for 12-24 hours
after the unit has been set-up, reset, or moved from one altitude to
another (i.e. from one floor of a building to another floor). In areas
where the weather is not affected by the change of air pressure, this
feature will be less accurate.


