6
After powering up both the remote temperature/humidity sensor and touch-screen weather station the LCD of the touch-
screen weather station will for a few seconds display all possible segments (to ensure all parts of the display can be
seen).
Immediately after this the unit will enter the check mode phase in which for about 15 minutes all measured and received
weather data be cycled through, updated and displayed. During this time period there will be no reception of the WWVB
time information.
Note:
The check mode phase allows the user of the touch-screen weather station to check all cables for correct
connection and all components for correct function.
After completing the check mode the touch-screen weather station will automatically switch to the normal display mode
from which all further settings can be performed by the user. At this point of time the unit will also automatically start
reception of the WWVB time information.
Important Note:
Reception of the radio-controlled time information will only take place after completion of the check mode
(approx. 15 minutes). In case the user wants to start the system without waiting for completion of the check
mode it can be terminated prematurely by once touching the TIME display in the upper left corner of the LCD.
Prior to manual setting or reception of radio-controlled time information there will be no recording of weather
history data.
3.4 Placement
After the touch-screen weather station has been checked for correct function mounting the system components can take
place. It must be ensured however that all components work properly together at their chosen mounting or standing
locations. If there appear to be problems with the 433 MHz wireless transmission they can mostly be overcome by slightly
moving the mounting locations.
Note:
Commonly the wireless communication between the remote temperature/humidity sensor and touch-screen
weather station in the open field reaches distances of a maximum 330 feet (100 meters) providing that there are no
interfering obstacles such as buildings, trees, vehicles, high voltage lines, etc.
Radio interferences created by PC screens, radios or TV sets can in some cases entirely cut off wireless communication.
Please take this into consideration when choosing standing or mounting locations.
4 Setting
Up:
Note:
Because the default settings already determined by the manufacturer it may not be necessary for many users to
perform - outside possibly the Relative Air Pressure (see further down) - any further basic settings. Changes however can
easily be made if desired.
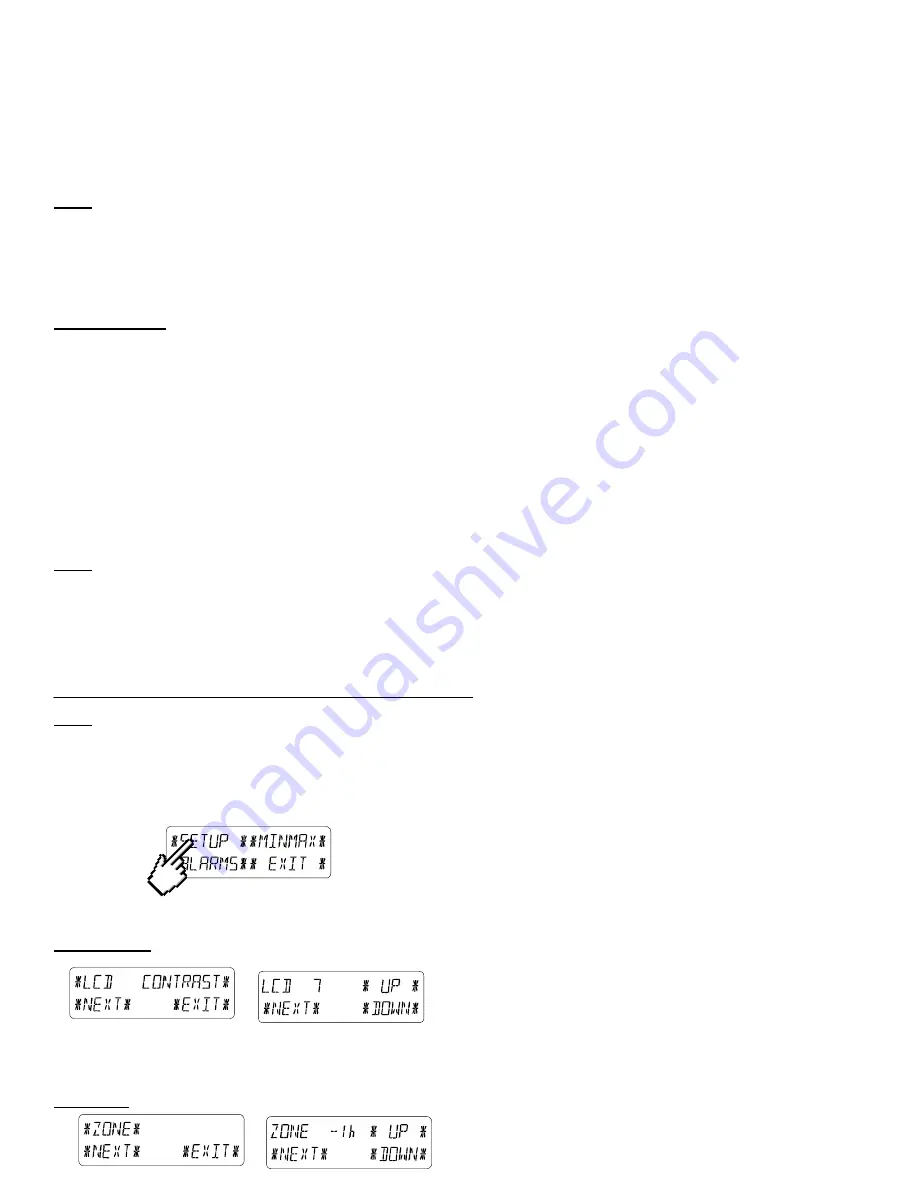
For basic settings the following menu is started by touching the touch-screen in the center of the text display (last two
lines on the LCD). Touching the display
٭
SETUP
٭
will enter the setup mode.
The basic settings can now be performed in the following successive order:
LCD Contrast
→
Contrast can be set in 8 steps from 0 to 7 (Default 4).
Time Zone
→
Time Zones can be set in the range from -12 to +12 hours (Default -5 hours for Eastern).


