background image

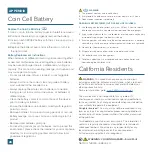
Coin Cell Battery

Replace the Coin Cell Battery
1.


 Use a coin to turn the battery cover to the left to remove it.

2.


Pull back the metal pin and gently remove the battery.

3.


Insert a fresh CR2032 battery with the 

+

 side up and snap 


it into place.

4.


Replace the battery cover and use the coin to turn it to


the right to lock.

Swallowing may lead to serious injury in as little as 2 hours or death, 
due to chemical burns and potential perforation of the esophagus.
If you suspect your child has swallowed or inserted a coin cell battery, 
immediately seek urgent medical assistance.
Examine devices and make sure the battery compartment is correctly 
secured, e.g. that the screw or other mechanical fastener is tightened. 
Do not use if compartment is not secure.
Dispose of used coin cell batteries immediately and safely. 
Flat batteries can still be dangerous.
Tell others about the risk associated with coin cell batteries and
how to keep their children safe. 

              WARNING

This product contains a coin cell battery.
If swallowed, it could cause severe injury or death in just 2 hours.
Seek medical attention immediately. 

1.

2.

3.

4.
5.
6.
7.

1.

2.

3.
WARNING: KEEP BATTERIES OUT OF REACH OF CHILDREN

California Residents

WARNING: 

This product can expose you to chemicals 

including acrylonitrile, butadiene, and styrene, which are known 

to the State of California to cause cancer and birth defects or 

other reproductive harm.

For more information, go to: 

www.P65Warnings.ca.gov

Battery Replacement Instructions

When batteries of different brand or type are used together, 

or new and old batteries are used together, some batteries 

may be over-discharged due to a difference of voltage or 

capacity. This can result in venting, leakage, and rupture and 

may cause personal injury.

  Do not mix Alkaline, lithium, standard, or rechargeable 

batteries.

  Always purchase the correct size and grade of battery 

most suitable for the intended use. 

  Always replace the whole set of batteries at one time, 

taking care not to mix old and new ones, or batteries of 

different types. 

  Clean the battery contacts and also those of the device 

prior to battery installation. 

  Ensure the batteries are installed correctly with regard to 

polarity (+ and -). 

  Remove batteries from product during periods of non-use. 

Battery leakage can cause corrosion and damage to this 

product. 

  Remove used batteries promptly. 

  For recycling and disposal of batteries, and to protect the 

environment, please check the internet or your local phone 

directory for local recycling centers and/or follow local

government regulations.

Not for children under 3 yrs.

WARNING: CHOKING HAZARD—Small Parts

APPENDIX

26

The manufacturer is not responsible for any radio or TV

interference caused by unauthorized changes or modifications 

to this equipment. Such changes or modifications could void the 

user authority to operate the equipment.

All rights reserved. 

This manual may not be reproduced in any

form, even in part, or duplicated or processed using electronic, 

mechanical or chemical process without the written permission

of the publisher.
This booklet may contain errors or misprints. The information it 

contains is regularly checked and corrections are included in 

subsequent editions. We disclaim any responsibility for any

technical error or printing error, or their consequences.

All trademarks and patents are recognized.

Содержание V23

Страница 1: ...SET UP GUIDE MODEL NUMBER V23 Wi Fi COLOR WIND SPEED WEATHER SYSTEM...

Страница 2: ...Product and Double Your Warranty Scan Here Scan the QR Code or visit bit ly v23_register to register your product and to double the standard one year warranty for free by opting to receive occasional...

Страница 3: ...wing Wind Data Wind Speed Records Customizable Alerts 14 15 18 SENSORS Placement Mounting Glide Pro Sensor Installation Add On Sensors Adding Sensors to Your Display Viewing Your Add On Sensor Data 19...

Страница 4: ...uter cover down to remove it Then remove the inner battery cover and install 3 fresh AA batteries according to polarity Replace both the battery cover and outer cover Display Insert the 5V Power Adapt...

Страница 5: ...nt and set custom alerts to notify you when conditions change Connecting is optional and the display will function as a standalone unit without the Wi Fi connection However we recommend connecting dur...

Страница 6: ...Manually Add Connect Display After the initial walkthrough displays can be added and connected via the Devices tab in the app s main menu Simply tap the Add Device or button at the bottom of the Devic...

Страница 7: ...pp 3 4 2 Open your La Crosse View app On the Main Menu scroll to ADD EDIT and select DEVICES Scan the Barcode on your Sensor or type in the Device ID manually Confirm the sensor image and Device ID an...

Страница 8: ...s of measure must be set manually within the display Settings Menu These are not controlled by the La Crosse View app The language selected will affect menu instructions as well as weekday and month r...

Страница 9: ...u 4 PLUS MINUS Use to adjust values When in Alert Settings press to arm disarm alert 5 TEMP Press to view Temperature Humidity History While viewing hold the MINUS button to reset history value Hold t...

Страница 10: ...t The Auto Dim Icon will appear on the LCD when the Auto Dim feature is activated Auto Dim Settings Program your display to automatically dim during preselected times 1 Hold the LIGHT button to enter...

Страница 11: ...a Crosse View app for a comprehensive list of Data Stream options Stream Options Examples UV Index Sunrise Sunset Times Chance of Thunderstorms Air Quality Personal Message 1 WEEKDAY Full day of the w...

Страница 12: ...Sensor Watch our Forecast Icon Video for more details bit ly forecast_vid When connected to Wi Fi the display will receive additional weather icons chance of precipitation values and future forecast i...

Страница 13: ...rom your outdoor sensors Hourly Forecast Example Daily Forecast Example Hourly Forecast Data Includes Daily Forecast Data Includes Forecast Icons Chance of Precipitation Wind Speed Gust Wind Direction...

Страница 14: ...oon Phase will appear regardless of forecast These times are preprogrammed and cannot be adjusted The moon icon is based on the lunar calendar and year month date settings The phases include Trend Arr...

Страница 15: ...unit of measurement hPa or InHg in the Settings Menu 13 Relative Pressure PRESSURE Relative Pressure Example Water Leak Sensor Example Pressure Add On Sensor Data Your relative pressure and add on se...

Страница 16: ...inutes 4 CURRENT WIND DIRECTION Choose between cardinal points letters or degrees in the Settings Menu 5 HIGH WIND SPEED ALERT ICON Appear if a wind speed alert is set active 6 RECEPTION INDICATOR Ind...

Страница 17: ...s Press the WIND button to view wind speed records Next hold the MINUS button until dashes appear on the display This reading will now reset to the current wind value Reset Wind Speed Records Viewing...

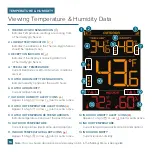
Страница 18: ...6 OUTDOOR HUMIDITY Current relative humidity 7 OUTDOOR HUMIDITY ALERT ICONS Appear if a high or low alert is set active 8 OUTDOOR TEMPERATURE ALERT ICONS Appear if a high or low alert is set active 9...

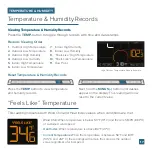
Страница 19: ...rature TEMPERATURE HUMIDITY Viewing Temperature Humidity Records Press the TEMP button to toggle through records with time and date stamps Press the TEMP button to view temperature and humidity record...

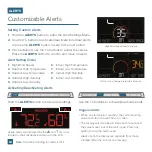
Страница 20: ...rresponding value and alert icon will flash on screen The display will also beep 5 times each minute until the value moves out of the alert range Press any button to stop the alert sound Alerts set on...

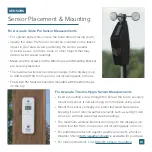
Страница 21: ...ly weather shield is available for purchase For video instructions visit bit ly th_sensor_mounting For Accurate Thermo Hygro Sensor Measurements For optimal battery life ensure the Solar Panel is fac...

Страница 22: ...ay differ when compared to local reporting stations If the basic installation option detailed above isn t suitable for your location the Glide Pro Sensor is designed to work in a variety of configurat...

Страница 23: ...quire additional equipment and possibly professional help for best results Advanced Installation Freestanding Pole Setup 1 Maximum Outside Pole Diameter Tripod Setup Example 1 Maximum Outside Pole Dia...

Страница 24: ...elp make adjustments to your lawn garden watering schedule USE CASE Set independent timers and alerts to monitor two steaks at the same time USE CASE Place in a pool or hot tub to keep an eye on chang...

Страница 25: ...Temperature MULTI SENSORS THERMO HYGRO SENSORS Find more add on sensor options by scanning the QR code or visiting bit ly v23_parts Expand Your System to Suit Your Needs WATER LEAK SENSOR 23 Featured...

Страница 26: ...Water Leak Sensor shown as example sensor not included 1 Hold the EXTRA SENSOR button until the Sensor Reception Indicator starts to animate Tap the EXTRA SENSOR button to switch between pressure and...

Страница 27: ...Range 10 to 99 RH Transmission Range 400 feet 121 92 m open air Update Interval Every 51 Seconds Power Requirements 2 AA Batteries not included Battery Life Over 24 Months MOBILE REQUIREMENTS Apple p...

Страница 28: ...es are used together some batteries may be over discharged due to a difference of voltage or capacity This can result in venting leakage and rupture and may cause personal injury Do not mix Alkaline l...

Страница 29: ...consider removing the no collocation statement This device complies with Part 15 of the FCC Rules Operation is subject to the following two conditions 1 This device may not cause harmful interference...

Страница 30: ...tlets Factory Reset If you are experiencing issues press the ALERTS LIGHT buttons down together until the display beeps You do not need to remove the battery to reset the display All records will be l...

Отзывы: