background image

Label & Mark Industries Company

User’s Manual of LK-360

- 27 -

Note:

If the selected page length is too short to print out all the characters, a
message will be prompted: Page contents too long! Press any key to return!

For specified page length, if the input characters are too many, a message
will be prompted: Page contents too long! Press any key to return!

Automatic page length

This function will generate a page length automatically depending on the letters,
symbols, character spacing, and font size.
Select Automatic length , and press [Enter], then the page in which the cursor
exists and all the pages behind it will assume an automatic length. Then, the
screen will show the text editing window automatically.
After you set an automatic font size, if you select Automatic length and press
[Enter], the following message will be shown:

Font size is auto, can’t set auto length. Any key to return!

4.2.3 [

] Orientation

This function is provided to set the printing orientation. The initial setting is
horizontal printing.
Press [

] key and then the page in which the cursor exists and all the pages

behind it will be printed in horizontal or vertical orientation as appropriate.
You are advised to make this setting before you enter the contents. Otherwise, it
may display Page contents too long! message.
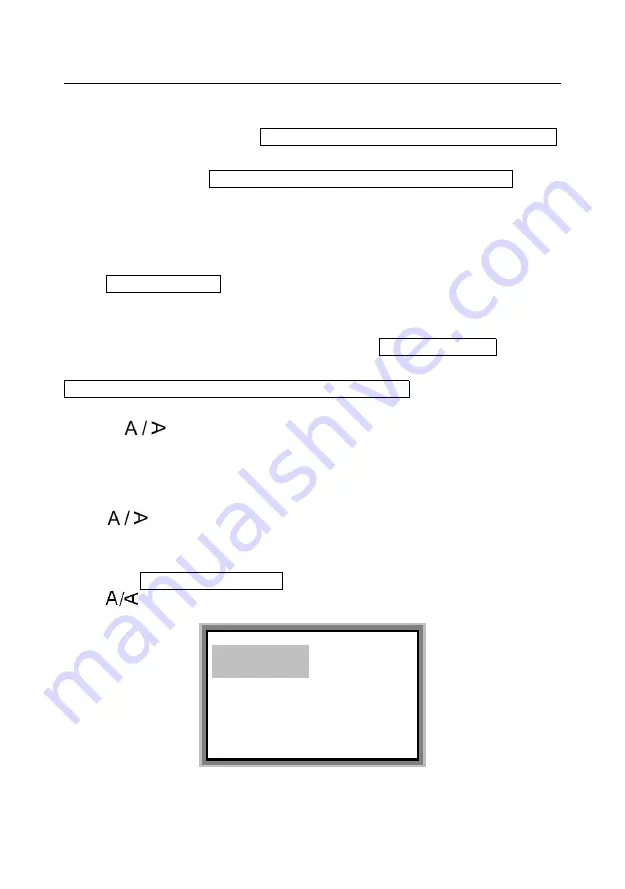
Press [

]] key, and the screen will display:

Horizontal
Vertical
Current—horizontal

Содержание LK-360

Страница 1: ...User s Manual LK 360 Label and Mark Printer LABEL MARK INDUSTRIES COMPANY ...

Страница 2: ......

Страница 3: ...tion about the products please contact L MARK or the sale agents 3 Without the prior written approval by L MARK no contents of this manual shall be copied or transmitted in any form or by any means 4 The Company is not to be held responsible for any consequences that may arise from any operations not conforming to the instructions contained in this manual 5 Other signs and trade marks referenced i...

Страница 4: ...tage fluctuation 6 If the printer is expected to be idle for a long time disconnect the printer from the power supply 7 Be careful to avoid introducing water or conducting matters like metals into the printer Disconnect the power supply immediately in case of such introduction 8 Do not print if there is no print material loaded otherwise the printer rubber roll and print head may be severely damag...

Страница 5: ...ur machine Compatibility is dependent on the features and specifications of consumables Please use original L MARK consumables which ensure a steady printing quality and help protect your machine 2 Use of non original ribbon or label will invalidate the warranty 3 Do not blockade the ribbon or label exit opening 4 Do not strike the keyboard forcefully 5 Do not pull out the print out by force Remov...

Страница 6: ... computer keyboard Beautiful L MARK font type offering a clearer and more lasting print out Specific Revise function this function is provided to test and correct printing length and adjust the position of the printer head and cutter With a unique function of printing selected pages enabling you to print selected pages in the current file Ultra large in built file memory capacity able to store mor...

Страница 7: ...onnection of AC power adapter 17 2 3 5 Connection of data cable 17 2 3 6 Power switch 17 2 3 7 Replacement of the cutter 18 Chapter III Basic operation 19 3 1 Power on 19 3 2 Selection of printing material 19 3 3 Selection of printing material specfications 20 3 3 1 Selection of sleeve tube specifications 20 3 3 2 Selection of label specifications 20 3 3 3 Selection of heat shrink tube specificati...

Страница 8: ...3 4 2 17 Superscript 43 4 2 18 Subscript 43 4 2 19 Cutting set 44 4 2 20 Cut depth 45 4 2 21 Print scope 46 4 2 22 Print 47 4 2 23 Caps lock 47 4 2 24 Language 48 4 2 25 Back Off 48 4 2 26 Backspace 48 4 2 27 Shift 49 4 2 28 Revise 49 4 2 29 Creat a new page 52 4 2 30 Display brightness adjustment 52 4 2 31 Key combination 52 Chapter Ⅴ Specifications description 53 Chapter Ⅵ Others 54 6 1 Specific...

Страница 9: ...ing materials The function of each key is also described 2 1 Configuration of the main unit 2 1 1 Basic configuration 1 LK 360 Cable ID Printer 1piece 2 Warranty card in user s manual 1sheet 3 Packing list 1sheet 4 Power adapter including power cable 1piece 5 Black ribbon for familiarizing purpose 1cartridge 6 USB memory disk 1piece 7 Computer connection cable 1piece 8 Handbag 1piece ...

Страница 10: ...ape Yellow 6mm LM606YL 5pcs 10m 5 box Label cassette tape Yellow 9mm LM609YL 5pcs 10m 5 box Label cassette tape Yellow 12mm LM612YL 5pcs 10m 5 box Label cassette tape Silver 6mm LM606SL 5pcs 10m 5 box Label cassette tape Silver 9mm LM609SL 5pcs 10m 5 box Label cassette tape Silver 12mm LM612SL 5pcs 10m 5 box Ink ribbons Ribbon cassette black LM36B 5pcs 80m 5 box Ribbon cassette white LM36W 5pcs 80...

Страница 11: ...Label Mark Industries Company User s Manual of LK 360 9 Ribbon cassette Label cassette tape ...

Страница 12: ...Label Mark Industries Company User s Manual of LK 360 10 2 2 Nomenclature and Functions 2 2 1 Main unit 2 2 2 LCD display description ...

Страница 13: ... N Nil no semi cutting no demarcating 4 Frame Effects setting of the page in which the cursor exists N Nil F with frame L underlined 5 Repeat Repeated printing times of the page in which the cursor exists 6 Density Value set for printing density 7 Caps Lock Current status of upper case or lower case 8 Size Size of printing medium 9 Material Types of printing medium 10 Language Current status of Ch...

Страница 14: ...r input Repeat This key is used to set the repeated printing times of certain pages Alignment This key is used to set the alignment of text align left or center Double Line This key is used to set double line PC Conn This key is used to connect to the computer and lock the keyboard File This key is used to register input data in the printer s memory This key is also used to call up or delete regis...

Страница 15: ... case input mode Print Scope This key is used to print selected pages in the text Cutting Set This key is used to choose half cutting cut line or wiyhout either half cutting or cut line Cut Depth This key is used to adjust the cutting depth of full cut or half cut Backspace This key is used to delete the character that precedes the cursor 2 3 Installation 2 3 1 Installation and removal of Ribbon I...

Страница 16: ...o be sure to roll tight the ribbon prior to installation 4 Close the protective cover Removal of Ribbon 1 Open the protective cover Make sure the print head is not pressed on the print rubber roll in other words make sure the print head is released Attention If the print head is found pressed upon the rubber roll please close the protective cover and switch off the power and then switch on the pri...

Страница 17: ... Close the protective cover 2 3 2 Installation and removal of printing material cassette Installation of printing material cassette 1 Open the protective cover 2 See the picture below roll the ribbon tightly and neatly in the direction as shown 3 Pull out the printing material from the cassette and length less than the front position of ribbon guide axle ...

Страница 18: ...is released Attention If the print head is found pressed upon the rubber roll please close the protective cover and switch off the power and then switch on the printer about 3 seconds later In this way the printer will initialize anew and the print head will return to a proper place 2 Raise the Ribbon and take it off carefully 3 Remove the ribbon cassette when the catches on both sides are fully r...

Страница 19: ...the other end of the AC power adapter connection cable into an AC power supply socket Attention Never plug AC power adapter cable into data line socket Do not connect AC power adapter cable into power supplies other than rated voltage 100V to 240V otherwise fire accident or electric shock may result 2 3 5 Connection of data cable 1 Switch off the power supply 2 Plug one end of the data cable into ...

Страница 20: ...tely after it is switched off otherwise miss operation or data loss may result Then the machine will display the text edit window 2 3 7 Replacement of the cutter Take off the cutter that needs to replaced and install a new cutter Note Be careful not to cut your finger when replacing cutter and anvil If a new cutter does not produce the desired performance please replace the anvil by appeal the sal...

Страница 21: ...the tube printer configuration is compatible with your material and its specifications 3 1 Power on Upon powered on the machine will produce the following power on display At this time the cutter dynamo will run and initialize 3 2 Selection of Printing Material After power on display the machine will produce material selection window and the screen will display as follows L MARK PVC Tube Label Shr...

Страница 22: ...e tube on the material selection window and then press Enter key The following window will be displayed Use or keys to select the desired specification and then press Enter key 3 3 2 Selection of label specifications Select label on the material selection window and press Enter key then the following window will be displayed Use or keys to select the desired specification and then press Enter key ...

Страница 23: ...n of Font Size After the selection of printing material specifications and press Enter key to recall the font size selection window The screen will display as follows Use or keys to select the desired font size and then press Enter key Note For 6mm label and 3 0 sleeve tube you may choose font sizes 1 2 3 For 9mm label and 4 0 and 5 0 sleeve tube you may choose font sizes 1 2 3 4 For 12mm label an...

Страница 24: ...ay as follows 1 L MARK 2 Press Print and the machine will print out the input contents and perform semi cutting automatically During printing the LCD will display Printing When printing is completed the machine will cut off the sleeve tube automatically and the text editing window will be displayed automatically This round of operation has been completed 3 6 Label printing 3 6 1 Printing After pow...

Страница 25: ...Capital as appropriate Enter L M A R and K one after another and the screen will display as follows Press Enter key then another page is created automatically and the screen will display as follows 1 L MARK 2 Press Print and the machine will print out the input contents and perform semi cutting automatically During printing the LCD will display Printing When printing is completed the machine will ...

Страница 26: ...ng page 8 The five settings namely length font size repeat effects and direction are all related to the cursor location After you have completed the setting the page in which the cursor exists and all the pages behind it will have the same settings You may use Top End and keys to move the cursor 9 The screen can display up to 3 lines each line being able to display up to 12 English letters 10 The ...

Страница 27: ...in printing error or damage the print head Press Material key and the screen display will be as follows Press or to choose PVC Tube or Label and press Enter Then a window will be displayed to select the specific material specifications Press or to select the desired specification and press Enter then you will enter into the text editing window Press or to choose Shrink tube and press Enter then yo...

Страница 28: ... ranges from 6mm to 100mm and shall be integer numbers only Press Length key and the screen will display as follows Specified page length Select Specify Length press Enter key and the screen will display as follows Input the page length value you desired at the cursor and then press Enter The page in which the cursor exists and all the pages behind it will assume this specified length Then the scr...

Страница 29: ...and all the pages behind it will assume an automatic length Then the screen will show the text editing window automatically After you set an automatic font size if you select Automatic length and press Enter the following message will be shown Font size is auto can t set auto length Any key to return 4 2 3 Orientation This function is provided to set the printing orientation The initial setting is...

Страница 30: ...r number font size and font setting If the contents are too long for printing after reverting from horizontal to vertical orientation the screen will display the following message Page contents too long Press Cancel to return 4 2 4 Font size This function is provided to set font size The setting of font size is valid for the page in which the cursor exists and all the pages behind it Press Font si...

Страница 31: ...s to ensure valid entries and ensure a same material length when no page length has been specified Note After you have chosen automatic page length function automatic font size function will become invalidated After you have chosen automatic page length function if you attempt to set font size and press Enter then the following message will be displayed Page length too long Press Cancel to return ...

Страница 32: ...o set the printing density This setting is valid for all the contents to be printed Press Density key and the screen will display as follows Press or to select the desired value and press Enter then the setting is completed and the screen will return to the text editing window automatically 1 2 3 4 5 6 have an ascending print color strength Please select the print color strength according to the a...

Страница 33: ...follows None Select None and press Enter then the page in which the cursor exists and all the pages behind it will have no effects To add effects Press or to select Frame or Underline and press Enter then the page in which the cursor exists and all the pages behind it will be framed or underlined Then the screen will return to the text editing window automatically Note The screen will display F fo...

Страница 34: ... certain patterns Decimal system is used for serial number One page can only have one serial number in order to be printed Serial number printing function is available for any place in a page Move the cursor to a place in a page desired and press Number key then the screen will display as follows Numerical serial number Select Decimal and press Enter then the screen will display as follows A A B B...

Страница 35: ...Input the starting serial number and press Enter then the screen will display as follows Input the terminating serial number and press Enter then the setting is completed and the screen will return to the text editing window automatically Then the text editing window will display serial number status as below For natural serial number 0 999 For aligned serial number 000 999 Letter sequence Select ...

Страница 36: ...s Enter then the screen will display as follows Enter the terminating letter and press Enter the setting is completed and then the screen will return to the text editing window automatically Now the text editing window will display the following sequential letter status For UPPER CASE sequential letter A Z A For lower case sequential letter a z a Alpha A Z Alpha a z Alpha A Z Start Alpha A Z End ...

Страница 37: ...e in which the cursor exists and all the pages behind it will have the same repeated printing times Press Repeat then the screen will display as follows Enter the number integer you want to repeat and press Enter and the page in which the cursor exists and all the pages behind it will be printed repeatedly for the number of times you just input and then the screen will return to the text editing w...

Страница 38: ...nted in a left alignment manner The screen will return to the text editing window automatically 3 To select Fine adjustment just select it and press Enter Fine adjustment is used to fine adjust the print contents toward the left or the right when the print contents can not be aligned center or left completely as previously envisaged due to material or other external factors The initial setting is ...

Страница 39: ...l display as follows Press Enter then the screen will display as follows For example if you want to shift the print contents leftward by 2 7mm you can input 2 7 if you want to shift the print contents rightward by 2 7mm you can input 2 7 then press Enter and the screen will return to the text editing window Adjust value 3 0 3 0 Label adjust Current 0 0 Adjust value 3 0 3 0 ...

Страница 40: ... 9mm and 12mm labels if bi line is chosen you can only use font size 1 2 and 3 You can only have 2 lines or 2 columns at the most Press Double Line when printer has set double line the screen displays as below The page was double line 4 2 12 PC Conn This function is provided to connect a computer and lock the keyboard then editing and printing through computer Please restart the printer when you n...

Страница 41: ...A If the name you input exists or the current file has already been saved then the screen will display a message as below You may overwrite the existing file or save as another file B If the name you input does not exist the file will be saved straightaway and the screen will return to the text editing window Save File Open File Delete File Input file name The file exists overwrite it Yes No ...

Страница 42: ... follows B If there is are file s the screen will display the name s of the saved file s Select the name you want and press Enter the screen will then display as follows Select Yes then the current file will be deleted and the accessed file will be opened Delete file Select Delete file and press Enter then the screen will display as follows No file exists Press any key to return Delete unsaved fil...

Страница 43: ...ou want to delete then the screen will display as follows Select Yes and press Enter then this file is deleted Then the screen will return to the text editing window B Delete all the files Select Delete all files and select Yes and press Enter then all the saved files will be deleted and the screen will return to the text editing window Delete one file Delete all files No file exists Press any key...

Страница 44: ...ed and the cursor will return to the initial input location and a new file is created Select No and press Enter then no contents will be deleted and the window will return to the previous editing window Note Deleted contents can not be recovered 4 2 15 Delete This function is provided to delete the page in which the cursor exists Move the cursor to the page you want to delete and press Delete then...

Страница 45: ...r to return to text entry interface 4 2 17 Superscript Move the cursor behind the character where you want to input superscript and press Superscript then a superscript symbol appears behind this character Then enter the superscript character For instance to put superscript 2 behind the number 6 then the print out will be 6 4 2 18 Subscript Move the cursor behind the character where you want to in...

Страница 46: ...aracter you need to press the superscript or subscript key repeatedly 4 2 19 Cutting set This setting is valid for all the contents to be printed This key is provided to set half cut cutting line no half cutting and nil no half cutting no cutting line The initial setting is half cutting Press Cutting setting and the screen will display as follows Press or to make your selection and press Enter to ...

Страница 47: ...creen will display as follows Use or to make your selection and press Enter to finish sleeve tube semi cutting depth Cutting depth ascends from 3 to 3 If you have chosen a semi depth of 3 but are not satisfactory with the semi cutting results then you may need to replace your cutter assembly Adjust full cut depth Select Full cut depth and press Enter to finish your full cutting depth setting The c...

Страница 48: ... to finish your label semi cutting depth The cutting depth ascends from 3 to 3 If you have chosen a semi depth of 3 but are not satisfactory with the semi cutting results then you may need to replace your cutter assembly Adjust full cut depth Select Full cut depth and press Enter to finish your full cutting depth setting The cutting depth ascends from 3 to 3 4 2 21 Print Scope This function is pro...

Страница 49: ...fault value That is to say if you do not input the starting page number nor the ending page number then the machine will print the page in which the cursor exists until the last page of this document 4 2 22 Print After you have made all the settings and input the print contents this function enables you to print the contents of all the pages in the current document on the printing material Blank p...

Страница 50: ...r tube Due to material difference or miss operation the printing material may be jammed on the rubber roll Press this key to reverse the roll and help remove the jammed material Press Back off key and the screen will display as follows Select Yes and press Enter then the rubber roll will be reversed This operation can be repeated until the jammed material is taken out Note Before Reverse operation...

Страница 51: ...on is provided to test and correct printing length And this function is provided to adjustment the position of the printer head and cutter Due to ambient temperature variance or material difference by different manufactures the actual printed page length may be a little different from what you have specified If you find a large discrepancy between the actual printed page length with what you have ...

Страница 52: ...r example If the measured total length of these four printings is 101mm you just enter 101 and then press Enter With this function it is possible to adjust the actually printed length to what you have specified Choose Cutter 0 0 and the screen will display as follows Then sent 100 0 100 0 can to adjust the position of cutter The unitage 1 0 0847mm For example If input 10 the cutter line position w...

Страница 53: ... Choose Header_Pos 1 0 and the screen will display as follows Please input the value specified the value under 0 means the printed contents will downwards the value upon 0 means the printed contents will upwards For example input the value 0 the print out contents will upwards 1mm compare to the setting before adjusting Choose Cutter 0 0 then press Enter and the screen will display as fellows Labe...

Страница 54: ...age of the text and press Enter and then you have just created a new page at the end of the text Insert a new page between two pages Move the cursor to a page and press Enter then you have just created a new page behind the said page Note The new page assumes the same attributes with its preceding page The new page assumes a page number sequentially If the new page contains nothing it will be igno...

Страница 55: ...lor background displaying up to 5 lines Characters printable Chinese English number symbols Entry method standard 83 key Memory About 100 000 characters Material cutting method Automatic half cutting automatic full cutting Power supply DC 12V 2A Ambient requirements Operation Temp 15 35 Relative humidity 10 85 without condensation Storage Temp 5 35 Relative humidity 10 85 without condensation Over...

Страница 56: ...ette tape Yellow 12mm LM612YL 5pcs 10m 5 box Label cassette tape Silver 6mm LM606SL 5pcs 10m 5 box Label cassette tape Silver 9mm LM609SL 5pcs 10m 5 box Label cassette tape Silver 12mm LM612SL 5pcs 10m 5 box Ink ribbons Ribbon cassette black LM36B 5pcs 80m 5 box Ribbon cassette white LM36W 5pcs 80m 5 box Ribbon cassette red LM36R 5pcs 80m 5 box Cutter Cutter cutter holder and cutting blade LM 02 1...

Страница 57: ...ead Material configuration not matching Please change material configuration to ensure it agrees with the materials used Ambient temperature to low or too high Please adjust the print color strength or change the ambient temperature Incomplete printing characters Font size too large Use a smaller font size Material specifications not properly set On the machine please set the material specificatio...

Страница 58: ...Label Mark Industries Company User s Manual of LK 360 56 ...

Страница 59: ...undation dampness or other human errors 6 Malfunctions or damages as a result of force majeure war earthquake and flood etc 7 All consumables like ink ribbon and label paper etc are not covered under this warranty 8 Product model has been tampered with or becomes illegible III Points of Attention To avoid the delayed service due to incomplete documents please make ready your warranty card and purc...

Страница 60: ...Product Warranty Card Product information S N Model Product S N Client information Name Address Contact Tel Fax Postal code E mail Service record Date Cause and reparation of faults Repaired by Sale agent Manufacturer LABEL MARK INDUSTRIES COMPANY http www lmark net ...

Страница 61: ...Label Mark Industries Company User s Manual of LK 360 ...

Страница 62: ...Label Mark Industries Company User s Manual of LK 360 Manufacturer LABEL MARK INDUSTRIES COMPANY http www lmark net Printed in china ...

Отзывы: