background image

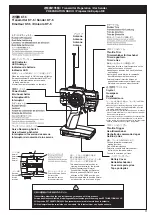
D/R

BATT.

ST.REV

TH.REV

N

N

R

R

POWER

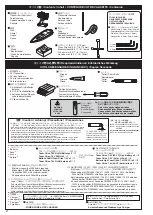
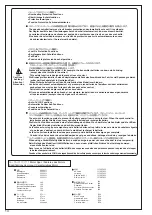
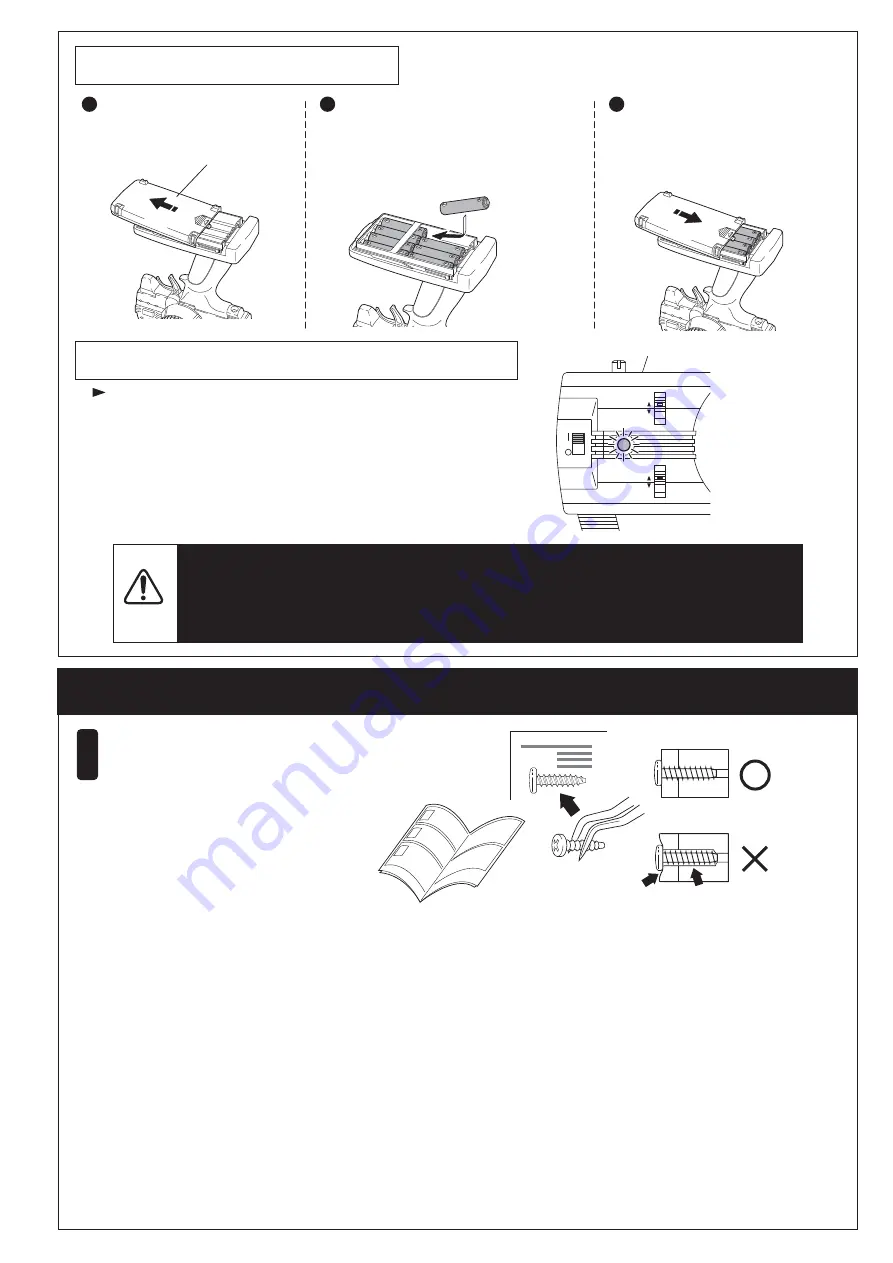
電池の入れ方

 / 

乾電池の交換時期

 / 

フタをはずす。

フタをしめる。

3

乾電池

8

本を図のように入れる。

LEDインジケーターが点滅したらすぐに乾電池を新品と交換してください。

LEDインジケーター

送信機の電池が無くなるとコントロールが不能になり大変危険です。

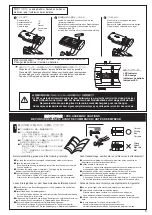
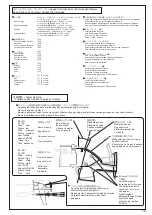
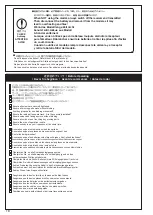
組立ての前に下記のことに注意してください。

●この説明書を良く読み、構造を理解する。
●キットの内容を確かめる。

※万一不良、不足がありましたら、お買い求めの販
売店か、当社「ユーザー相談室」までご連絡くださ
い。

●小さな部品の形やサイズを間違えないようにする。図

を参考にして確認しながら組立てる。

TP

ビス締をめるときは・・・

締めこみが固くても部品が固定されるまで締めて
ください。
ただし、部品が変形するまで締めるとビスがきか
なくなります。

フタ

組立て前の注意

組立て前の注意

5

Loading Battery / DasLaden der Akkus  

Batteries radio / Instalación de las baterías

Changing Batteries / Das Wechseln der Batterien  

Changer les batteries / Cambio de baterías

Lid
Deckel
Cache radio
Tapa

Remove the lid.
Deckel abnehmen
Retirer le cache
Retire la tapa

Close the lid. It is snapped into place.
Deckel schließen
Replacer le cache batterie comme indiqué.
Cierre la tapa y colóquela en su lugar

Load 8 AA Alkaline Batteries as shown in the 
  following illustration.
8 Batterien oder geladene Akkus in den Sender einsetzen
Placer selon le schéma çi-dessous les 8 piles ou 
  batterie de type R6
Instale 8 pilas  alcalinas AA tal y como muestra el dibujo.

LED Indicator  
LED Anzeige  
Indicateur de batterie  
Indicador LED  

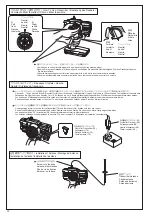
Do NOT operate when transmitter and/or receiver batteries are low or else the control of the model will be lost.

Beim Aufleuchten der roten LED am Sender muß der Modellbetrieb sofort eingestellt werden!

Ne jamais attendre que les piles de la radio soient déchargées pour les changer.

Nunca deje que las baterías se descarguen completamente ya que podría perder el control de su modelo.

When the LED indicator flashes, replace batteries as soon as possible.  
Wenn die LED Anzeige aufleuchtet, Akkus so schnell es geht austauschen.  
Lorsque diode se met a clignotter, remplacer immediatement les batteries.  
Cuando el LED parpadee, cambie las baterías cuanto antes.  

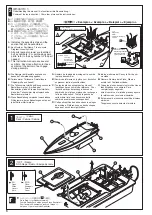
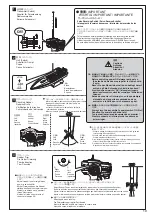
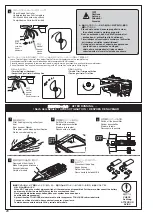
                  / PRE-ASSEMBLY CAUTIONS 

BEVOR SIE BEGINNEN / AVANT DE COMMENCER / ANTES DE EMPEZAR

1

Lesen Sie folgendes vor dem Zusammenbau aufmerksam durch:

Lesen Sie zuerst die Bauanleitung ganz durch und verstehen Sie den Aufbau 

Ihres Modelles.

Überprüfen Sie den Verpackungsinhalt.

Sollten Teile fehlen, wenden Sie sich direkt an Ihren Fachhändler oder an den 
Kyosho-Vertreiber in Ihrem Land.

Verwechseln Sie Schrauben sowie kleine Bauteile nicht!  Vergleichen Sie sie vor 

dem Einbau mit den Darstellungen in Originalgröße in den Baustufen.

Beachten Sie beim Festziehen einer Treibschraube folgendes:

Schrauben Sie solange, bis das anzubringende Teil sicher und fest sitzt.  
Achten Sie jedoch darauf, daß Sie den Gewindegang im Material nicht überdrehen!

Before assembling, please read the following carefully:

First, read this instruction manual and understand the model’s construction.

Check the contents of this kit.

Should parts be missing, immediately contact the retail shop or your nearest 
Kyosho distributor.

Do not take the wrong screw or small part.  Compare it to the true-to-scale 

diagram in each assembly step, then install it.

When tightening a self-tapping (TP) screw:

Even if hard to turn, tighten a TP screw until the part is securely attached.  
However, do not overtighten as the plastic thread inside the part may strip!

Avant l’assemblage, veuillez lire les points suivants attentivement:

Lisez d’abord complètement cette notice; ainsi vous aurez un aperçu du 

déroulement et pourrez mieux vous orienter.

Vérifiez ensuite le contenu du kit.

Si jamais il y a des pièces manquantes, adressez-vous directement à votre 
magazin spécialisé ou au distributeur Kyosho dans votre pays.

Ne confondez pas les vis et les petites pièces!  Vérifiez-les à l’aide des 

illustrations dans chaque plage de montage, puis assemblez les.

Lorsque vous serrez une vis autotaraudeuse:

Serrez jusqu’à ce que la pièce à monter soit bien installée.  Pourtant, veillez à 
ne pas trop la serrer puisque vous risquez d’abîmer le filet dans la pièce.

Antes de comenzar el montaje, lea atentamente lo siguiente:

Lea, en primer lugar, este manual para obtener una idea general.

Compruebe la conformidad de todas las piezas.

      Si faltara alguna pieza, contacte con la tienda donde lo adquirió.  
      No se admitirán reclamaciones en modelos en proceso de montaje.

Antes de colocar las piezas y tornillos, asegurese mirando la tabla en cada 

paso.

A la hora de apretar Tornillos Autorroscantes(TP):

  Apriételos firmemente en la pieza donde corresponda.

      No intente apretarlos demasiado, ya que podrían deformar la pieza.

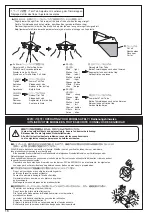
Correct
Richtig
Bon
Correcto

Wrong
Falsch
Mauvais
Mal

1

2

3

Содержание TWIN STORM VE 800

Страница 1: ...hr Modell und dessen gefahrlose Bedienung Bitte bewahren Sie diese Dokumentation zur späteren Verwendung auf ATTENTION Ce modèle n est pas un jouet CONSEJOS DE SEGURIDAD Este modelo de Radio Control no es un juguete Si vous êtes débutant dans le modèle réduit prenez conseils auprès de modélistes confirmés afin d utiliser votre modèle dans des conditions optimales Assemblez ce kit en dehors de la p...

Страница 2: ...es acheter que la borne du effectue correctement le contact dans le boitier Al utilizar baterías Ni MH AA instale las baterías respetando la polaridad indicada en el portapilas Además compruebe que las baterías poseen la longitud adecuada y que el terminal contacta correctamente ya que algunas poseen el terminal más corto de lo normal Plus terminal height more than 1 4mm Pluspol muss groesser als ...

Страница 3: ...msfunktion Permet le contrôle de la marche avant du frein et de la marche arrière Controla la velocidad y el freno When changing or replacing frequency crystal please purchase or replace with Futaba AM27MHz or Futaba compatible AM27MHz crystals Beim Wechseln oder Austauschen des Quarzes verwenden Sie den Futaba AM 27 MHz oder einen Futaba der mit AM 27 MHz Quarzen kompatibel ist Lors du changement...

Страница 4: ...t la main droite pour commander la direction Utilice la mano izquierda para controlar el gatillo de gas y la mano derecha para controlar el volante Frequency Crystals Quarze Crystals 01 12 can be used in the R C system for this set 12 channels sold separately Japan only so up to 12 boats can be run together at the same time Verwenden Sie Quarze mit den Kanälen 1 bis 12 So können bis zu 12 Boote gl...

Страница 5: ... Ihren Fachhändler oder an den Kyosho Vertreiber in Ihrem Land Verwechseln Sie Schrauben sowie kleine Bauteile nicht Vergleichen Sie sie vor dem Einbau mit den Darstellungen in Originalgröße in den Baustufen Beachten Sie beim Festziehen einer Treibschraube folgendes Schrauben Sie solange bis das anzubringende Teil sicher und fest sitzt Achten Sie jedoch darauf daß Sie den Gewindegang im Material n...

Страница 6: ...iones utiliza diversos símbolos Téngalos en cuenta durante el montaje A Die Nummer der Baustufe sowie das zu bauende Teil werden angegeben B Teilenummer Teilename Darstellung in Originalgröße und Anzahl C Die Teilenummer stellt den Bezug zu unserer Bestellnummer her Am Ende der Bauanleitung finden Sie eine Ersatzteilliste die zu der Teilenummer die entsprechende Bestellnummer liefert D Diese Bauan...

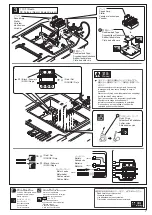
Страница 7: ...lon Battery Akkupacks Batterie Batería Attach connectors in correct polarity Connecting in wrongpolarity may cause damage to amp or accidents Stecker durchf hren und wieder einsetzen unbedingt auf die korrekte Polung achten Fixer les connecteurs en respectant les pôlarités Effectuer cette étape avec attention Instale los conectores respetando la polaridad Si se equivoca en la polaridad el variador...

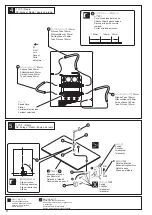
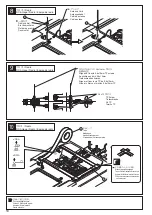
Страница 8: ...120mm Durite silicone 120mm Tubo Silicona 120mm 8 Detached at step 2 aus Baustufe 2 Détaché à l étape 2 Desmontado en paso 2 Align direction Richtung beachten Aligner la direction Alinear Silicone Tube 120mm Silikonschlauch 120mm Durite silicone 120mm Tubo Silicona 120mm Silicone Tube 50mm Silikonschlauch 50mm Durite silicone 50mm Tubo Silicona 50mm 8 Note the direction Einbaurichtung beachten Not...

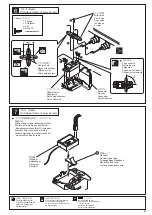
Страница 9: ...P 3 x 8mm 4 7 Radio RC Anlage Radio Equipo de radio Pay close attention here Vorsicht Wichtiger Hinweis Attention Avis important Preste atención Connect as per radio instruction manual Schließen Sie die Servos gemäß der Bedienungsanleitung Ihrer RC Anlage an Branchez selon la notice de la radio Conecte siguiendo las instrucciones del manual del equipo de radio Receiver Empfaenger Récepteur Recepto...

Страница 10: ...ouverture Coloque la cinta adhesiva transparente sin dejar huecos Tape Klebeband Adhésif transparent Cinta adhesiva transparente Radio RC Anlage Radio Equipo de radio 9 Align and fix with 2 6x12mm TP screws Ausrichten und mit 2 6x12mm Treibschrauben fixieren Aligner et fixer la vis TP de 2 6x12mm Alinear y fijar con tornillos 2 6x12mm TP TP Screw Treibschraube Vis TP Tornillo TP Radio RC Anlage Ra...

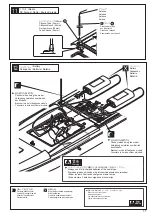
Страница 11: ...onectar a la hora de utilizar el modelo Always use 2 fully charged batteries of the same type Stets den gleichen Akkutyp mit gleichem Ladezustand verwenden Utiliser toujours 2 batteries charger en même temps Utilice siempre 2 baterías cargadas del mismo tipo Detached at step 2 aus Baustufe 2 Détaché à l étape 2 Desmontado en el paso 2 Antenna Antenne Antenne Antena Read carefully at this symbol Hi...

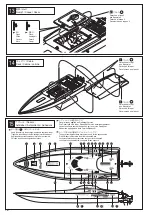
Страница 12: ...opposite side Die Aufkleber in Klammern slnd für die andere Selte Les autocollants entre parenthéses sont pour le côté opposé Los números entre paréntesis son para el lado opuesto Decal already applied on Readyset version Die Dekorteile sind in der ReadySet Version bereits aufgebracht Les autocollants sont déjà apposés sur la version Readyset Adhesivos ya pegados en la versión Readyset Detached at...

Страница 13: ...the lamp flashes green twice it will flash red 4 times Following this the red and green lamps will remain on This indicates setting is complete Einige Sekunden später nachdem die grüne LED zweimal geblinkt hat blinkt die rote LED viermal Danach leuchten beide LEDs permanent die Programmierung ist abgeschlossen Quelques secondes plus tard après que la diode clignote 2 fois verte elle clignotera 4 f...

Страница 14: ...iento excepto cuando el gas está en neutral Auto Cut Off Function Automatische Abschalt Funktion Coupure automatique Función de Corte Automático The auto cut function operates to prevent the battery power from running too low When the speed controller lamp flashes and the throttle stops cease operating the model and recharge the battery Die Auto Cut Funktion verhindert eine Tiefentladung des Akkus...

Страница 15: ... sensorless Solo compatible con motores sin sensores Auto cut off voltage function Automatische spannungsbedingte Abschaltfunktion Coupure automatique en cas surtension Auto corte funcion del voltaje Overheating protection function Überhitzungs Schutzfunktion Protection contre la surchauffe Funcion de la proteccion de recalentamiento Lost Rx protection function Empfangsverlust Schutzfunktion Fail ...

Страница 16: ... a personas y o propiedades Do not put your hands or any objects into rotating parts as this could result in serious accidents Fassen Sie niemals in bewegte Teile des Antriebs Ne jamais mettre votre main ou un objet sur des pièces en mouvements Mantenga las manos alejadas de las piezas móviles The motor and battery get hot from running Do not touch them for a while after running Die Teile des Antr...

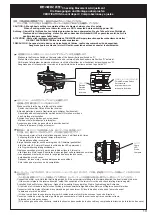
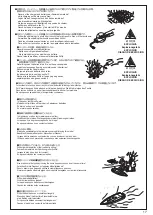
Страница 17: ...rcuitos no realice las operaciones abajo indicadas For accident prevention do not run your model under the following circumstances Zur Vermeidung von Schaeden oder Unfaellen beachten Sie bitte die folgenden Punkte Dans les cas suivants ne pas utiliser votre bâteau afin d éviter tout problème No navegue con su modelo bajo las siguientes condiciones In the sea or in other salt water Modell nicht im ...

Страница 18: ...urely installed Ensure servos and linkages move without binding Ensure all cords are not touching any moving parts Ensure the area of operation is safe Ensure nobody is on your frequency at the same time Assurez vous que toutes lesvis soien bien serrées Assurez vous que les pièces en mouvement ne cognent rien Sont elles bein graissées Assurez vous que les batteries soient bien chargées Sont elles ...

Страница 19: ...ner le volant de la radio afin de vérifier la commande de direction Mueva el volante y compruebe el movimiento del timón Checking Rudder Ruderkontrolle Vérification de la direction Comprobación de la dirección This model uses normal position for steering and reverse for the throttle Schalter Lenkservo auf Normal Schalter Gas Funktion auf Reverse Utiliser la position NORMALE pour la direction et RE...

Страница 20: ...cken daß sich die Schraube frei drehen kann prüfen Sie alle Funktionen Placer le bateau sur son stand et s assurer que l hélice et les autres pièces en rotation tournent librement Coloque el modelo en el soporte asegurándose que la hélice no contacta con ningún objeto ahora compruebe si el timón se mueve correctamente al mover el volante de su emisora Disconnect the battery Akkus trennen Retirer l...

Страница 21: ...ull Draw out water from inside the hull Oil the metal parts Alle Verschraubungen auf festen Sitz pruefen Alle beweglichen Teile nachfetten Alle Kabel auf Beschaedigungen pruefen ggf neu isolieren oder erstzen Pruefen Sie die Antriebsteile auf Verschleifl Modell nach jeder Fahrt reinigen Entfernen Sie saemtliche Feuchtigkeit aus dem Inneren des Rumpfes Die Wartung MAINTENANCE Después de navegar S a...

Страница 22: ...n de l hélice Nettoyer l hélice et la graissée L hélice tourne difficilement Le bateau ne s arrête pas Mauvais réglages du variateur Se référer à la notice pour effectuer le réglage du variateur électronique Le moteur fonctionne mais pas le bateau Problème dans la transmission du bateau Resserez les vis et vérifier toute la transmission du bateau Problème moteur Changer de moteur si nécessaire Pro...

Страница 23: ... posición neutral reajustar el varillaje El Motor funciona pero el modelo no navega Junta no instalada o tornillos sueltos Apretar tornillos Motor estropeado Instalar un nuevo motor PROBLEMA CAUSA SOLUCION El Variador de Velocidad se para y no funciona El eje no gira suavemente Limpiar el eje y aplicar grasa Sobrecalentamiento Dejar enfriar Bateria descargada Una vez enfriada recargar la batería 2...

Страница 24: ...59 36 18 17 53 19 55 56 22 25 59 57 57 20 17 58 16 23 7 61 24 25 24 2 6x8mmTP 2 6x8mmTP 2 6x8mmTP TN022VE 1705 TN003C TN003C TN003C 1889 TN003C TN003C TN003C TN003C TN003C TN003C TN003C TN008C TN021VE 96183 94852 94856 94856 HJ12 TN025 TN025 33 TN025 BRG003SUS 33 TN025 BRG003SUS 94881 94881 94881 94881 94881 94881 ORG02BK ORG05 94852 94105C 94851 94752 94856 HJ12 TN003C TN003C 63 94201Z TN003C TN0...

Страница 25: ...004C 3 3x3mm 3x6mm 3 mm W0148 TN004C W0148 3x10mm 16 68 52 49 3x10mm 3x8mmTP 190mm 120mm ORI61116 16 96441B ORI62059 3x10mm 3x6mm 3x6mm 3x8mmTP 2 6x12mmTP 2 6x8mmTP 3x12mmTP 2 6x8mmTP 4x4mm 190mm 3x14mm 94907 94907 94907 94907 94907 94907 94907 94905 3 94907 94907 94907 94905 3 94907 94905 1 94907 94907 94907 1 94907 94907 94907 94905 3 94907 96183 94905 3 94901 3 94907 94907 94905 2C 94907 94434 ...

Страница 26: ...ヶ入り スパーギヤ42T Spur Gear 42T 走行姿勢調整用ウェイト60g入り セッティングウェイト Setting Weight 42 と交換1ヶ入り ステンレススラストベアリング4x9x4 Stainless Thrust Bearing 4x9x4 金属プロペラD37xP1 4 3ブレード Metal Propeller D37xP1 4 3 Blade 44 と交換 ターンフィン LLサイズ カーボン Turn Fin LL size Carbon デジタルセットアップボックス VORTEX ESC用 Digital Set up Box for VORTEX ESC 旋回性を向上 1枚入り ESCの各種セッティング用 蛍光ストラップ S Fluorescent Strap S 防水クリアーテープ WaterProofing Tape 3 と交換 SPARE PARTS T...

Страница 27: ...です C ご注文から約3 4日でお客様の ご自宅か お店にお届けします A 取扱説明書で必要なパーツの 品番と数量を確認する B お店で必要なパーツを注文し 代金を支払う お店に行けない場合は 京商ホームページ内の京商オンラインショップからお申し込みいただくか 電話注文でお申し込みいただく ようになります 1 まずはお店でお求めく ださい 注文専用電話番号 046 229 1541 受付時間 月 金曜 祝祭日を除く 13 00 17 00 KYOSHOホームページ内のインデックスから京商オ ンラインショップをクリックしていただくか 右記QR コードを携帯で読み込んでいただく と 直接サイトにアクセスできます 必要事項を入力の うえご利用ください オンラインショップ インターネッ ト でお申し込みの場 合は2種類 各社クレジッ トカード 代引支払い から お選びいただけますのでご利用ください...

Страница 28: ...エンジン 受付No 京商記入欄 都 道 府 県 電 話 都 道 府 県 電話 電話 R C歴 品番 商品名 FAX FAX 京商にお問い合せの際は 京商ユーザー相談室 にご連絡ください お問い合せの際は お手元に商品や組立 取扱説明書をご用意のうえ 組立 取扱説明書のページ数 行程番号 部品番号 キーNo を用いるなど なるべく具体的にお知らせください お問い合せ用紙は F A X または郵便でお送りください 回答方法は 京商で検討のうえ考慮させて頂きます 郵送の場合は お問い合せ用紙のコピーを保管してください キリ トリ線 The service mentioned below is available only for Japanese market お問い合せご記入欄 組立 取扱説明書のページ数や部品番号 キーNo を用いるなど なるべく具体的にご記入ください 京商株式会社では お客...

Отзывы: