background image

THE  FINEST  RADIO  CONTROL  MODELS

R

※製品改良のため、予告なく仕様を変更する場合があります。

Specifications are subject to change without prior notice!

Technische  nderungen sind ohne vorherige AnkŸndigungen mšglich! Les sp cifications peuvent changer sans pr avis!

安全のための注意事項

この無線操縦模型は玩具ではありません

!

●小さい部品があるので、組立て作業は幼児の手がとどかない所で必ずおこなっ

てください。

●動かして楽しむ場所は、万一の事故を考えて安全を確認してから、責任をもっ

てお楽しみください。

●組立てた後も、説明書がいつでも見られるように大切に保管してください。

●この商品は高い性能を発揮するように設計されています。組立てに不慣れな方は、模

型を良く知っている人にアドバイスを受け確実に組立ててください。

SAFETY PRECAUTIONS

This radio control model is not a toy!

First  time  builders  ask  advise  from  people  having  building  experience  in  order  to 
assemble the model correctly and to bring out it's best performance.

Assemble this kit only in places out of childrenÕs reach!

Take enough safety precautions prior to operating this model.  You are responsible for this 
modelÕs assembly and safe operation!

Always keep this instruction manual ready at hand for quick reference, even after completing 
the assembly.

ACHTUNG!

Dieses Modell ist kein Spielzeug!

AnfŠnger sollten mšglichst Rat bei Modellbaukundigen einholen, um das Modell richtig 
zusammenzubauen und gefahrlos bedienen zu kšnnen.

Bauen Sie dieses Modell nur au§er Reichweite von Kindern zusammen!

Treffen Sie genŸgend Sicherheitsvorkehrungen, bevor Sie Ihr Modell bedienen!  Sie 
alleine tragen die Verantwortung fŸr Ihr Modell und dessen gefahrlose Bedienung!

Bitte bewahren Sie diese Dokumentation zur spŠteren Verwendung auf.

ATTENTION!

Ce mod le nÕest pas un jouet!

Si vous  tes d butant dans le mod le r duit, prenez conseils aupr s de mod listes 
con-firm s afin dÕutiliser votre mod le dans des conditions optimales.

Assemblez ce kit en dehors de la port e de jeunes enfants!

Prenez des pr cautions lors de lÕutilisation.  Vous seul  tes responsable des  
volutions de votre mod le.  La soci t  KYOSHO ou son distributeur ne peuvent 
en aucun cas  tre tenus responsables des accidents pouvant survenir lors de 
lÕutilisation de ce mod le!

Gardez cette notice ˆ port e de main afin de vous y r f rer rapidement.

※ご使用前にこの説明書を良くお読みになり十分に理解してください。

Before commencing assembly, please read these instructions thoroughly.

Bitte lesen Sie die Anweisungen vor Gebrauch genau durch!

Veuillez attentivement lire les instructions avant lÕemploi!

Lea cuidadosamente este manual antes de comenzar el montaje

No. 30072

(和英独仏西)

© 2001 KYOSHO

/禁無断転載複製

CONSEJOS DE SEGURIDAD

Este modelo de Radio Control no es un juguete

Los no inicados en este hobby deber‡n ser aconsejados por expertos antes de 
comenzar el montaje de este modelo.

Realice el montaje en un lugar fuera del alcance de los ni–os.

Siempre extreme las medidas de seguridad. Usted es el œnico responsable del 
funcionamiento de su modelo.

Mantenga este manual a mano.

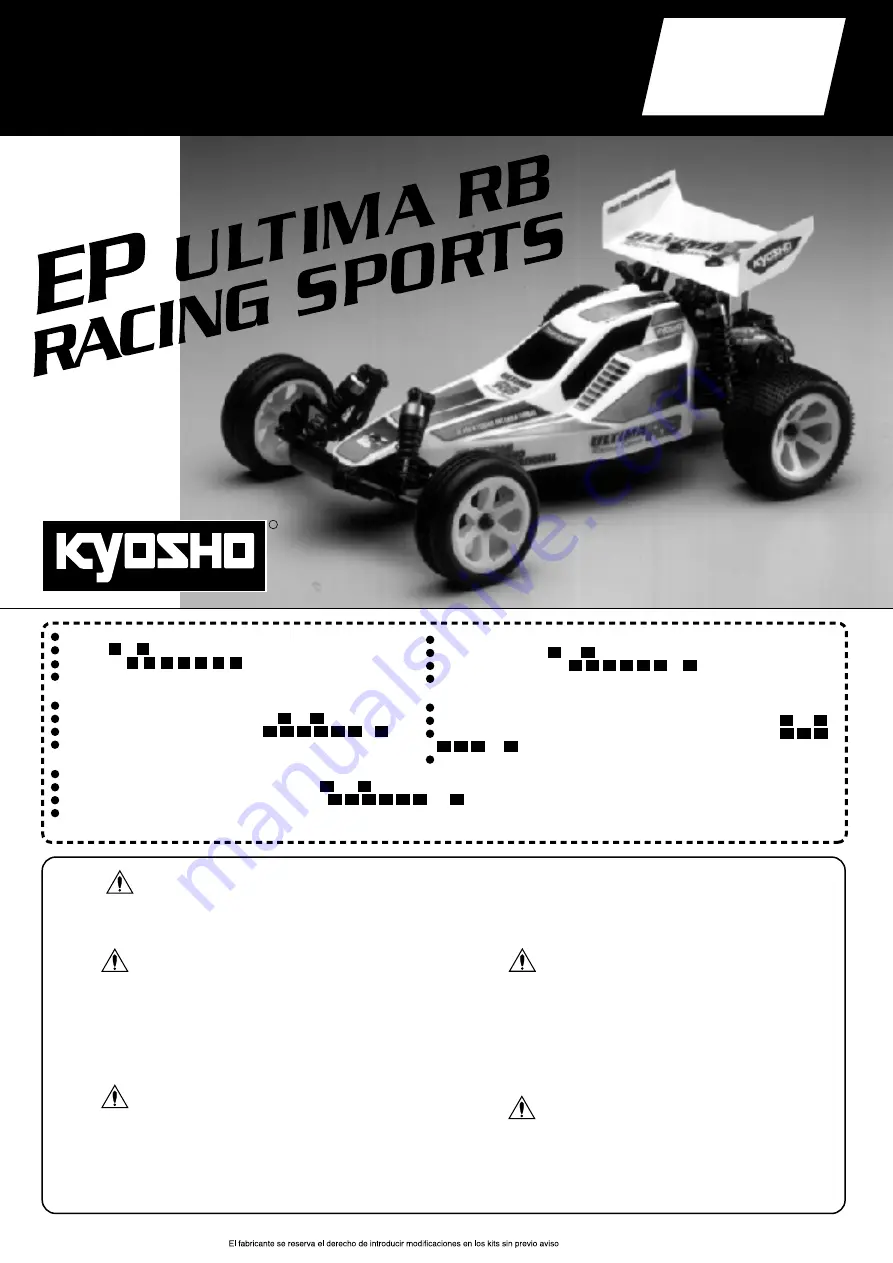
INSTRUCTION MANUAL

組立/取扱説明書

ELECTRIC

POWERED 

EP

VERSION

EP アルティマ RB レーシングスポーツ

Diese Bauanleitung bezieht sich auf die ARR und die Readyset Version.
Bitte beachten Sie fŸr die ARR Version die Baustufen        bis       .
Bitte beachten Sie fŸr die Readyset Version die Baustufen                                    bis       .
†berprŸfen Sie die Einstellungen Ihrer RC-Anlage gemŠ§ Seite 20, bevor
Sie mit dem Betrieb des Modells beginnen.

Notice de montage pour les versions ARR et Readyset.
Version ARR : Etapes         a        .
Version Readyset : Etapes                                    a       .
Lire attentivement la page 20 avant la mise en route de votre modele.

Este manual de instrucciones sirve para la versi—n ARR y la versi—n Readyset.
Si usted ha adquirido la versi—n ARR solamente deber‡ realizar los pasos       al        .
Si usted posee la versi—n Readyset solamente deber‡ realizar desde el                   
                  al       .
Asegœrese de comprobar la p‡gina n¡20 "preparacl—n del equipo de radio"
antes de rodar con su modelo.

この説明書は、

ARR

readyset 

共通です。

ARR 

は、


までを組立ててください。

readyset 

は、


を組立ててください。

20

ページの、プロポのセットアップを必ず確認してください。

This is instruction manual for both ARR and Readyset version. 
ARR version need to assemble step number        to       . 
Readyset version need to assemble step number                                       to       . 
Make sure to check page 20 "radio set-up" before start your model. 

25

34 35 36 37 39 40 41

41

34 35 36 37 39 40

41

25

41

34 35 36 37 39 40

41

25

41

34 35 36 37 39 40

41

25

41

34 35 36

37 39 40

41

25

41

Содержание EP ULTIMA RB RACING SPORTS

Страница 1: ...tilisation de ce mod le Gardez cette notice ˆ port e de main afin de vous y r f rer rapidement ご使用前にこの説明書を良くお読みになり十分に理解してください Before commencing assembly please read these instructions thoroughly Bitte lesen Sie die Anweisungen vor Gebrauch genau durch Veuillez attentivement lire les instructions avant lÕemploi Lea cuidadosamente este manual antes de comenzar el montaje No 30072 和英独仏西 2001 KYOSHO 禁...

Страница 2: ...O Utilice siempre una emisora para coche R C de 2 canales con dos servos 注意 スプレーカラーを使用する場合 缶の説明を良く読んでください CAUTION Before using Kyosho Spray Colors always read the explanations WICHTIG Lesen Sie bitte zuerst die Gebrauchsanleitung der Spray farben sorgfŠltig durch IMPORTANT Avant lÕutilisation des Kyosho Spray Colors lisez atten tivement les explications AVISO Antes de comenzar a pintar lea las ins...

Страница 3: ...ater a Ni Cd スピードコントローラー Rotary Speed Controller Mechanischer Fahrtenregler Variateur m canique Variador de velocidad 1 2 3 4 5 6 7 8 9 10 11 始める時 終わる時 送信機に単3乾電池をセットする 送信機のアンテナをのばす ニカドバッテリーをつなぐ 受信機のアンテナをのばす トリムを中央にセットする 送信機のスイッチを入れる 受信機のスイッチを入れる 動かしてサーボが動いているか 確認 受信機のスイッチを切る 送信機のスイッチを切る 送信機のアンテナを縮める 1 2 3 4 5 6 7 8 9 10 11 1 2 3 4 5 6 7 8 9 10 11 1 2 3 4 5 6 7 8 9 10 11 START FINISH Insert the AA ...

Страница 4: ...urese mirando la tabla en cada paso A la hora de apretar Tornillos Autorroscantes TP Apri telos firmemente en la pieza donde corresponda No intente apretarlos demasiado ya que podr an deformar la pieza 説明書の見かた How to read the instruction manual So funktioniert die Bauanleitung Comment lire les instruction C mo leer el manual de instrucciones 2 No 4 No 5 No 6 メタル Metal Bushing Metallager Palier m t...

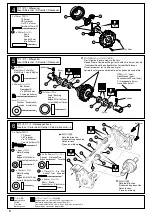
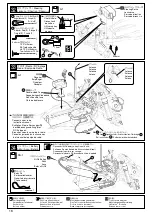
Страница 5: ...is 3 Support amortisseurs arri re Soporte Amortiguadores Traseros Rear Shock Stay Hintere DŠmpferbrŸcke 4 3mm Nut Mutter Ecrou Tuerca 3mm 4 3 x 8mm F H Screw SK Schraube Vis F H 3x8mm Tornillo 3x8mm F H 2 3 x 12mm TP Screw LK Treibschr Vis TP 3x12mm Tornillo 3x12mm TP 4 3 x 12mm TP F H Screw SK Treibschraube Vis TP F H 3x12mm Tornillo 3x12mm TP F H 1 3 x 8mm TP F H Screw SK Treibschraube Vis TP F ...

Страница 6: ...0 18 3x16mm Note the direction Einbaurichtung beachten Notez le sens F jese en el dibujo Note the direction Einbaurichtung beachten Notez le sens F jese en el dibujo 6 GetriebegehŠuse Gearbox Carter de diff rentiel Caja de transmisi n 3 x 16mm TP Screw LK Treibschr Vis TP 3x16mm Tornillo 3x16mm TP 1 19 2 x 11mm Axe 2x11mm Pasador Pin Stift 2 22 5 x 10mm Metal Bushing Lager Bague M tal 5x10mm Casqu...

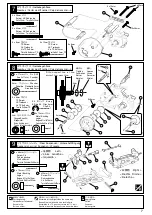
Страница 7: ...Bague M tal 5x10mm Casquillo Met lico 5x10mm 1 22 5 x 10mm Metal Bushing Lager Bague M tal 5x10mm Casquillo Met lico 5x10mm 2 30 3 x 46mm Screw Pin Schraubachse Vis 3x46mm Tornillo Pasador 3x46mm 2 29 3 x 25mm Screw Pin Schraubachse Vis 3x25mm Tornillo Pasador 3x25mm Assemble left and right sides the same way Bauen Sie eine linke und eine rechte Seite Assemblez le c t gauche comme le c t droit Rea...

Страница 8: ...mm TP F H Assemble left and right sides the same way Bauen Sie eine linke und eine rechte Seite Assemblez le c t gauche comme le c t droit Realice el montaje de igual forma en ambos lados Make sure both dog bones are inserted into the diff drive joints before attaching transmission to the chassis Ensure smooth non binding movement while assembling Das Teil mu sich leicht bewegen lassen La pi ce do...

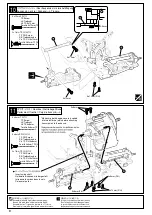
Страница 9: ...ttention Avis important Preste atenci n 4 3 x 12mm TP F H Screw SK Treibschraube Vis TP F H 3x12mm Tornillo 3x12mm TP F H 0 5mm 0 5mm 36 36 29 3 x 25mm Screw Pin Schraubachse Vis 3x25mm Tornillo Pasador 3x25mm 3 x 12mm TP Screw LK Treibschr Vis TP 3x12mm Tornillo 3x12mm TP 46 107 47 44 29 45 43 Right Rechts Drolte Derecho Right Rechts Drolte Derecho Left Links Gauche Izquierda Left Links Gauche Iz...

Страница 10: ... LK Treibschr Vis TP 3x8mm Tornillo 3x8mm TP 2 47 5 8mm Pillow Ball Kugelschraube Rotule 5 8mm Rótula 5 8mm 1 102 4 5mm Pillow Ball Kugelschraube Rotule 4 5mm Rótula 4 5mm 1 5 x 9 x 8mm Servo Saver Collar Lager für Servosaver Entretoise de sauve servo Casquillo salvaservos 57 4 Ensure smooth non binding movement while assembling Das Teil muß sich leicht bewegen lassen La pièce doit pouvoir pivoter...

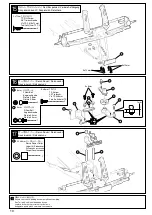
Страница 11: ...de papier entre les dents des pignons Coloque un trozo de papel entre la corona y el piñón antes de apretar los tornillos 4 3 x 12mm TP F H Screw SK Treibschraube Vis TP F H 3x12mm Tornillo 3x12mm TP F H 18 Body Mounts Karrosseriestützen Fixations de carrosserie Soportes de carrocería 19 Tie Rod Spurstänge Biellette Tirante 20 Motor Motor Moteur Motor Assemble left and right sides the same way Bau...

Страница 12: ... end ride height adjust the amount of When adjusting always run your car Der Abstandshalter existiert in 5 Grš en Justieren Sie hiermit die Bodenfreiheit des Fahrzeugs an der Vorder und Hintcrachse Les bagues existent dans 5 paisseurs diff rentes choisir le nombre et l paisseur de pour les r glages de suspension est disponible en 5 anchuras Elija la que m s se adapte al tipo de terreno 65 E2 5 E r...

Страница 13: ...ortisseur Amortiguador Shock Sto dŠmpfer 2 3 x 8mm TP Screw LK Treibschr Vis TP 3x8mm Tornillo 3x8mm TP Assemble left and right sides the same way Bauen Sie eine linke und eine rechte Seite Assemblez le c t gauche comme le c t droit Realice el montaje de igual forma en ambos lados Must be purchased separately Das Teil ist nicht im Bausatz enthalten Doit tre achet s par ment Debe comprarse por sepa...

Страница 14: ...cez des trous dans le indiqu Perfore agujeros con la medida indicada 2 5mm True to scale diagram Ma stabsgetreue Darstellung Illustration ˆ lÕ chelle Dibujo a tama o real 2x10mm 81 Make sure the servo is set to neutral before fitting servo horn Refer to page 3 arrangement of the radio system Nicht Verdrehen Siehe Seite 3 falls der Fahrtenregler versehentlich verdreht worden ist Ne pas faire pivote...

Страница 15: ...ie die AnschlŸsse wie dargestellt Pliez les extr mlt s Doble el terminal Red Rot Rouge Rojo 1 Lead from Speed Controller Anschluskabel vom Fahrtenregler Reli au variateur Cables del variador de velocidad 82 82 82 Rot Rouge Rojo Red Gelb Jaune Amarillo Yellow 3x8mm 12 13mm 2 3 x 8mm TP Screw LK Treibschr Vis TP 3x8mm Tornillo 3x8mm TP Cut off shaded portion Schneiden Sie die schraffierten FlŠchen h...

Страница 16: ...33 Radio RC Anlage Radio Equipo de Radio 34 Battery Akku Accu Bater a Receiver EmpfŠnger R cepteur Receptor Pay close attention here Vorsicht Wichtiger Hinweis Attention Avis important Preste atenci n True to scale diagram Ma stabsgetreue Darstellung Illustration ˆ lÕ chelle Dibujo a tama o real Must be purchased separately Das Teil ist nicht im Bausatz enthalten Doit tre achet s par ment Debe com...

Страница 17: ...s 94 95 x2 Assemble as many times as specified Sooft wie angegeben zusammenbauen Assemblez aussi souvent quÕindiqu Repita las veces se aladas Assemble left and right sides the same way Bauen Sie eine linke und eine rechte Seite Assemblez le c t gauche comme le c t droit Realice el montaje de igual forma en ambos lados Apply instant glue CA glue super glue Verwenden Sie Sekundenkleber Collez avec d...

Страница 18: ...en Peingnez la carrosserie avec des peintures en spray de chez Kyosho Pinte la carrocer a desde el interior utilizando sprays 37 Carrosserie Carrocer a Body Shell Karrosserie 38 Painting Lackierung Peinture Pintado de la Carrocer a Cut off shaded portion Schneiden Sie die schraffierten FlŠchen heraus Coupez la partie gris e Corte la zona oscurecida Drill holes with the specified diameter Bohren Si...

Страница 19: ...ls to the positions indicated in numerical order Tragen Sie die Aufkleber in der Reihenfolge ihrer Nummern auf Appliquez les autocollants dans lÕordre de leur num ro Coloque los adhesivos siguiendo el orden The decal numbers between brackets are only for the opposite side Die Aufkleber in Klammern slnd fŸr die andere Selte Les autocollants entre parenth ses sont pour le c t oppos Los nœmeros entre...

Страница 20: ... syst me de glissement afin de patiner l g rement ˆ partir du point mort Como norma general ajuste el Slipper Clutch para que patine un poco desde parado The more the slipper clutch slips the more heat is generated The longer you run under such cir cumstances the more likely you will damage the spur gear Je stŠrker die Kupplung im Betrieb durchrutscht desto stŠrker erwŠrmt sich die Kupplung Bei lŠ...

Страница 21: ...m Sender um V rifier que les commandes de directions correspondent au sch ma Si les commandes sont invers es utiliser l interrupteur d inversion de servo Compruebe el movimiento de la direcci n utilice el interruptor de inversi n de la emisora si fuera necesario Radio set up Einstellen der Fernsteuerung R glages radio Equipo de Radio Trim Trimmung Trim Trim 90 1N 3 2 3 2 1N R Neutral Neutral Neutr...

Страница 22: ...ls Ihr Modell Das kšnn te schwere UnfŠlle zur Folge haben Bedenken Sie da auch andere in Ihrer Umgebung ein ferngesteuertes Modell bedienen kšnnten Stellen Sie sicher da niemand zur selben Zeit die selbe Frequenz in Ihrer Umgebung benutzt Das kann zum Ver lust Ihres Model les sowie zu schweren UnfŠllen fŸhren Pour viter tout accident nÕutilisez jamais votre mod le 1 ˆ proximit de routes 2 dans un ...

Страница 23: ...dernehmen oder um bauen 4 Akkukabel dŸrfen nicht in bewegende oder sich drehende Teile kommen 5 Verbrauchte Akkus fachgerecht an entsprechen der Stelle entsorgen oder an den Kyosho FachhŠndler Ne jamais mettre vos doigts dans les pi ces en mouvement Apr s utilisatlon ne pas toucher le moteur ou lÕaccu Danger de br lures Consignes de s curit 1 Lisez la notice de lÕaccu et du chargeur avant leur uti...

Страница 24: ...ached Is the running area safe Is anybody using the same frequency as you Are the wheels and the tires securely attached Are all rotating parts greased Do moving parts contact anywhere Do the shocks move and function correctly Sind alle Schrauben fest angezogen Sind die Senderakkus geladen Sind die Akkus im Modell geladen lst das Zahnflankenspiel richtig eingestellt Funktioniert die Lenkung richti...

Страница 25: ...te Querlenker aus Wechseln Sie beschŠdigte oder verschlissene ZahnrŠder aus SŠubern Sie das Chassis von Schmutz V rifiez si toutes les vis et crous sont bien serr s et si certaines pi ces ne sont pas us es ou abim es Graissez toutes les pi ces en mouvement R parez le cablage si certains fils sont endommag s Si les connexions de servos ou lÕantenne sont endommag s faites les r parer par le fabrican...

Страница 26: ...aus dem Modell nehmen Quand vous aurez fini de rouler prenez votre voiture Ne la laissez pas sur la piste Retire su coche de la pista 26 ON OFF STOP Make sure that the speed controller is in its neutral position Stellen Sie sicher da der Fahrtenregler in Neutralposition ist V rifiez si le variateur de vitesse est en position neutre Compruebe que el variador de velocidad est en posici n neutral Ful...

Страница 27: ... rotate at all RŠder laufen schwer Les roues tournent tr s vite ne tournent pas Las ruedas apenas no giran Backlash is too tight Radmuttern zu festangezogen La courroie de transmission est trop serr e Ajuste muy duro Readjust as per instruction manual Einstellen gemŠ Anleltung R ajustez selon les instructions de montago Reajustar Readjust as per instruction manual Einstellen gemŠ Anleitung R f rez...

Страница 28: ...W5102 67 RS71 109 RS63 78 SM55 110 RS48B 116 RS48B 63 RS58 111 RS155 112 RS154 113 RS57 114 RS154 113 RS155 112 RS51B 24 RS55 1 RS58 115 RS63 13 RS72 123 1889 92 RS72 124 AE49 19 RS67 95 1916 22 RS69 98 RS46 15 25 RS45 23 RS32 29 RS61 32 RS31 30 RS5 31 RS54 20 RS50 17 1916 22 RS27 28 RS59 35 RS47 27 AE57 8 RS50 16 1914 21 AE49 19 1914 21 AE56 3 126 AE39 70101 62 1705 93 AE57 8 RS55 2 AE52 4 AE50 5...

Страница 29: ...ブギヤシャフト スリッパー用 Drive Gear Shaft for Slipper フロントタイヤ Front Tire リヤタイヤ Rear Tire フロントダンパースプリング Front Shock Spring リヤダンパースプリング Rear Shock Spring ウイングステー Wing Stay ボディセット Body Set デカール Decal Set ウイング Wing メインシャシー EP Main Chassis EP スリッパーシート Slipper Sheet スリッパープレート Slipper Plate スプリング Spring ジョイント Joint メインギヤ スリッパー Main Gear Slipper スリッパーハブ Slipper Hub スイングシャフト 56mm Swingshaft 56mm フロントサスアーム Front Susp...

Страница 30: ...ボールスタッド S 4 8mm Ball Stud S キングピン King Pin フロントホイール Front Wheel フロントタイヤ Front Tire 3 16x3 8インチボールベアリング 3 16x3 8 in Ball Bearing FOR JAPANESE MARKET ONLY オプションパーツ OPTIONAL PARTS 200 一律 2セット入 2 pcs 2セット入 2 pcs フロントダンパー Front Shock フロント Front リヤダンパー Rear Shock 印は セットで使用するパーツです 単体での使用はできません UM128 4 8mmボールスタッド L 4 8mm Ball Stud L UM 104フロントハブを使う場合 下記のパーツが必要です UM103 UM112 UM113 UM126 UM128 UM129 OTW12 U...

Страница 31: ...ド 40mm Adjuster Rod 40mm リヤタイヤ Rear Tire リヤホイール Rear Wheel ユニバーサルスイングシャフト Universal Swingshaft 5x10mmボールベアリング 5x10mm Ball Bearing リヤハブ Rear Hub フロントサスアーム Front Suspension Arm サスシャフト 24mm Suspension Shaft 24mm Eリング E2 5 E ring E2 5 リヤサスアーム Rear Suspension Arm サスシャフト 26mm Suspension Shaft 26mm Eリング E2 5 E ring E2 5 FOR JAPANESE MARKET ONLY オプションパーツ OPTIONAL PARTS 200 一律 印は セットで使用するパーツです 単体での使用はできません...

Страница 32: ...ング L 75 Spring L 75 スプリング L 80 Spring L 80 カラーアンテナ 蛍光イエロー Color Antenna Fluorescent Yellow 1708 カラーアンテナ 黒 Color Antenna Black カラーアンテナ 蛍光ピンク Color Antenna Fluorescent Pink 5x10mm ボールベアリング 5x10mm Ball Bearing 4x8mm ボールベアリング 4x8mm Ball Bearing 8x14mm ボールベアリング 8x14mm Ball Bearing ベアリングセット Ball Bearing Set ボールベアリング1台分 Ball Bearing 1000 96993 3 16x3 8 インチ ボールベアリング 3 16x3 8 in Ball Bearing エクスピードストック15Tモ...

Страница 33: ...ら京商へ申し込めます お店でご希望のパーツがたまたま品切れだった場合でも 京商の パーツ直送便 を利用すればその場で注文でき ます パーツ直送便 は お店に備え付けのパーツ直送便注文用紙にご希望のパーツの品番や数量等 必要事項 をご記入の上 お店に代金をお支払いいただければ結構です 3 4日でお客様のご自宅か お店にお届けします 発送手数料が不要で早く着くお得なシステムです 一部取り扱っていないお店もございます パーツ直送便取り扱い店は このステッカーが目印 3 4日でお客様の ご自宅かお店に お届けします パーツ直送便 注文用紙に 品番 と必要数を記入 パーツ直送便の 注文用紙といっしょに 代金をお店の人に 払おう 発送手数料は 不要 お届けまで 3 4日 発送手数料 200円 発送手数料 200円 お届けまで 10 12日 お届けまで 6 7日 お店に行けない場合は郵便局から申し込んで...

Страница 34: ... 10 00 18 00で電話連絡可能な時間帯 頃 電話でのお問い合わせは 月曜 金曜 祝祭日を除く 10 00 18 00 フ ァ ッ ク ス では 24時間お問い合わせの受付をして居ります 回答は 翌営業日 以降となる場合があります 営業日 月曜 金曜 祝祭日を除く これらのサービスは日本国内に限らせて頂きます 商品No ご購入店 ご使用 プロポ フリガナ 店名 ご氏名 ご自宅 住所 平日の昼間に 可能な連絡先 ご自宅の 連絡先 ご購入 年月日 ご使用 モーター 受付No 京商記入欄 都 道 府 県 電 話 都 道 府 県 性別 生年 月日 大正 昭和 平成 男 女 電話 R C歴 商品名 ファックス 電話 ファックス 京商にお問い合わせの際は 京商ユーザー相談室 にご連絡ください お問い合わせの際は お手元に商品や組立 取扱説明書をご用意のうえ 組立 取扱説明書のページ数 行程番号 ...

Отзывы: