


2-25
Installing and Setting up the Machine > Default Settings of the Machine
Default Settings of the Machine
The default settings of the machine can be changed in System Menu. Before using this machine, configure such settings
as date and time, network configuration, and energy saving functions as needed.
Setting Date and Time
Follow the steps below to set the local date and time at the place of installation.
When you send an E-mail using the transmission function, the date and time as set here will be printed in the header of
the E-mail message. Set the date, time and time difference from GMT of the region where the machine is used.
1
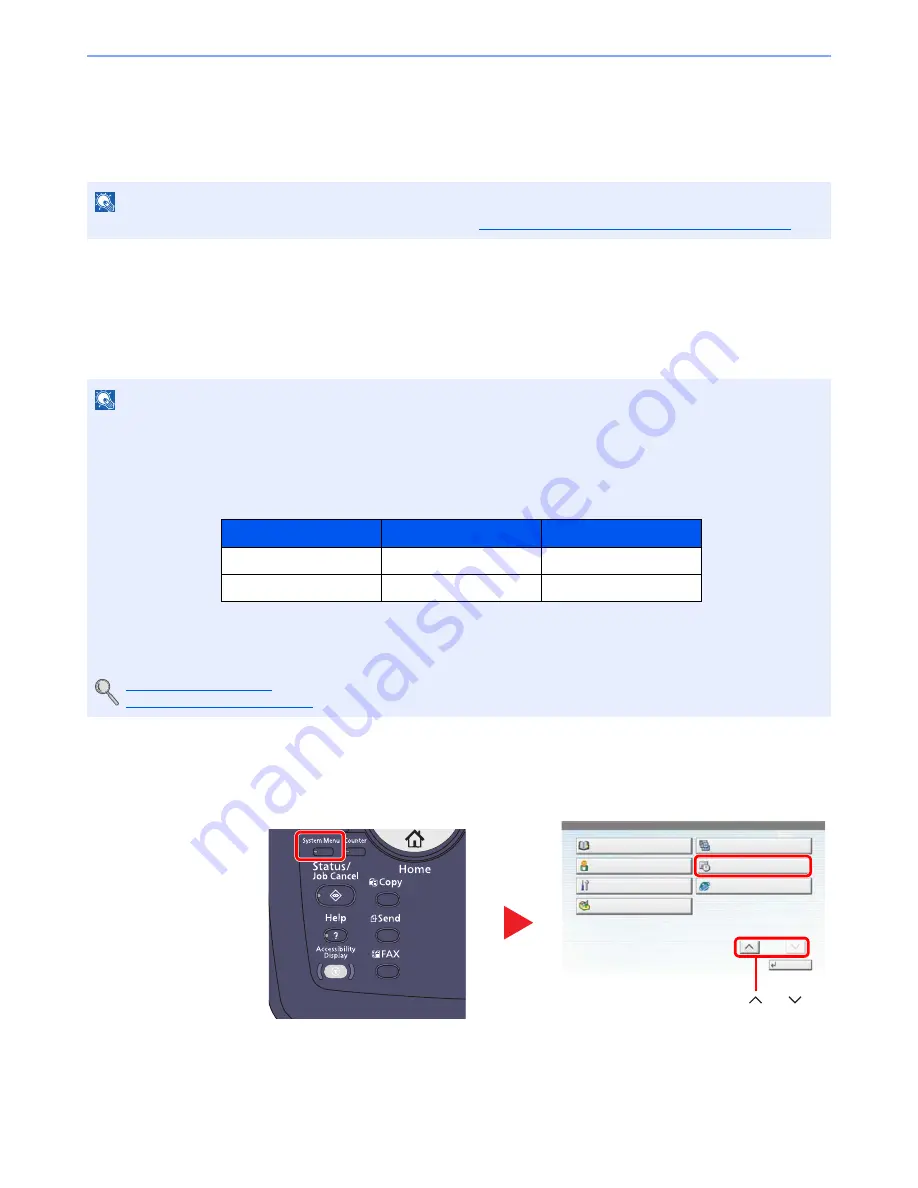
Display the screen.
Press the [
System Menu
] key and select [Date/Timer/Energy Saver].
NOTE
For settings that are configurable from System Menu, refer to
Setup and Registration (System Menu) (page 8-1)
.
NOTE
If user login administration is enabled, you can only change the settings by logging in with administrator privileges.
If user login administration is disabled, the user authentication screen appears. Enter a login user name and
password, and press [Login].
The factory default login user name and login password are set as shown below.
Be sure to set the time difference before setting the date and time.
If you change the date/time while using the trial version of an application, you will no longer be able to use the
application.
Application (page 5-10)
Optional Applications (page 11-7)
Model Name
Login User Name
Login Password
6501i
6500
6500
8001i
8000
8000
1
System Menu
Edit Destination
Close
User Property
Adjustment/Maintenance
Application
User Login/Job Accounting
Date/Timer/Energy Saver
Internet
2/2
3
Press [ ] or [ ] to
scroll up and down.
2
Содержание TASKalfa 6501i
Страница 1: ...OPERATION GUIDE 6501i 8001i ...
Страница 22: ...xxi Banner Tray Option 11 28 Glossary 11 29 Index Index 1 ...
Страница 42: ...xli Menu Map ...
Страница 60: ...1 18 Legal and Safety Information Notice ...
Страница 108: ...2 48 Installing and Setting up the Machine Transferring data from our other products ...
Страница 180: ...4 18 Printing from PC Printing Data Saved on the Printer ...
Страница 440: ...9 42 User Authentication and Accounting User Login Job Accounting Unknown ID Job ...
Страница 447: ...10 7 Troubleshooting Regular Maintenance 3 4 5 6 CLICK ...
Страница 480: ...10 40 Troubleshooting Troubleshooting Cassettes 3 and 4 1 2 3 4 2 1 B1 B2 ...
Страница 481: ...10 41 Troubleshooting Troubleshooting Multi Purpose Tray 1 2 3 4 ...
Страница 483: ...10 43 Troubleshooting Troubleshooting Duplex unit 1 2 ...
Страница 484: ...10 44 Troubleshooting Troubleshooting Duplex Unit and Cassette 1 1 2 3 CLICK ...
Страница 486: ...10 46 Troubleshooting Troubleshooting Fixing unit 1 2 A1 ...
Страница 488: ...10 48 Troubleshooting Troubleshooting Right tray 1 2 3 A1 ...
Страница 489: ...10 49 Troubleshooting Troubleshooting Bridge Unit 1 2 ...
Страница 490: ...10 50 Troubleshooting Troubleshooting 4 000 Sheet Finisher Option Coupling Section 1 2 Tray A 1 2 D1 D6 ...
Страница 492: ...10 52 Troubleshooting Troubleshooting Tray B 1 2 3 Tray C 1 D2 D3 ...
Страница 493: ...10 53 Troubleshooting Troubleshooting Conveyor 1 2 Mailbox Option 1 D2 D3 1 2 ...
Страница 494: ...10 54 Troubleshooting Troubleshooting Center Folding Unit Option Ejection Section 1 2 3 2 1 2 1 2 1 D9 D9 ...
Страница 496: ...10 56 Troubleshooting Troubleshooting 5 Cassette 5 Option Side Feeder 3 000 sheet 1 2 2 1 ...
Страница 501: ...10 61 Troubleshooting Troubleshooting Clearing a Staple Jam Staple cartridge holder A 1 2 3 2 1 CLICK ...
Страница 502: ...10 62 Troubleshooting Troubleshooting Staple cartridge holder B C 1 2 3 4 2 1 CLICK ...
Страница 544: ...Index 10 Index ...
Страница 545: ......
Страница 548: ...First edition 2013 7 2N7KDEN100 ...


