background image

i

Contents

1  

Machine 

Parts 

................................................................................................ 1-1

Components at the Front of the Printer ................................................................................... 1-2
Components at the Left of the Printer ..................................................................................... 1-2
Components at the Right of the Printer ................................................................................... 1-3
Internal Components  ............................................................................................................... 1-4

 Printing Operation  ........................................................................................ 2-1

Loading Printer Driver  ............................................................................................................. 2-2
Printing from Application Software .......................................................................................... 2-3

3  

Maintenance 

.................................................................................................. 3-1

General Information  ................................................................................................................ 3-2
Loading Paper ......................................................................................................................... 3-3
Toner Container Replacement ................................................................................................. 3-8
Cleaning the Printer  .............................................................................................................. 3-13

4  

Troubleshooting 

............................................................................................ 4-1

General Guidelines  ................................................................................................................. 4-2
Print Quality Problems  ............................................................................................................ 4-3
Error Messages ....................................................................................................................... 4-6
Clearing Paper Jams ............................................................................................................. 4-11

5  

Specifications 

................................................................................................ 5-1

Содержание EP C320DN

Страница 1: ...Operation Guide FS C8100DN ...

Страница 2: ......

Страница 3: ...rnal Components 1 4 2 Printing Operation 2 1 Loading Printer Driver 2 2 Printing from Application Software 2 3 3 Maintenance 3 1 General Information 3 2 Loading Paper 3 3 Toner Container Replacement 3 8 Cleaning the Printer 3 13 4 Troubleshooting 4 1 General Guidelines 4 2 Print Quality Problems 4 3 Error Messages 4 6 Clearing Paper Jams 4 11 5 Specifications 5 1 ...

Страница 4: ...ii ...

Страница 5: ...pyright notice as the material from which the copying is done Regarding Tradenames PRESCRIBE is a registered trademark of Kyocera Corporation KPDL is trademark of Kyocera Corporation Hewlett Packard PCL and PJL are registered trademarks of Hewlett Packard Company Centronics is a trade name of Centronics Data Computer Inc PostScript is a registered trademark of Adobe Systems Incorporated Macintosh ...

Страница 6: ...License Under this license you may use the Programs only with the device on which they are installed and transfer possession of the Programs and the device to another party If you transfer the Programs you must transfer a copy of this license and any other documentation to the other party Your license is then terminated The other party agrees to these terms and conditions by its first use of the P...

Страница 7: ...notype Imaging License Agreement 1 Software shall mean the digitally encoded machine readable scalable outline data as encoded in a special format as well as the UFST Software 2 You agree to accept a non exclusive license to use the Software to reproduce and display weights styles and versions of letters numerals characters and symbols Typefaces solely for your own customary business or personal p...

Страница 8: ... TERMS AND CONDITIONS NEITHER PARTY SHALL BE BOUND BY ANY STATEMENT OR REPRESENTATION NOT CONTAINED IN THIS AGREEMENT NO CHANGE IN THIS AGREEMENT IS EFFECTIVE UNLESS WRITTEN AND SIGNED BY PROPERLY AUTHORIZED REPRESENTATIVES OF EACH PARTY BY OPENING THIS DISKETTE PACKAGE YOU AGREE TO ACCEPT THE TERMS AND CONDITIONS OF THIS AGREEMENT Compliance and Conformity FCC Statement for users in the United St...

Страница 9: ...tted inside the printer is completely confined within protective housings and external covers the laser beam cannot escape from the printer during any phase of user operation Laser Notice This printer is certified in the U S to conform to the requirements of DHHS 21 CFR Subchapter for Class I 1 laser products and elsewhere is certified as a Class I laser product conforming to the requirements of I...

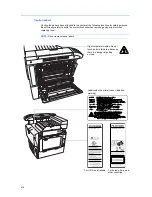
Страница 10: ...ly careful to avoid fire or electric shock when removing a paper jam or when replacing toner NOTE Do not remove these labels High temperature inside Do not touch parts in this area because there is a danger of getting burned For Europe Asia and other countries For U S A and Canada Label inside the printer Laser radiation warning ...

Страница 11: ...ufacturer Kyocera Mita Corporation Manufacturer s address 2 28 1 Chome Tamatsukuri Chuo ku Osaka 540 8585 Japan This device complies with Part 15 of the FCC Rules Operation is subject to the following two conditions 1 this device may not cause harmful interference and 2 this device must accept any interference received including interference that may cause undesired operation The manufacturer and ...

Страница 12: ...utilized plain paper dry toner etc The printer can be equipped with several enhancement optional unit as a dual paper feeder as PF 710 large capacity paper feeder as PF 750 DF 710 DF 730 as document finisher booklet unit as BF 710m mail bin as MT 710 and punch unit as PH 5A conforms to the following product specifications AS NZS 3548 1995 EN 55 022 1998 Class B AS NZS 4268 2003 IEC60950 1999 EN 60...

Страница 13: ...am is to reduce environmental pollution by encouraging the manufacture and sale of equipment that uses energy more efficiently This printer is equipped with a sleep timer function that conforms with the standards of the ENERGY STAR Program This function makes it possible to reduce the amount of electrical power consumed by the printer For maximum power savings turn off the printer s power supply w...

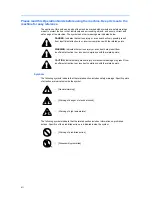
Страница 14: ... symbols indicate that the related section includes information on prohibited actions Specifics of the prohibited action are indicated inside the symbol DANGER Indicates that serious injury or even death will very possibly result from insufficient attention to or incorrect compliance with the related points WARNING Indicates that serious injury or even death may result from insufficient attention ...

Страница 15: ...anger of personal injury or damage to the machine Avoid locations with humidity or dust and dirt If dust or dirt become attached to the power plug clean the plug to avoid the danger of fire or electrical shock Avoid locations near radiators heaters or other heat sources or locations near flammable items to avoid the danger of fire To keep the machine cool and facilitate changing of parts and maint...

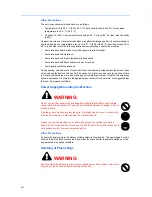
Страница 16: ...r when printing an extremely large number of copies the smell may become unpleasant To maintain the appropriate environment for print work it is suggested that the room be properly ventilated Power Supply Grounding the Machine WARNING Do not use a power supply with a voltage other than that specified Avoid multiple connections in the same outlet These types of situations present a danger of fire o...

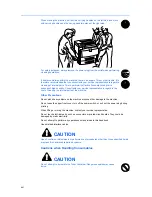
Страница 17: ...ediately be absolutely certain to remove the power plug from the outlet and then contact your service representative If anything harmful paper clips water other fluids etc falls into the machine turn the power switch off O immediately Next be absolutely certain to remove the power plug from the outlet to avoid the danger of fire or electrical shock Then contact your service representative Do not r...

Страница 18: ...cleaning the internal parts of the machine Other Precautions Do not place heavy objects on the machine or cause other damage to the machine Do not open the upper front cover turn off the power switch or pull out the power plug during printing When lifting or moving the machine contact your service representative Do not touch electrical parts such as connectors or printed circuit boards They could ...

Страница 19: ...e the contents of your stomach If necessary contact a physician If you do happen to get toner in your eyes flush them thoroughly with water If there is any remaining tenderness contact a physician If toner does happen to get on your skin wash with soap and water Do not attempt to force open or destroy the Toner Container Other Precautions After use always dispose of the Toner Container in accordan...

Страница 20: ...Printing Operation This chapter explains how to print from your PC 3 Maintenance This chapter explains how to replace the toner container and how to care for your printer 4 Troubleshooting This chapter explains how to handle printer problems that may occur such as paper jams 5 Specifications This chapter lists the printer s specifications ...

Страница 21: ... Typeface Used to emphasize button or items to be selected in dialog boxes and titles displaying in dialog boxes Click Next Note Used to provide additional or useful information about a function or feature NOTE For information about storing the pin refer to step 10 Important Used to provide important information IMPORTANT Ensure paper is not folded curled or damaged Caution Cautions are statements...

Страница 22: ...xx ...

Страница 23: ...tions Try to be familiar with the names and functions of these parts for correct use and optimal performance This chapter contains explanations on the following topics Components at the Front of the Printer 1 2 Components at the Left of the Printer 1 2 Components at the Right of the Printer 1 3 Internal Components 1 4 ...

Страница 24: ...ts at the Front of the Printer 1 Operation Panel 2 Front Cover 3 Paper Cassette 1 4 Paper Cassette 2 5 Top Tray 6 Top Cover Components at the Left of the Printer 7 Left Cover 1 8 Left Cover 2 9 Carrying Handles 6 1 2 3 4 5 7 8 9 ...

Страница 25: ...rk Interface Connector 13 USB Interface Connector 14 Option Interface Slot OPT 15 Memory Card CompactFlash Slot 16 Option Hard Disk Unit Slot HDD 17 Parallel Port Interface Connector 18 Main Power Switch 19 MP Tray multi purpose tray 20 Slider 21 MP Tray Extension 22 Hand Holes 12 10 13 14 15 16 17 19 20 20 21 11 22 18 ...

Страница 26: ...oner Container Yellow 25 Toner Container Cyan 26 Toner Container Magenta 27 Waste Toner Box 28 Toner Container Lock Lever 29 Cleaning Brush 30 Paper Width Guide 31 Paper Width Adjusting Tab 32 Paper Length Guide 33 Power Cord Connector 23 24 25 28 26 27 29 32 30 31 33 ...

Страница 27: ...2 1 2 Printing Operation This chapter contains explanations on the following topics Loading Printer Driver 2 2 Printing from Application Software 2 3 ...

Страница 28: ...TE If the Welcome to the Found New Hardware Wizard dialog box displays select Cancel 2 Insert the CD ROM supplied with the printer into the optical drive of the PC 3 The installation program launches NOTE If the installation program fails to launch use Windows Explorer to access the CD ROM and select Setup exe 4 Perform the procedures displayed on the installation program to install the KX DRIVER ...

Страница 29: ...nt The Print dialog box displays 3 Click the drop down list of printer names All the printers installed in Windows are listed Click the name of the machine 4 Use Number of copies to enter the number of prints required Up to 999 copies can be entered For Microsoft Word we recommend that you click Options and specify Use printer settings for the Default tray 5 To start printing click OK NOTE For inf...

Страница 30: ...Printing Operation 2 4 ...

Страница 31: ...3 1 3 Maintenance This chapter contains explanations on the following topics General Information 3 2 Loading Paper 3 3 Toner Container Replacement 3 8 Cleaning the Printer 3 13 ...

Страница 32: ...ation This chapter describes basic maintenance tasks you can perform on the printer You can replace the following component according to the printer s display Toner Kits Waste Toner Box Also the internal parts need periodic cleaning ...

Страница 33: ...oaded in the paper cassette 1 and 2 500 sheets A4 Letter or smaller or 250 sheets B4 Legal or larger can be loaded in the paper cassette 1 500 sheets can be loaded in the paper cassette 2 Fan the paper then tap it on a level surface to avoid media jams or skewed printing Load paper on the paper cassette following the instructions below 1 Pull out the paper cassette completely ...

Страница 34: ...d paper of A4 letter or smaller set the supplement lever of the paper length guide upright as illustrated 4 Set paper aligning with the left side of the paper cassette IMPORTANT Confirm that the paper length and paper width guides are lined up closely with paper If space is found set the guide again Otherwise it may cause paper jams Do not set folded paper Otherwise it may cause paper jams Do not ...

Страница 35: ... m 100 sheets A4 Letter or smaller or 50 sheets B4 Legal or larger can be loaded Be sure to use the MP tray to print on extra paper such as OHP film or thick paper IMPORTANT When setting special paper such as transparencies and thick paper into the MP tray select the type of paper Follow the instructions below to use the MP tray 1 Prepare the MP tray Extend the MP tray to load paper of A4R or larg...

Страница 36: ...eed the upper limit of the tray Otherwise it may cause paper jams If you set an envelope be sure to close the opening and set the printing side up Set the opening front or left and insert it along the slide until it stops Loading paper into the optional paper feeder PF 750 3000 sheets of plain paper 80 g m A4 B5 or Letter can be loaded into the optional paper feeder PF 750 Ask your service technic...

Страница 37: ...Maintenance 3 7 2 Set paper into the paper cassette NOTE Do not set folded paper Otherwise it may cause paper jams Do not exceed the upper limit of the cassette 3 Slowly set back the paper cassette ...

Страница 38: ...oubles and ensure a long printer life The toner kits are supplied in 4 different colors cyan magenta yellow and black A new toner kit for each color contains the following items Toner Container Cleaning cloth Plastic waste bags for old toner container and old waste toner box Waste toner box Installation Guide NOTE Do not remove the toner container from the carton until you are ready to install it ...

Страница 39: ...is to avoid damaging media by the magnetism of the toner You do not have to turn the printer power off before starting the replacement Any data that may be in the process of printing in the printer will be deleted if you turn the printer power off To replace the toner container first make sure of the color of the toner container requiring replacement In this example it is assumed that you are repl...

Страница 40: ...n box 8 Hold the new toner container with the toner container lock lever up and tap the upper part of the container 10 times or more Do not tilt the container 9 Hold the toner container with both hands as illustrated and shake the container strongly 10 times or more IMPORTANT Shake the container fully Otherwise an error may occur due to short supply of toner 10 Set the new toner container into the...

Страница 41: ...er lock lever to the original position Replace other color toner containers in the same way 13 Press the release lever of the waste toner box B and then pull out the waste toner box slowly NOTE Do not place the used waste toner box upside down 14 Place the cap on the used waste toner box as illustrated 15 Insert the used waste toner box into the plastic bag provided for waste toner boxes B ...

Страница 42: ...e 3 12 16 Open the cap of the new waste toner box 17 Set the new waste toner box in the printer 18 Close the front cover When replacing is finished clean the printer referring to Cleaning the Printer on page 3 13 ...

Страница 43: ...he toner container or the waste toner box is replaced to maintain the best printing quality 1 Open the front cover 2 Remove the cleaning brush 3 Open the left cover 1 4 Open the duplex unit A1 5 Move the brush left and right along the separator as illustrated to clean the separator ...

Страница 44: ...Maintenance 3 14 6 Close the duplex unit A1 and the left cover 1 IMPORTANT Push the indicated position to close left cover 1 securely 7 Replace the clean brush and close the front cover ...

Страница 45: ...ng This chapter contains explanations on the following topics General Guidelines 4 2 Print Quality Problems 4 3 Error Messages 4 6 Clearing Paper Jams 4 11 If a problem cannot be corrected contact your service technician ...

Страница 46: ...r using Windows 98 via the parallel port rename device driver file drvwppqt vxd This file may be located in Windows System Iosubsys or Arcada System folder For technical details visit Microsoft web site for the device driver Symptom Check Items Corrective Action Print quality is not good Refer to Print Quality Problems on page 4 3 Paper is jammed Refer to Clearing Paper Jams on page 4 11 Nothing l...

Страница 47: ...ing system 1 Press Menu and then press S or T to display Others 2 Press X and then press S or T to display Service 3 Press X and then press S or T to display Drum And then press OK twice 4 The message display shows Please wait and then the drum starts turning and stops after approx 100 seconds The printer reverts to Ready Clean the separator Open the printer left cover 1 and clean the separator wi...

Страница 48: ...or about 5 minutes The printer reverts to Ready when cleaning is finished Gray background Refresh drum Refer to the following procedures on the operation panel and try cleaning the drum surface using the printer s built in cleaning system 1 Press Menu and then press S or T to display Others 2 Press X and then press S or T to display Service 3 Press X and then press S or T to display Drum And then ...

Страница 49: ...ition Check the file or program Check whether the problem is being caused by a PRESCRIBE command error If the problem occurs only with a specific file or program the most likely cause is an error in a parameter to a command or command syntax Color on the data and actual printout are different Perform color calibration Perform color calibration either by switching the printer off then on or using t...

Страница 50: ...d The total number of pages printed is also indicated e g 0123456 The corresponding paper cassette is not installed Install the cassette The cassette number can be 1 topmost to 4 bottom The punch unit chad box of the option document finisher is full Discard the chads The punch unit waste box of the document finisher is full or is not installed correctly Check if the box is properly installed and t...

Страница 51: ...inserted in the printer is not formatted and therefore cannot be read or written A hard disk error has occurred Look at the error code given in place of and refer to Storage Error Codes on page 4 10 To ignore the hard disk error press GO This message is displayed when you attempt to use the printer s operation panel to change the environmental settings on the interface from which data are presentl...

Страница 52: ...lbox tray is full When removing the paper printing will be resumed indicates the tray number The memory card is accidentally removed from the printer s memory card slot during reading If you continue reading the memory card insert the same memory card into the slot again The printer again reads it from the beginning of the data Also refer to Insert the same Memory card on page 4 7 The total amount...

Страница 53: ...ck The top tray has become full approx 500 pages You must remove all printed pages from the top tray When the printer detects that the top tray is empty again the printer will continue printing into the top tray This message is displayed if the installed toner container is determined not to be an original Kyocera Mita toner container by the self diagnostic performed after the power is switched on ...

Страница 54: ...as does not exist Set the alias again 97 The number of permanent code jobs that can be stored reached the limit value and no more can be saved Either delete some unnecessary jobs etc or increase the limit 98 An unreadable page was found in a job The job is damaged 99 A print job for the specified ID does not exist in the hard disk Code Meaning 01 The printer does not support the memory card insert...

Страница 55: ...an occur in more than one component on the paper paths Paper jam message Paper jam location Description Reference page A Paper is jammed at the upper cassette or inside the printer 4 13 B Paper is jammed at the lower cassette or inside the printer 4 14 C Paper is jammed at an optional paper feeder cassette PF 710 upper cassette PF 750 4 15 D Paper is jammed at an optional paper feeder cassette PF ...

Страница 56: ...e paper jam Utilizing Online Help Messages Online help messages are available in the printer s message display to provide simple instructions for clearing jams Press when the paper jam message has appeared Then a help message will appear to facilitate jam clearing in the location H Paper is jammed in a left cover section 4 21 I Paper is jammed in the left cover section of an option unit PF 710 PF ...

Страница 57: ...er Cassette Paper Cassette 1 Remove the paper if a paper jam occurred in the paper cassette 1 Follow the instructions below 1 Open the left cover 1 2 Remove the jammed paper 3 Open the duplex unit A1 4 Remove the jammed paper ...

Страница 58: ...paper cassette 1 8 Close the duplex unit A1 and the left cover 1 IMPORTANT Push the indicated position to close left cover 1 securely Paper Cassette 2 Remove the paper if a paper jam occurred in paper cassette 2 Follow the instructions below 1 Open the left cover 2 2 Remove the jammed paper ...

Страница 59: ... jammed paper 5 Slowly close paper cassette 2 6 Close the left cover 2 Paper Cassette 3 or 4 option Remove the paper if a paper jam occurred in the optional paper feeder PF 710 PF 750 Follow the instructions below 1 Open the left cover 3 2 Remove the jammed paper ...

Страница 60: ...being used 4 Remove the jammed paper 5 Slowly close the paper cassette 6 Close the left cover 3 MP Tray Remove the paper if a paper jam occurred in the MP tray or feed unit Follow the instructions below 1 Open the left cover 1 2 Remove the jammed paper ...

Страница 61: ...Troubleshooting 4 17 3 Open the duplex unit A1 4 Remove the jammed paper 5 Open the feed guide B1 6 Remove the jammed paper 7 Remove all the paper set in the MP tray B1 ...

Страница 62: ...e B2 counterclockwise 10 times or more The jammed paper will be moved to the inside of the left cover 10 Remove the jammed paper If paper cannot be removed perform the steps described below 11 Pull out the feed unit B3 12 Open the cover B4 and remove the jammed paper ...

Страница 63: ...er cassette 1 and feed unit B3 17 Close the feed guide B1 the duplex unit A1 and the left cover 1 IMPORTANT Push the indicated position to close left cover 1 securely 18 Replace the paper in the MP tray Left Cover 1 Remove the paper if a paper jam occurred inside the left cover 1 Follow the instructions below WARNING The printer s fixing unit is extremely hot Take sufficient care when working in t...

Страница 64: ...Troubleshooting 4 20 1 Open the left cover 1 2 Remove the jammed paper 3 Open the duplex unit A1 4 Remove the jammed paper 5 Open the fixing unit cover A2 ...

Страница 65: ...x unit A1 and the left cover 1 IMPORTANT Push the indicated position to close left cover 1 securely Left Cover 2 Remove the paper if a paper jam occurred inside the left cover 2 or 3 Follow the instructions below 1 Open the left cover 2 or 3 2 Remove the jammed paper 3 Close the left cover ...

Страница 66: ... Cover Remove the paper if a paper jam occurred inside the top cover Follow the instructions below 1 If you can see jammed paper from the exit pull it out 2 Open the top cover and remove the jammed paper 3 Close the top cover ...

Страница 67: ...edger Legal 7 ppm Monochrome A4 Letter 15 ppm B5 16 ppm A5 R 10 ppm A3 B4 Ledger Legal 8 ppm Paper Weight Cassette 60 105 g m2 MP Tray 60 220 g m2 Paper Size Cassette A3 B4 A4 B5 A5 Folio Ledger Legal Letter Oficio II Statement MP Tray A3 B4 A4 B5 A5 B6 A6 Folio Ledger Legal Letter Oficio II Statement Executive ISO B5 Env Monarch Envelope 10 Envelope 9 Envelope 6 Envelope DL Envelope C4 Envelope C...

Страница 68: ...indows NT4 0 Apple Macintosh OS 9 Apple Macintosh OS X Controller PowerPC750GL 800MHz Memory Standard 256 MB Maximum 1024 MB 512 MB x 2 Interface Standard USB Hi Speed USB Parallel IEEE1284 Network 10BASE T 100BASE TX KUIO LV slot Option IB 11 Serial IB 21E 10BASE T 100BASE TX Operation Environment Temperature 10 32 5 C 50 90 5 F Relative Humidity 15 80 RH Altitude 2 000 m 6547 feet maximum Illumi...

Страница 69: ...A1 ...

Страница 70: ......

Страница 71: ......

Страница 72: ...Rev 1 1 2007 2 302HP56011 ...

Отзывы: