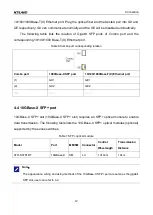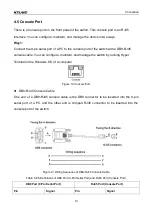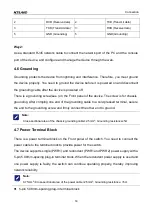
Connection
15
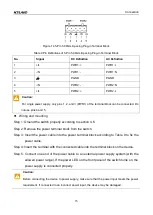
Figure 14 5-Pin 5.08mm-Spacing Plug-in Terminal Block
Table 9 Pin Definitions of 5-Pin 5.08mm-Spacing Plug-in Terminal Block
No.
Signal
DC Definition
AC Definition
1
+/L
PWR1: +
PWR1: L
2
-/N
PWR1: -
PWR1: N
3
PGND
PGND
4
-/N
PWR2: -
PWR2: N
5
+/L
PWR2: +
PWR2: L
Caution:
For single power supply, only pins 1, 2, and 3 (PWR1) of the terminal block can be connected. Do
not use pins 4 and 5.
Wiring and mounting
Step 1: Ground the switch properly according to section 4.6.
Step 2: Remove the power terminal block from the switch.
Step 3: Insert the power cable into the power terminal block according to Table 9 to fix the
power cable.
Step 4: Insert the terminal with the connected cable into the terminal block on the device.
Step 5: Connect one end of the power cable to an external power supply system (with the
allowed power range). If the power LED on the front panel of the switch turns on, the
power supply is connected properly.
Caution:
Before connecting the device to power supply, make sure that the power input meets the power
requirement. If connected to an incorrect power input, the device may be damaged.


