


18 |
MIG/MAG
- Setting PRE-GAS function
(gas pre-flow)
the function serves to provide a protective atmosphere
before the arc is ignited. pressing the control button on
the torch activates the function that is active for the set
time. after the set time has elapsed, the welding arc
ignites. the value is preset from factory, it is not adjus
-
table.
MIG/MAG
- Setting SOFT START function
(approach speed / inlet of wire)
the function is used to start the welding process smo
-
othly and eliminates the initial spatter of metal when
the arc is ignited. the value is preset from factory, it is
not adjustable.
MIG/MAG
- Setting bURN bACK function
Function to prevent the wire from sticking to the weld.
When welding is complete, the wire feeder stops but
the arc is still burning for some time. the value is preset
from factory, it is not adjustable.
MIG/MAG
- Setting POST-GAS function
this function ensures the protection of the weld after
the welding process. the value is preset from factory,
it is not adjustable.
Welding in method TIG
Welding inverters allow tiG welding with touch-tri
-
ggering. the tiG method is very effective for welding
stainless steel.
1. connect the welding accessories. Welding torch on
the pole (-), grounding cable on the pole (+), connect
the protective gas.
2. turn the inverter on by the main switch.
Switch the
machine to TIG mode.
set the welding parameters
according to the above procedure.
3. press the button on the burner.
4. release the button on the burner to end the welding
process.
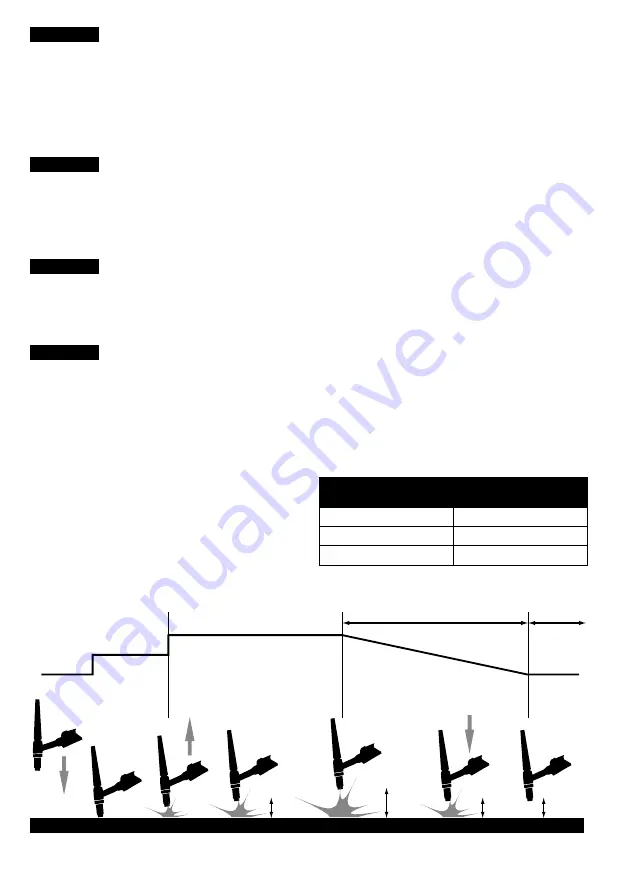
Welding process at TIG LA
(picture 1)
starting the gas with a valve on the welding torch.
1. approaching the tungsten electrode to the welded
material.
2. light touch of tungsten electrode of welded material
(no need to cut).
3. removal of tungsten electrode and arcing of welding
arc with la - very low wear tungsten electrodes by
touch.
4. Welding process.
5. Finishing the welding process and activating the
doWN slope - crater filling (if equipped in the ma
-
chine) is performed by removing tungsten-electro
-
des to about 8 - 10 mm from the welded material.
6. re-approach - welding current decreases after the
set time to the end value set current (eg 10 a) - filling
the crater.
7. end of the welding process. the digital control auto
-
matically switches off the welding process.
switch off the gas with a valve on the welding torch.
Selection and preparation of tungsten electrodes:
table 1 shows the welding current and diameter va
-
lues for tungsten electrodes with 2 % thoria - red
electrode markings.
table 1
Diameter of the electrode
(mm)
Welding current
(A)
1.0
15 - 75
1.6
60 - 150
2.4
130 - 240
1
2
3
4
5
6
7
1-3 mm
1-3 mm
1-3 mm
8-10 mm
0 - 5 s
POST GAS
I
0
ON
IW
I
START
I
END
picture 1 - welding process at tiG la
en


