KTS-Electronic GmbH & Co. KG - GPA 3000
12
3.3 KTS GPA 3D- Software
3.3.1 Search with KTS GPA 3D
3.3
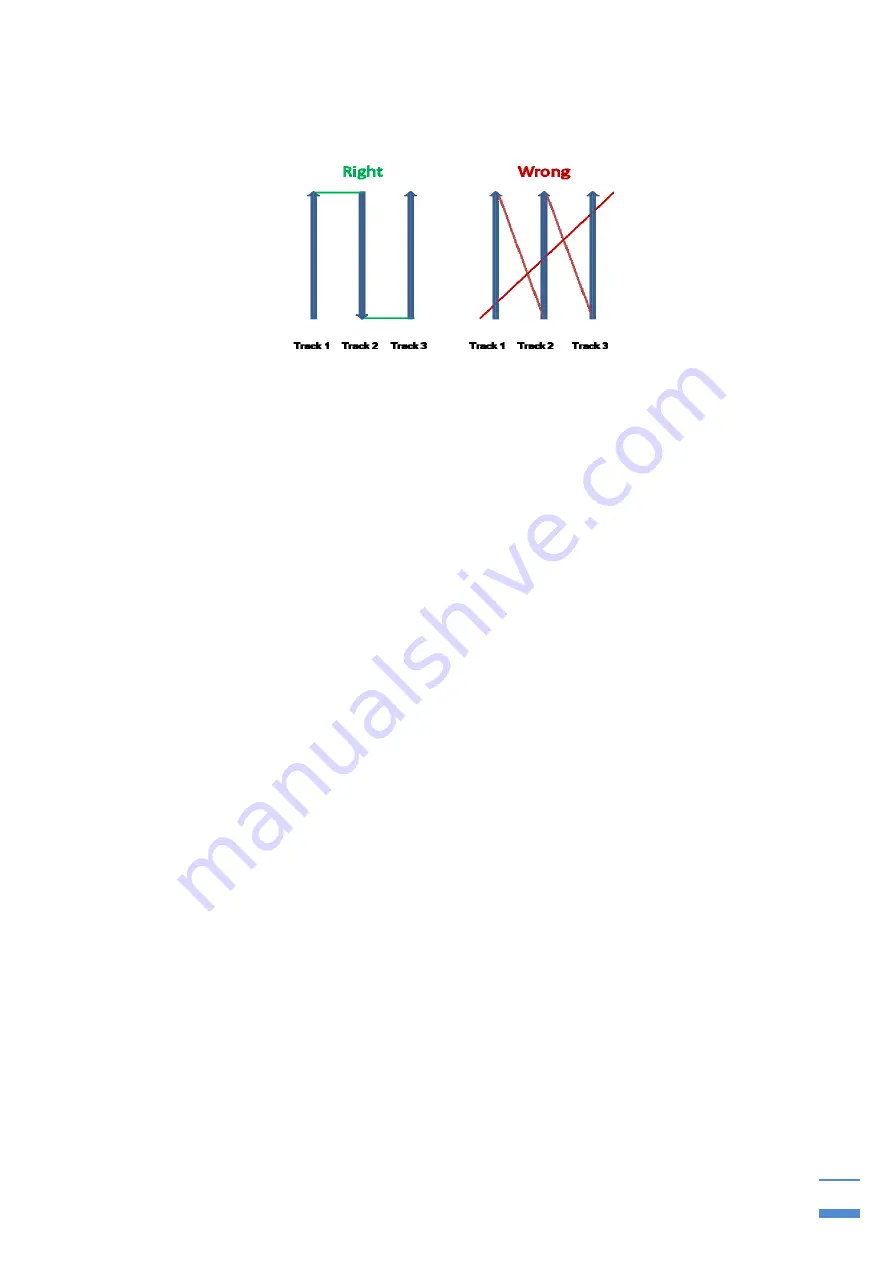
- Walking direction for 3D evaluation
Before starting the measurement the area should be divided in equal lanes
Select “MEASURE” in the menu on the right hand side of the screen.
Tap on the “START”-button which will appear on the lower part of the screen
and immediately start walking with the universal probe like shown in the figure
above.
During the measuring process the values will appear in different colors on the
screen.
After each lane the measurement will stop automatically. Tap on “START” to
continue. (The number of lanes is selectable. See 5.3.3).
The frequency of the measurements is adjustable. The options “SLOW”,
“NORMAL” and “FAST” appear on the lower hand of the screen.(Selecting
“SLOW” results in a bigger area but lower resolution and vice versa).
For higher accuracy you should walk in a steady pace.
Lane lengths of 5 to 10m are advantageous.
You can pause a measurement anytime with the “STOP”-button. (Continue with
the “START”- button.).
After the measurement is completed the image gets rendered.
The measurement can be saved with the “SAVE”-button. Time and date will be
added automatically after you named the image.
The measurement can be deleted with the “RESET”- button.
Hint: The Bluetooth pairing has failed if there is no “START”- button on the lower part
of the screen . (see 4.2)


