9
Working LED light
The working LED light
6
can be used in poor lighting conditions to illuminate the work area. The
working LED light will light up as soon as you press the ON / OFF switch
1
.
Left / right motion direction
The rotation direction can be changed using the left / right rotation switch
3
.
To change the direction of rotation, stop the machine and turn the left / right rotation
switch
3
in the desired direction.
T
he central position of the left / right rotation switch
3
locks the ON / OFF switch
1
.
B
efore beginning to work, check that the left / right rotation switch is in the desired
position in order to avoid potential damage to the tool or to the battery powered drill.
Inserting and removing a bit
Insert the bit into the chuck for accessories
4
(fig 1). After installation, try pulling the component
slightly by hand to make sure it is locked in place.If it is not insured, repeat the above procedure.
T
o remove the bit, pull it by hand.
Angle setting
The tool can be locked into two different angle settings. To do so, press the locking button
2
and
move the screwdriver into the desired position (press the release button and turn the handle to
the right). Then release the locking button
2
(fig 2).
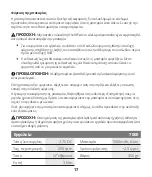
WARNING:
Never change the direction of rotation when the chuck is rotating. Wait until it
has stopped.
WARNING:
Switch the tool off and set the left / right control to the locked centre position when
installing or removing bits to prevent accidental starting.
Correct and regular cleaning will improve the safety and extend the lifespan of the device.
For safe and proper working, always keep the tool and ventilation slots clean.
Τhe tool may be cleaned most effectively with compressed dry air or with a soft cloth moistened with
soapy water.
Always wear safety goggles when cleaning tools with compressed air.
Certain cleaning agents and solvents damage plastic parts.
Some of these are: gasoline, carbon tetra
-
5. Maintenance
CAUTION:
Before you switch on the screwdriver, make sure that it is correctly locked in the
desired angle position.
Содержание 7000
Страница 2: ...2 4 2 Handle Λαβή fig 1 fig 2 Bit Εξάρτημα ...
Страница 3: ...3 PH0P H1 PH2 PZ1 PZ2 T15 T20 5H 4H 1 4 4 5 1 6 2 3 7 ...
Страница 22: ...22 7000 www krausmann gr ...


