background image

Operating Your SDI Video Matrix Switcher 


19 


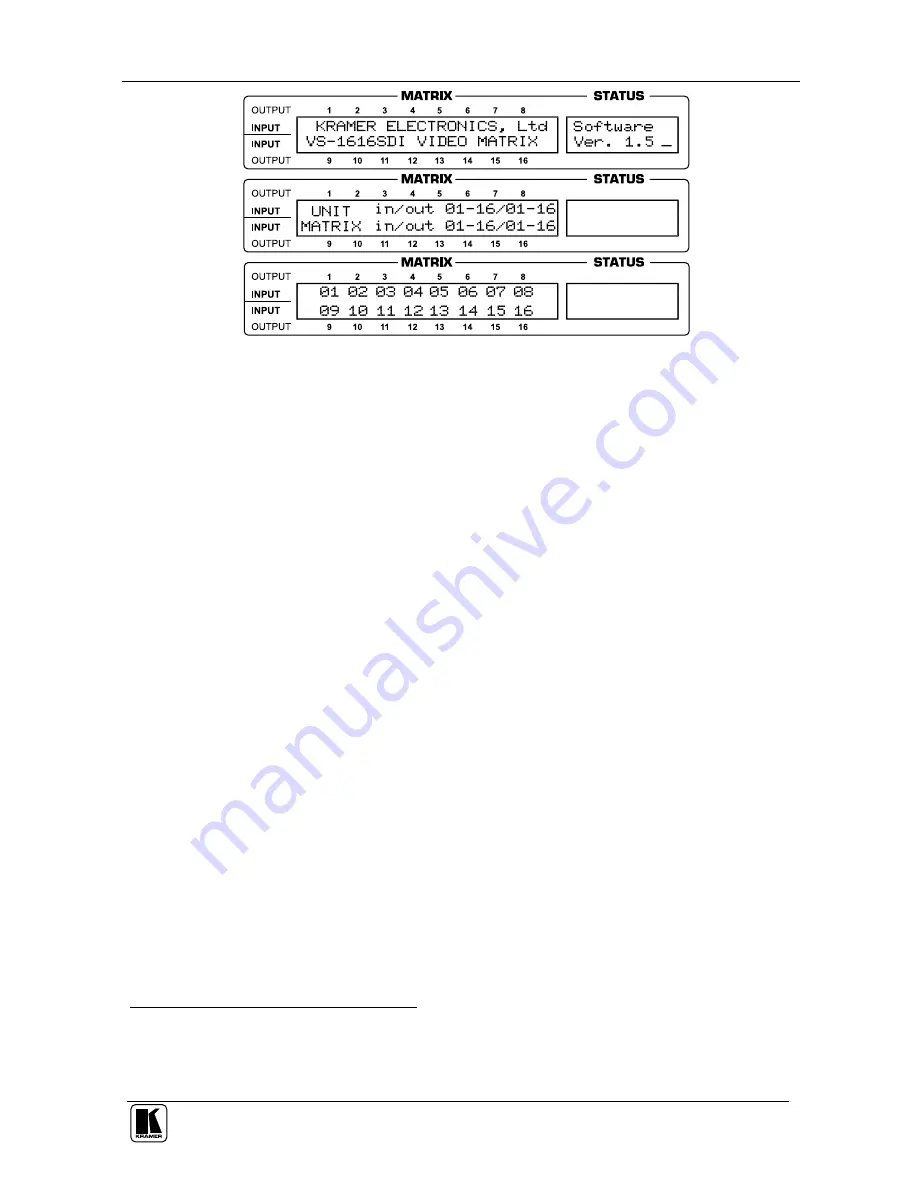
Figure 12: Default Startup Status Display Sequence 

7.2  Using the Front Panel Buttons 

You can switch (see section 7.2.2) and clear (see section 7.2.3): 


One input to one output 


Several inputs to several outputs 


One input to all outputs 

7.2.1  Confirming the Settings 

Choose to work in the 

AT ONCE

 mode or the 

CONFIRM

 mode: 

In the 

AT ONCE

 (default

1

) mode: 


Actions require no user confirmation 


Execution is immediate 


No protection is offered against changing an action in error 

In the 

CONFIRM

 mode

2


You have an optional method to help avoid making a mistake 


Every action requires user confirmation 


Execution is delayed

3

 until the user confirms the action 


Protection is offered to prevent erroneous switching 


You can key-in several actions and then confirm them by pressing 

the TAKE button once, to simultaneously switch several monitors 


1 For all actions except storing/recalling setups 
2 The CONFIRM mode is the default for storing/recalling setups (see section 8.5) 
3 Failure to press the TAKE button within about 30 seconds (the Timeout) will abort the action 

Содержание VS-1616SDI

Страница 1: ...Kramer Electronics Ltd USER MANUAL Model VS 1616SDI 16x16 SDI Video Matrix Switcher ...

Страница 2: ...modem Adapter 14 6 4 1 5 Connecting to a DB25 COM Port 14 6 4 2 Connecting the RS 485 Control Interface 15 6 5 Configuring the Sync 17 6 6 Connecting the Keyboard Extension 17 7 Operating Your SDI Video Matrix Switcher 18 7 1 Using the Startup Display 18 7 2 Using the Front Panel Buttons 19 7 2 1 Confirming the Settings 19 7 2 1 1 Toggling Between the AT ONCE and CONFIRM Modes 20 7 2 2 Switching O...

Страница 3: ... 6 Choosing What to INDICATE 35 8 7 Choosing the COMMUNICATION Setting 36 8 8 Setting the IR REMOTE Control 37 8 9 Choosing the AUTO STORE Current SETUP 38 8 10 Identifying the MACHINE 38 8 11 Choosing the Initial RESET 39 9 Upgrading Flash Memory 40 9 1 Connecting the PC to the RS 232 Port 40 9 2 Upgrading the Firmware 41 10 Technical Specifications 43 11 Hex Codes 43 12 ASCII Protocol General 45...

Страница 4: ...tension EXT KEYS Connector 18 Figure 12 Default Startup Status Display Sequence 19 Figure 13 Sequence of MENU Commands 28 Figure 14 Choosing the MTX SYNC from Matrix Setting 33 Figure 15 Choosing what to INDICATE 35 Figure 16 Machine Identification 39 Tables Table 1 Quick Reference Operating Guide for a Single Machine 3 Table 2 Front Panel VS 1616SDI 16x16 SDI Video Matrix Switcher Features 5 Tabl...

Страница 5: ...Kramer control software Null modem adapter This user manual2 2 Getting Started We recommend that you Unpack the equipment carefully and save the original box and packaging materials for possible future shipment Review the contents of this user manual Use Kramer high performance high resolution cables3 3 Overview The Kramer VS 1616SDI is an adjustment free high performance 16x16 vertical interval m...

Страница 6: ... source for its vertical trigger Alternately input 1 can be assigned as the sync source In addition the VS 1616SDI Can be configured into a Kramer multi signal switcher system including digital and analog video digital and analog audio and RS 422 control switchers When integrated in a system all units switch in true audio follow video mode Recalls up to 99 configuration setups via the non volatile...

Страница 7: ...ure 1 see section 6 3 for further details To operate a single machine see Table 1 Figure 1 Default Dipswitch Setup on a Single Machine Table 1 Quick Reference Operating Guide for a Single Machine To perform this command Press Connect an input with an output OUT IN Clear disconnect a specific output OUT OFF Clear disconnect all outputs ALL OFF Connect all outputs to a specific input ALL IN Store a ...

Страница 8: ...KRAMER SIMPLE CREATIVE TECHNOLOGY Your SDI Video Matrix Switcher 4 Figure 2 VS 1616SDI 16x16 SDI Video Matrix Switcher ...

Страница 9: ...ete setup and switching Table 3 Rear Panel VS 1616SDI 16x16 SDI Video Matrix Switcher Features Feature Function 14 DIGITAL Space for optional digital Genlock input board with BNC Connector 15 EXT SYNC BNC Connector Connects to the external sync source 16 ANALOG BNC Connector Connects to the analog Genlock source 17 75 Analog Genlock Button Press to terminate at 75 or release for looping 2 18 EXT e...

Страница 10: ...semble the following kinds of systems A stand alone switcher see section 6 1 A system of interconnected switchers see section 6 2 6 1 Configuring a Standalone SDI Video Matrix Switcher By default a single VS 1616SDI unit is configured as a 16x16 stand alone switcher for SDI video with 16 inputs and 16 outputs as Figure 3 illustrates Figure 3 Configuring a Stand Alone 16x16 VS 1616SDI Switcher 1 Sw...

Страница 11: ... VS 162V a 16x16 video matrix switcher and VS 162AV a 16x16 audio video matrix switcher The block diagram in Figure 4 illustrates how to assemble an interconnected varied format 16x16 series switcher that consists of a 32x32 composite video matrix switcher a 16x16 digital video matrix switcher a 32x32 balanced stereo audio matrix switcher and a 16x16 digital audio matrix switcher Note that each gr...

Страница 12: ...Switchers Refer to section 6 3 for details of how to set the dipswitches and to section 6 4 for details of how to control this group of interconnected varied format 16x16 series switchers and other configurations 6 3 Setting the Dipswitches Configure the VS 1616SDI by setting the 8 dipswitches as Figure 5 and Table 4 define ...

Страница 13: ... a null modem adapter 8 RS 485 termination for first and last machine ON RS 485 line terminates with 110 for others OFF RS 485 line is open 6 3 1 Setting the MACHINE To control a unit via RS 232 or RS 485 each unit has to be identified via its unique MACHINE Set the MACHINE 2 on a VS 1616SDI unit according to Table 5 A valid MACHINE is from 1 to 15 Table 5 Machine Dipswitch Settings DIPSWITCH MACH...

Страница 14: ...municates with other switchers via a common control line You can set DIP 5 OFF to disable the Follow SYSTEM mode in stand alone switcher applications3 You must set DIP 5 ON to enable the Follow SYSTEM mode in an interconnected varied format switcher application4 Refer to section 8 2 for a description of the MENU s Follow SYSTEM and Breakaway from SYSTEM modes 6 3 3 Understanding the SLAVE Mode The...

Страница 15: ...r or a PC The control interface must be identical on each switcher in the series of 16x16 matrix switchers either RS 232 or RS 485 One control interface suffices Do not use both RS 232 and RS 485 control interfaces in the same configuration For example in an interconnected varied format 16x16 switcher application2 if the switcher that connects to the PC connects via the RS 232 control interface ea...

Страница 16: ...12 The RS 232 daisy chain switcher arrangement is transparent This lets you arrange the switchers from the series of 16x16 matrix switchers according to your requirements and not according to a fixed sequence dependent on the MACHINE Figure 6 Connecting a PC to Four Switchers ...

Страница 17: ...16SDI unit and the Null modem adapter that attaches to the RS 232 IN DB9 port on the other 16x16 matrix switcher 2 On the other 16x16 matrix switcher set DIP 7 OFF enabling Null modem adapter use 6 4 1 2 Connecting without a Null modem Adapter To connect a VS 1616SDI unit with any matrix switcher that forms part of the series of 16x16 matrix switchers without using a Null modem adapter 1 Connect a...

Страница 18: ...unit 2 Set DIP 7 ON disabling Null modem adapter use2 on the VS 1616SDI unit 6 4 1 5 Connecting to a DB25 COM Port To connect the PC s DB25 COM port to a VS 1616SDI unit 1 Connect the PC s DB25 COM port to the RS 232 IN DB9 port on the VS 1616SDI unit as Figure 7 illustrates Female DB25 From PC PIN 20 connected to PIN 6 Connect PINS 4 5 and 8 together Figure 7 Connecting a PC with a 25 pin connect...

Страница 19: ...es of 16x16 matrix switchers as Figure 9 illustrates 1 Connect the PIN on the VS 1616SDI unit to the PIN on the other 16x16 matrix switcher unit 2 Connect the PIN on the VS 1616SDI unit to the PIN on other 16x16 matrix switcher unit 3 If shielded cable is used for an RS 485 connection connect the shield to the Ground PIN For details about how to configure the vertical sync if required refer to sec...

Страница 20: ... Interface Converter connect the PC s DB 9 COM port to the RS 232 in DB9F port on the VP 43xl Next connect the RS 485 port on the VP 43xl to the RS 485 ports on the switchers by connecting the A terminal of the VP 43xl to the terminals of the switchers and B to terminals Figure 10 An RS 485 Control Interface Setup ...

Страница 21: ... block connectors In this case set the first machine to select the sync source from the external sync connector or from the INPUT 1 connector This sync is now available to the other machines via the RS 485 terminal block connector as Figure 8 and Figure 9 illustrate Select the MTX sync on the other machines that receive that sync 6 6 Connecting the Keyboard Extension Connecting dry contact closure...

Страница 22: ...smitted by a touch screen system PC1 or other serial controller The Kramer RC IR2 Infra Red Remote Control Transmitter Dry contact closure switches connected to the Keyboard Extension 7 1 Using the Startup Display After switching on the power the MATRIX and STATUS2 displays show the following screens in sequence 1 For instructions on using Kramer Windows Control Software refer to the separate user...

Страница 23: ...ate No protection is offered against changing an action in error In the CONFIRM mode2 You have an optional method to help avoid making a mistake Every action requires user confirmation Execution is delayed3 until the user confirms the action Protection is offered to prevent erroneous switching You can key in several actions and then confirm them by pressing the TAKE button once to simultaneously s...

Страница 24: ... Several inputs to several outputs see section 7 2 2 2 One input to all outputs see section 7 2 2 3 7 2 2 1 Switching One Input to One Output Pressing an OUT IN combination when your VS 1616SDI operates in the AT ONCE mode implements the switch immediately To switch one input to one output AT ONCE mode 1 Press the appropriate OUT button The MATRIX Display shows the 2 blinking digits representing t...

Страница 25: ... ONCE mode you need to execute each OUT IN combination separately see section 7 2 2 1 When switching many inputs to many outputs it is recommended to toggle to the CONFIRM mode In the CONFIRM mode you can key in several actions and then confirm them by pressing the TAKE button once simultaneously switching several inputs to several outputs To switch several inputs to several outputs in the CONFIRM...

Страница 26: ... outputs as the MATRIX Display shows no digits blink and the TAKE LED lights 7 2 2 3 Switching One Input to All Outputs To switch one input to all the outputs in the AT ONCE mode 1 Press the ALL button The MATRIX Display shows all the sets of 2 blinking digits each representing the present input number for that respective output blinking simultaneously The STATUS Display shows the message all OUTs...

Страница 27: ...x is the output number 2 Press the OFF button3 The input is cleared and the MATRIX Display does not show any Input in its place The STATUS Display momentarily shows the message out x reset Where x is the output number To clear an output in the CONFIRM mode the TAKE LED is lit 1 Repeat step 1 above 2 Press the OFF button3 The MATRIX Display shows the 2 blinking digits 00 instead of the previous 2 b...

Страница 28: ...he output number 2 Press the OFF button The output is cleared and the MATRIX Display does not show any Input in its place The STATUS Display momentarily shows the message out x reset Where x is the output number To clear several outputs in the CONFIRM mode the TAKE LED is lit 1 Repeat step 1 above 2 Press the OFF button The MATRIX Display shows the 2 blinking digits 00 instead of the previous 2 bl...

Страница 29: ...hat respective output blinking simultaneously The STATUS Display shows the message all OUTs 2 Press the OFF button1 All the outputs are cleared and the MATRIX Display momentarily shows the message Reset ALL connections To switch one input to all the outputs in the CONFIRM mode the TAKE LED is lit 1 Repeat step 1 above 2 Press the OFF button 1 The TAKE LED blinks and the MATRIX Display shows the me...

Страница 30: ...Store xy 3 Press the TAKE button The memory stores the setup and the MATRIX Display shows the message Setup xy stored Note saving a setup to an already allocated setup prompts the message in the MATRIX Display Setup already exists Press TAKE to overwrite Pressing the TAKE button replaces the stored setup with the current setup Alternatively press a different OUT button to change the setup 7 2 4 2R...

Страница 31: ...an the other setups by pressing different OUT buttons To stop previewing the setups press a non relevant button for example an IN button 4 Press the TAKE button The specific setup is implemented If trying to recall an empty setup2 the MATRIX Display would show a message saying that that particular setup is empty and would return you to step 1 above 8 Using the MENU Command Sequence You can press t...

Страница 32: ...ont panel yes TAKE next MENU Follow the SYSTEM yes TAKE next MENU SWITCHING METHOD setting yes TAKE next MENU extended KEYBOARD setting yes TAKE next MENU STORE RECALL setting yes TAKE next MENU what to INDICATE yes TAKE next MENU COMMUNICATION setting yes TAKE next MENU IR REMOTE setting yes TAKE next MENU AUTO store current SETUP yes TAKE next MENU identify MACHINE yes TAKE next MENU initial RES...

Страница 33: ...but remote RS 232 and RS 485 commands function and show on the MATRIX Display To unlock the VS 1616SDI Either 1 Press the MENU button The MATRIX Display shows the message to UNLOCK front panel press TAKE The TAKE LED blinks 2 Press the TAKE button The front panel unlocks5 and the MATRIX Display momentarily2 shows the message Front panel UNLOCKED Or 1 Nevertheless even though the front panel is loc...

Страница 34: ... action independently of the others The VS 1616SDI unit will function5 in the Follow SYSTEM mode if at least one other VS 1616SDI unit6 is set to the Follow SYSTEM mode and these units interconnect via an RS 232 and or RS 485 communication line To set the VS 1616SDI unit to function in the Follow SYSTEM mode 1 Press the MENU button twice The MATRIX Display shows the message Follow the SYSTEM yes T...

Страница 35: ...mplements all the changes to the same state as the rest of the system placing the switcher in the Follow SYSTEM mode To set the VS 1616SDI unit to function in the Breakaway from SYSTEM mode 1 Press the MENU button twice The MATRIX Display shows the message FOLLOW the system yes TAKE next MENU 2 Press the TAKE button The Displays show the messages BREAKAWAY from system Press TAKE to execute current...

Страница 36: ...al connected to Input 1 Before choosing the EXTERNAL SYNC DIGITAL or the INT 1 DIGITAL SWITCHING METHOD setting it is necessary to install a digital Genlock input board2 Without installing the optional digital Genlock input board these SWITCHING METHOD setting commands will be unavailable Setting the VS 1616SDI unit as a Large Matrix instead of as a Stand Alone UNIT provides a choice of 5 SWITCHIN...

Страница 37: ...4 Choosing the MTX SYNC from Matrix Setting 8 3 2 Configuring a SWITCHING METHOD To choose a SWITCHING METHOD setting do the following 1 Press the MENU button until you reach the SWITCHING METHOD setting The MATRIX Display shows the message SWITCHING METHOD setting yes TAKE next MENU 2 Press the TAKE button The Displays show the messages Use OUTkey to configure 1 noVIS 2 EXT 3 INT 1 4 MTX Current ...

Страница 38: ...etting the extended Keyboard setting ON or OFF To set the extended KEYBOARD mode do the following 1 Press the MENU button until reaching the extended Keyboard setting The MATRIX Display shows the message extended KEYBOARD setting yes TAKE next MENU 2 Press the TAKE button The Displays show the messages Outkey 1 External keys OFF 2 External keys ON current X key ON1 3 Press the OUT button 1 to deac...

Страница 39: ... the CONFIRM default mode do the following 1 Press the MENU button until reaching the STORE RECALL setting The MATRIX Display shows the message STORE RECALL setting yes TAKE next MENU 2 Press the TAKE button and choose the appropriate Outkey 1 for the AT ONCE mode Outkey 2 is for the CONFIRM mode The Displays show the messages STO RCL mode changed current At once 8 6 Choosing What to INDICATE Choo...

Страница 40: ...TAKE to execute Current OUTs INs 4 Press the TAKE button The Displays show the messages display mode changed Current SETUP 8 7 Choosing the COMMUNICATION Setting Choose the response option reply or no reply To choose the No Reply response option for example do the following 1 Press the MENU button until you reach the COMMUNICATION setting The MATRIX Display shows the message COMMUNICATION setting ...

Страница 41: ...o the following 1 Press the MENU button until reaching the IR REMOTE setting The MATRIX Display shows the message IR REMOTE setting yes TAKE next MENU 2 Press the TAKE button The Displays show the messages Outkey 1 InfraredREMOTE OFF 2 InfraredREMOTE ON current remote OFF 3 Press the OUT button 2 The TAKE LED blinks and the Displays show the messages Turn ON infrared REMOTE Press TAKE to execute C...

Страница 42: ...g 1 Press the MENU button until you reach the AUTO Store Current SETUP command The MATRIX Display shows the message AUTO store current SETUP yes TAKE next MENU 2 Press the TAKE button The Displays show the messages OUTkey 1 no AutoSave 2 AutoSave CURRENT setup current NO save 3 Press the OUT button 2 The TAKE LED blinks and the Displays show the messages Auto store CURRENT setup Press TAKE to exec...

Страница 43: ...e do the following 1 Press the MENU button until you reach the initial RESET command The MATRIX Display shows the message initial RESET yes TAKE next MENU 2 Press the TAKE button The MATRIX Display shows the message Outkey 1 Current status 2 Factory default 3 Press the OUT button 2 for example to reset to the factory default The TAKE LED blinks and the Displays show the messages Reset to factory d...

Страница 44: ... in the STATUS display as Figure 12 illustrates in section 7 1 9 1 Connecting the PC to the RS 232 Port Before installing the latest Kramer firmware version on a VS 1616SDI unit connect The COM port on your PC to the RS 232 IN port on the VS 1616SDI unit When upgrading the firmware on several VS 1616SDI units at once Connect the COM port on your PC to the RS 232 IN port on the first VS 1616SDI uni...

Страница 45: ...wing message Please release key TAKE 6 Release the TAKE button The TAKE LED blinks and the MATRIX Display shows the following message Update program Please confirm TAKE 7 Press the TAKE button The MATRIX Display shows the following message YOU will lose current SETUP1 Confirm TAKE 8 Press the TAKE button again The MATRIX Display shows the following message Are you ABSOLUTELY sure Press TAKE to exe...

Страница 46: ...mpletes the color of the Send button ceases to be red and the numbers inside the blue line disappear The Displays on the VS 1616SDI show the messages Program replaced successfully 16608D 16608D 13 After about 3 seconds the Displays show the messages Turn unit OFF reconnect cables and turn ON 16608D 16608D 14 Verify that the checksum for example 16608D is the same on both lines If not repeat the fi...

Страница 47: ...s 4 2 2 Component 360Mb s 4 2 2 Widescreen Equalization Automatic up to 300m Belden 8281 cable 270Mb s Jitter 300ps at 270Mb s 10Hz Overshoot 5 Output Level 800mV 5 Control 38 selector switches RS 232 RS 485 IR remote dry keyboard extension Dimensions 19 inch W 7 inch D 2U H rack mountable Power Source 230 VAC 50 60 Hz 115VAC U S A 10VA Weight 3 5 kg 7 8 lbs approx Accessories Power cord Null mode...

Страница 48: ... 2 F E D C B A IN 3 F E D C B A IN 4 F E D C B A IN 5 F E D C B A IN 6 F E D C B A IN F E D C B A IN 8 F E D C B A IN A A F A E A D A C A B A A A A A A A A A A A IN 10 B B F B E B D B C B B B A B B B 7 B B B B B B IN 11 C C F C E C D C C C B C A C C C C C C 4 C C C IN 12 D D F D E D D D C D B D A D D D D D D D D D IN 13 E E F E E E D E C E B E A E E E E 6 E E E E E IN 14 F F F F E F D F C F B F A ...

Страница 49: ...tion is OK send the string to the VS 1616SDI It should reply by sending the string OK 13 ASCII Protocol Description The three basic commands are Y T and P Y command MAKE A CROSSPOINT CONNECTION Format Y o i where i is the input number and o is the output number Note The string does not need a space spaces are used here just to add clarity to the explanation Example Y3 4 connects input 4 to output ...

Страница 50: ...Format T s where s is the setup number 1 to 99 to recall Example T13 recalls setup number 13 P command STORE A SETUP Format P s where s is the setup number up to 99 that stores the present status of the machine Example P13 stores in setup number 13 The reply for all commands is OK or ERROR ...

Страница 51: ...47 ...

Страница 52: ...For the latest information on our products and a list of Kramer distributors visit our Web site www kramerelectronics com where updates to this user manual may be found We welcome your questions comments and feedback Caution Safety Warning Disconnect the unit from the power supply before opening servicing ...

Отзывы: