


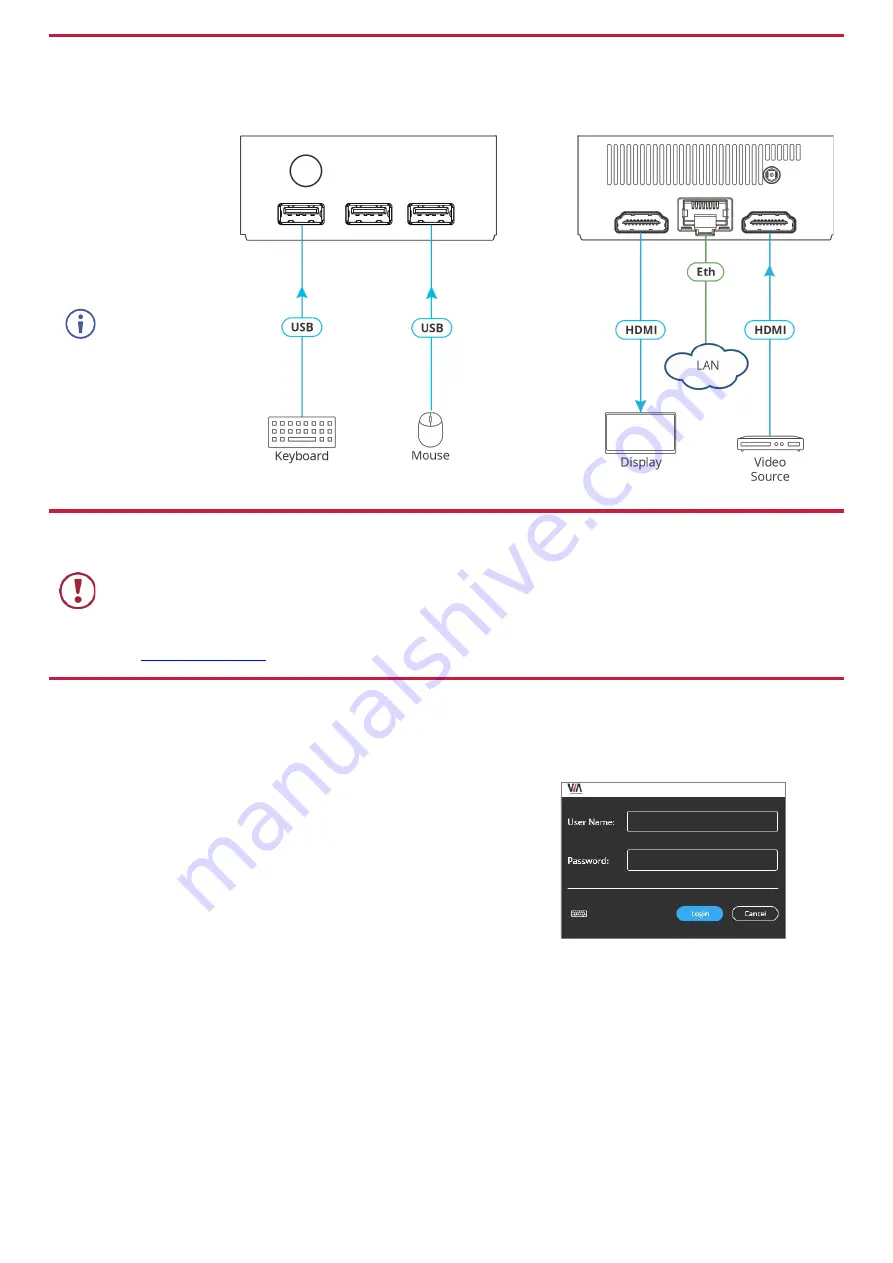
Step 4: Connect the inputs and outputs
Always switch OFF the power on each device before connecting it to your
VIA Connect
²
. For best results, we recommend
that you always use Kramer high-performance cables to connect AV equipment to
VIA Connect
²
. Using third-party cables
may cause damage!
1. Connect the
keyboard and
mouse.
2. Connect an HDMI
display.
3. Connect to the LAN
(default mode).
4. If required, connect
a wired HDMI video
source.
If you wish to use
a Kramer active
optical pluggable
HDMI cable with
your
VIA
Connect
²
, contact
your local Kramer
office to assist in
purchasing the
correct cable.
Step 5: Connect the power
Connect the 12V DC power adapter to
VIA Connect
²
and plug it into the mains electricity.
Caution:
There are no operator serviceable parts inside the unit.
Caution:
The device is intended to be installed at a height of 2 meters or less.
Warning:
Use only the Kramer Electronics power adapter that is provided with the unit.
Warning:
Disconnect the power and unplug the unit from the wall before installing.
See
for updated safety information.
Step 6: Configure VIA Connect²
A wizard guides you through configuration. If you choose to skip the wizard, follow these steps for configuration:
General Settings Configuration
1. On the main display, click the VIA icon in the lower left corner. The VIA gateway dashboard appears.
2. Click
Settings
. The settings login window appears.
3. Enter the User Name (default = su) and Password (default = supass) and
click
Login
. The VIA Settings window appears.
The VIA Settings tabs are:
▪
LAN Settings
– Configure network parameters (default = DHCP)
▪
System Controls
– Define audio input and output sources, change
display resolution, view system health indicators, and activate your unit.
▪
Wi-Fi
– Activate and configure the built-in Wi-Fi capability.
4. When you have finished configuring settings, click
Reboot
to apply all
settings.
Change to AP Wi-Fi Mode
Set up the built-in Wi-Fi module as a secondary Access Point (for guests).
1. On the Wifi tab, click the
Wifi Settings
switch. The switch turns green and additional Wi-Fi settings appear.
2. Click
AP Mode
, and enter a new name in the SSID field and a new password or use the default name and password.
3. Select a Wi-Fi channel for the Access Point.
4. Select
Enable Internet
(if the primary LAN network is connected to the Internet) OR
Activate Standalone Wifi
(to create an
autonomous network without Internet access) and click
Apply
.
Switch to Client Wi-Fi Mode
Attach your
VIA Connect
²
as a client device to your main network:
1. On the Wifi tab, click the
Wifi Settings
switch. The switch turns green and additional Wi-Fi settings appear.
2. Click
Client Mode
, select an available network from the drop-down.
3. Enter the required password and click
Apply
.
4. Disconnect the LAN cable (if connected) before rebooting the device.


