


Using the Embedded Web Pages
The
TP-590TXR
can be operated remotely using the
embedded web pages. Access the web pages from the
control computer using a web browser and an Ethernet
connection.
Before attempting to connect:
•
Ensure that your browser is supported.
•
Ensure that JavaScript is enabled.
Note
: In the event that a Web page does not update
correctly, clear your Web browser’s cache.
Note
: Only one instance of the web pages can be open at a
time.
To browse the TP-590TXR web pages:
1. Open your Internet browser.
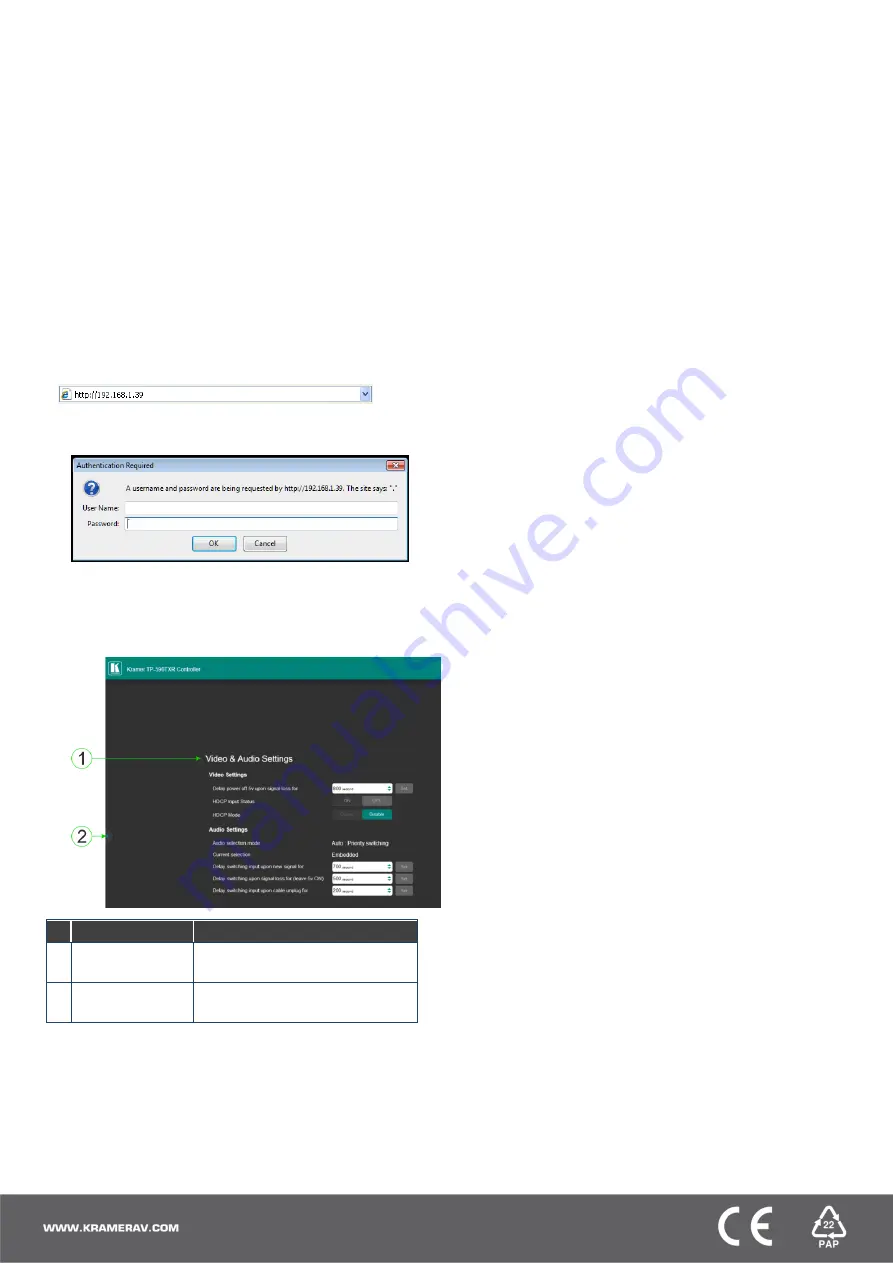
2. Type the IP number of the device (default =
192.168.1.39) in your browser.
If authentication is enabled, the following window
appears.
3. Enter the valid username and password to access the
web pages.
Following a successful logon, the Default page
appears.
#
Item
Description
1
Video & Audio
Settings
View the current video and audio
settings.
2
Reveal Button
Click to reveal the Page Selection
panel.
4. Click the Reveal button to open the left hand side
page panel.
5. Select the required page from the Page Selection
Panel to configure the device:
Video & Audio Settings Page
: Modify the video and
timeout parameters.
Device Settings Page
:
•
View some of the device characteristics (for example,
model and web version)
•
Edit IP settings
•
Load and save configurations
•
Reset the device to factory default settings
EDID Management Page
:
•
Copy EDID data to either or both of the inputs
•
Lock the EDID on each input independently
Note
: Do not power up the display before locking the EDID.
Firmware Upgrade Page:
•
View the current firmware version
•
Upgrade the firmware
Authentication Page
: Assign or change logon
authentication details.
About Page
: View the Web page version and Kramer
Electronics Ltd company details.


