


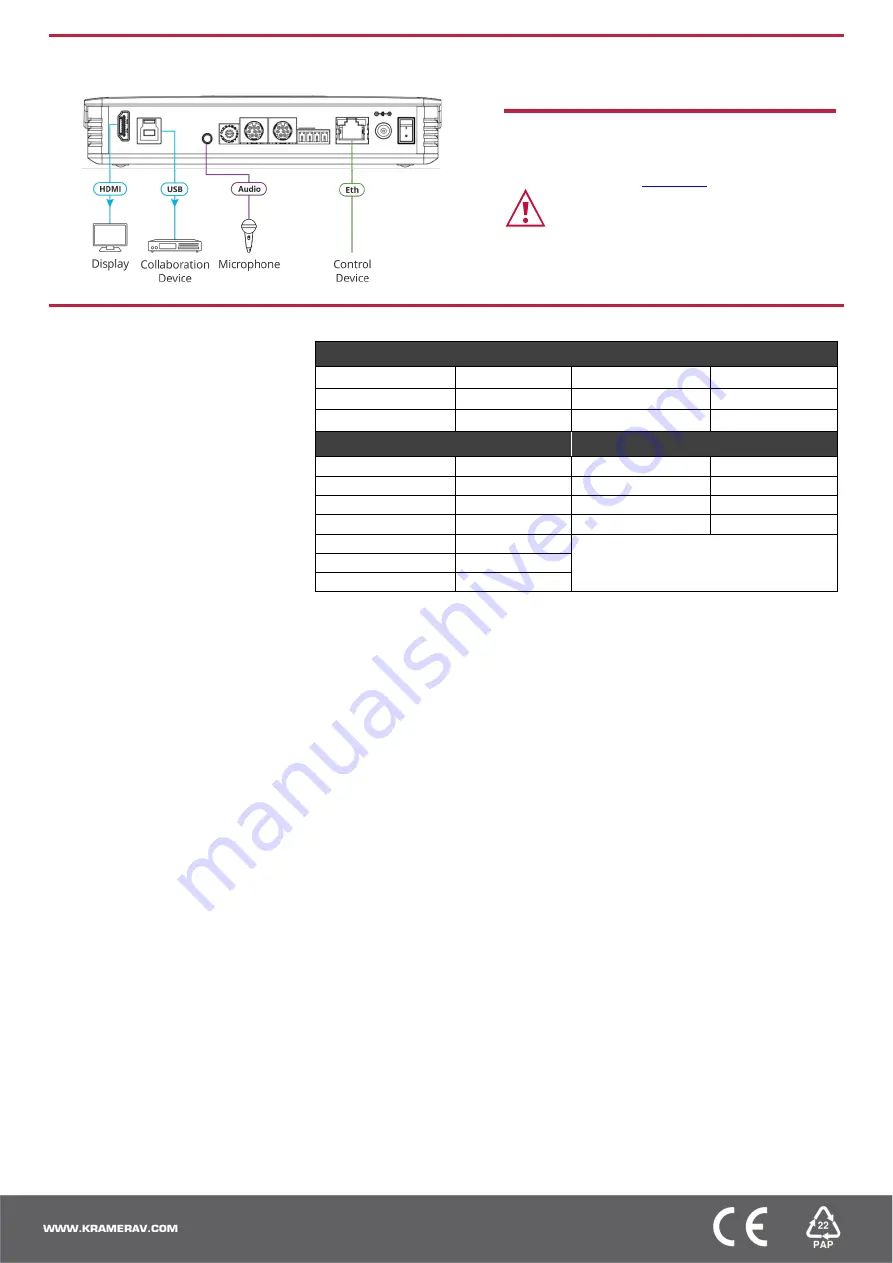
Step 4: Connect inputs and outputs
Always switch OFF the power on each device before connecting it to your
K-CAM-USB
.
Step 5: Connect power
Connect the power adapter to
K-CAM-USB
and plug it
into the mains electricity.
Safety Instructions (See
for updated safety information)
Caution:
•
For products with relay terminals and GPI\O ports, please refer to the
permitted rating for an external connection, located next to the terminal or
in the User Manual.
•
There are no operator serviceable parts inside the unit.
Warning:
•
Use only the power cord that is supplied with the unit.
•
Disconnect the power and unplug the unit from the wall before installing.
Step 6: Operate K-CAM-USB
Operate
K-CAM-USB
via:
•
Using the IR remote control
transmitter.
•
Remotely, embedded web
pages via the Ethernet.
•
Remotely, by RS-232 serial
commands transmitted by a
touch screen system, PC, or
other serial controller.
RS-232 Control
Baud Rate:
115,200
Parity:
None
Data Bits:
8
Command Format:
ASCII
Stop Bits:
1
Default Ethernet Parameters
Ports
IP Address:
192.168.1.39
Data: 3000
Web: 80
Subnet Mask:
255.255.0.0
Onvif: 2000
Soap: 1936
Gateway:
0.0.0.0.
RTMP: 1935
Rtsp: 554
UDP Port #:
50000
Visca: 1259
WebSocket: 8088
TCP Port #:
5000
Default Username:
admin
Default Password:
admin
Pairing the remote control to
K-CAM-USB
You must perform pairing before using the remote control.
•
Press the SET and * keys simultaneously for 3 seconds.
The remote control LED flashes and pairing is complete.
The terms HDMI, HDMI High-Definition Multimedia Interface, and the HDMI Logo are trademarks or registered trademarks of HDMI Licensing Administrator, Inc.


