34
35
СТИРАЛЬНАЯ МАШИНА АВТОМАТ
AUTOMATIC WASHING MACHINE
СТИРАЛЬНАЯ МАШИНА АВТОМАТ
AUTOMATIC WASHING MACHINE
ИНСТРУКЦИЯ ПО ЭКСПЛУАТАЦИИ • USER GUIDE
ИНСТРУКЦИЯ ПО ЭКСПЛУАТАЦИИ • USER GUIDE
The machine has excellent quality
and performance, and is your good household helper! Every washing machine is,
before leaving the factory, carefully and thoroughly detected to ensure their
functions are complete and they are in the best operational state;
Please read the Manual carefully before using the product and keep it for future
needs;
The graphics in the description are schematic diagrams of products, whic
i
may by nconsistent with the model you buy. Please subject to the actual model!
Component Name and Accessories of Washing Machine
Component Name
Drain Hose
Clips
Head cover
Control panel
Detergent box
Door
Inner barrel
PTC door lock
Carriage bolt (X4)
Inlet valve (cold water)
Back cover plate
Unpacking the washing machine
Unpacking your washing machine and check if is there any damage during the
transportation.Also make sure that all the items(as shown below) in the attached
bag are received. If there is any damage to the washing machine during the
transportation,or any item is missing or damaged,please contact the local dealer
immediately.
If your washing machine is not double inlet, you do not have the hot inlet hose.
Drain Hose
Support Bracket
(Used to loop the
end of drain hose)
Inlet Hose
(Connect to cold
water supply)
Hot Inlet Hose
(Connect to Hot
water supply)
Hole Cover (4EA)
(Used to plug
transit bolt holes)
Description of Washing Machines
The machine has excellent quality
and performance, and is your good household helper! Every washing machine is,
before leaving the factory, carefully and thoroughly detected to ensure their
functions are complete and they are in the best operational state;
Please read the Manual carefully before using the product and keep it for future
needs;
The graphics in the description are schematic diagrams of products, whic
i
may by nconsistent with the model you buy. Please subject to the actual model!
Component Name and Accessories of Washing Machine
Component Name
Drain Hose
Clips
Head cover
Control panel
Detergent box
Door
Inner barrel
PTC door lock
Carriage bolt (X4)
Inlet valve (cold water)
Back cover plate
Unpacking the washing machine
Unpacking your washing machine and check if is there any damage during the
transportation.Also make sure that all the items(as shown below) in the attached
bag are received. If there is any damage to the washing machine during the
transportation,or any item is missing or damaged,please contact the local dealer
immediately.
If your washing machine is not double inlet, you do not have the hot inlet hose.
Drain Hose
Support Bracket
(Used to loop the
end of drain hose)
Inlet Hose
(Connect to cold
water supply)
Hot Inlet Hose
(Connect to Hot
water supply)
Hole Cover (4EA)
(Used to plug
transit bolt holes)
Install Washing Machine
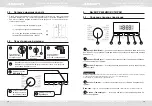
Remove transit bolts
Before using this washing
machine, transit bolts
must be removed from the
backside of this machine.
Please take the following
steps to remove the bolts
:
1. Loosen the four transit bolts with a spanner
2. Take each bolt head and pull it through the wide part of the hole. Repeat for each bolt.
3. Fill the holes with the supplied plastic covers.
4. Keep the transit bolts properly for futher use.
Levelness adjustment
Do not place the washing machine outdoors or in a place below 0 °С, otherwise the program
controller tends to be damaged.
WARNING
• When the four feet are in close contact with the floor, the washing machine must be completely
level and secure. When the washing machine is level, make the feet as low as possible.
• Improper levelness adjustment will result in the washing machine’s big noise, vibration,
displacement, etc.
• There is a vent at bottom of the washing machine (do not block it). Place the washing machine
on a solid, flat and skidproof floor. To avoid injuries, do not place the washing machine on soft
blanket, wooden floor, platform or rack.
(Connect
to
Hot
water
supply)
Hot
Inlet
Hose
(Used to plug transit
bolt holes)
Drain Hose
Support Bracket
(Used to loop the end
of drain hose)
Hole Cover (4EA)
Inlet Hose
(Connect
to
cold
water
supply)
Spanner
(1.Used to adjust the bottom
of the machine,
2.Remove the transport bolt on
the back of the machine)
Base foot structure
Lock nut
Support foot covered
with rubber
Factory status
Lockingnut close
to bottom of box
Supporting foot close
to locking nut
Support base is close
to the ground
1
.
When
palcing
the
machine
,
check whether
the
bottom
foot
is
in
the factoory state.if
not,please restore the bottom foot to the
factory state:the locking
nut is locked tightly on bottom of
the box,and the support foot is locked
tightly on the locking nut:
2
.
After the machine is placed,press the opposite
corner of the top cover plate of the washing
machine with both hands in turn
and shake it vertically downward
to check whether the supporting
foot is close to the ground and
whether the machine is shaken
3.To ensure that the machine is placed in the right state,
loosen the locking nut according to thedirection shown
in the diagram with the attachedspanner to the appropriate
height until thesupporting footisclosetothegroundand
themachineisfreefromshaking
4
.
Finally,use the spanner to turn the lock nut back
to thebottom of the box to lock it(you can also
slightly fix the support foot by hand to avoid the
support foot moving again)
Ensure that the supporting
feet do not move again
Note:in order to facilitate installation,the factory stutus of the foot may not be all
locked,please be sure to lock all four feet before adjusting the level!


