15
■
3-1
Installation
Place the device on a motorized table (optional accessory).
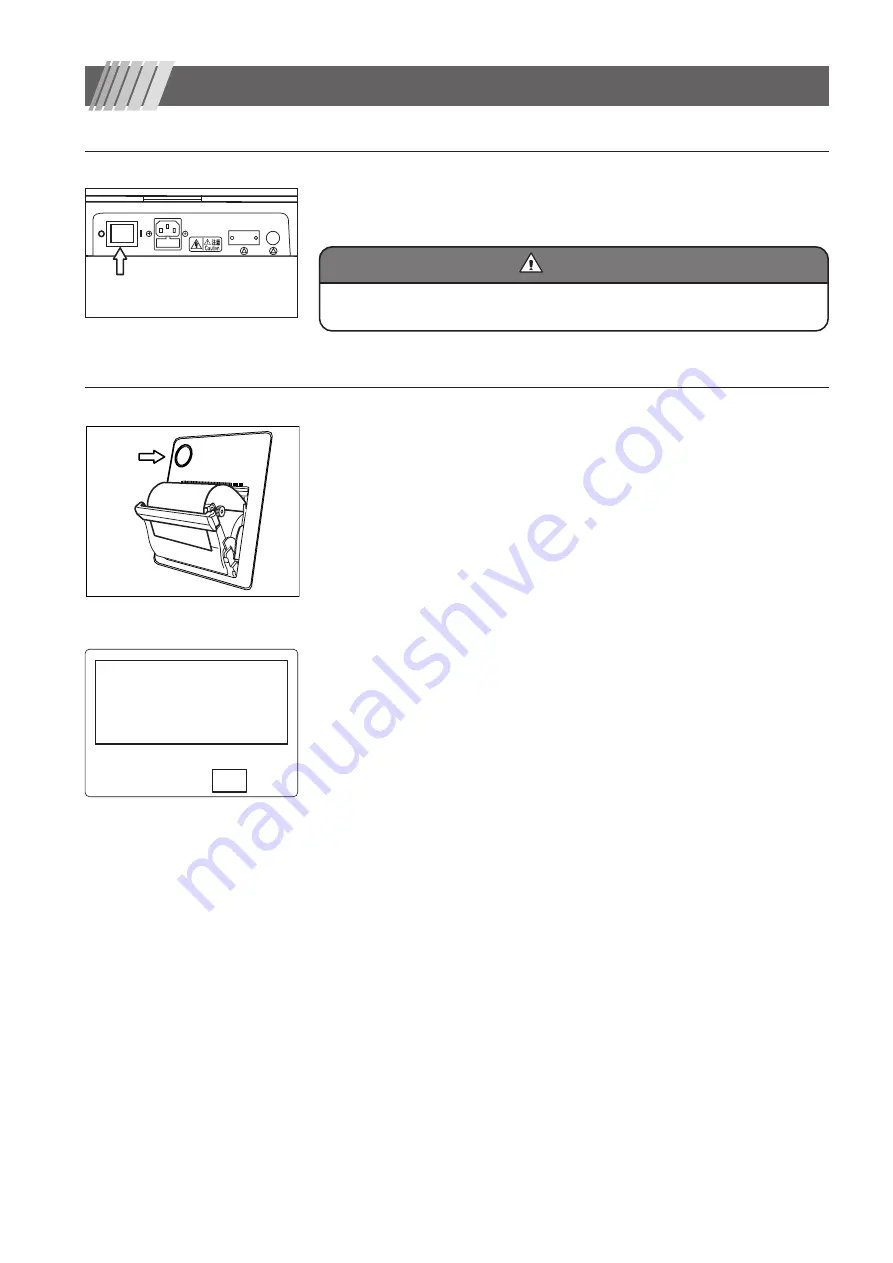
Make sure that POWER Switch shown in Fig. 1 is at OFF position (O).
Connect the power cable to the power supply inlet and connect the other end of the
cable to a nearby wall outlet.
■
3-2
Printer paper installation
The printer lid opens when the round dimple “Printer lid button” is pushed.
Install a printer paper as shown in Fig. 2 and close the lid.
When no printer paper is installed or Printer switch is pressed while the lid is kept open,
“Please check printer paper. If paper is remaining. Call a service Person.” (see Fig. 3)
✽
is displayed.
Make sure there is a printer paper and the lid is closed and push “Set”.
If the same message appears continuously, call a service person.
✽
This message does not appear when output mode is set to EXT. See “8.Con-
figuration and settings” for details.
3.
Setting up
Make sure that
POWER Switch is off.
Fig. 2
Printer lid button
Fig. 3
Fig. 1
Connect a ground cable securely to avoid injury. Connect the power supply cable to a
grounding receptacle for a triplex cable.
Warning
Warning
Set
Error 5
(Printer)
Please check printer paper. If pa-
per is remaining.
Call a service Person.


