3
Using Ralink Utility
Please follow the instructions below to use the Ralink configuration utility to connect to a wireless access point.
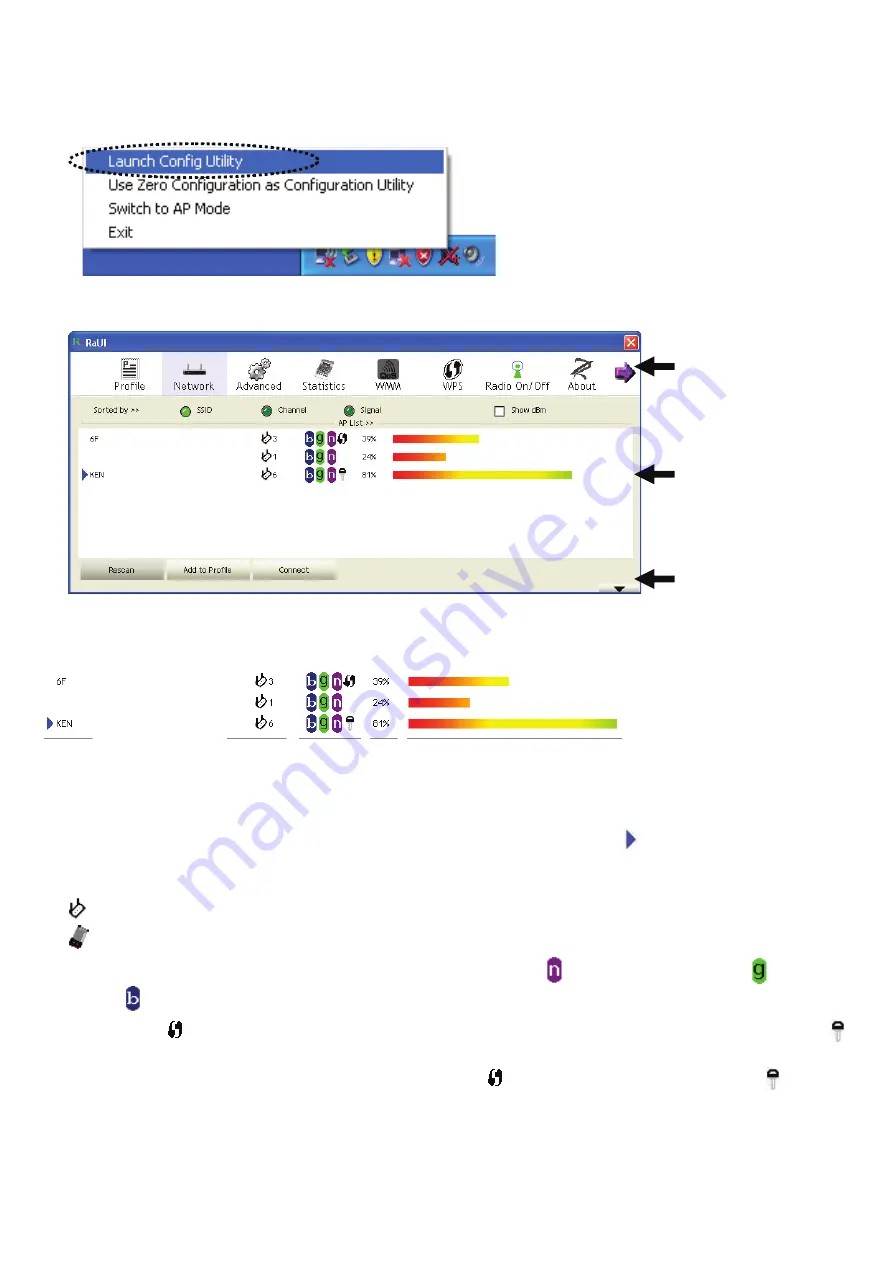
1. Right-click the Ralink configuration utility icon located in the lower-right corner of your computer desktop and then click
‘Launch Config Utility’.
Ralink setup utility (RaUI) will launch, and begin to scan for all wireless access points automatically.
Menu
Setup Area
More / Less
button
Information explanation
Scan result includes 5 types of information, which are:
A
B
C
D
E
A
The SSID (Service Set Identifier) of wireless device.
If nothing is displayed here, it means the SSID of this wireless device is hidden. If a symbol appears in front of the
name of the wireless device, it means you’ve established a connection with that wireless device
B
The type of this wireless device and the channel number of this wireless device
Means this wireless device is an access point
Means this wireless device is a computer (Ad-Hoc mode, point-to-point connection)
C
The wireless standard supported by this access point is displayed here. for 802.11n, ‘g; for 802.11g , and ‘b’ for
802.11b .
The WPS icon will appear when the access point supports WPS. If the access point uses encryption, a key icon
will appear
Note: When the access point supports WPS and the WPS icon is shown, you will not see the key icon here even
though the access point uses encryption.
D
Shows the signal strength of the access point by percentage
E
Shows a bar graph of the signal strength
Содержание CMP-WNPCI40
Страница 42: ...42 Vista Ralink 1 Ralink 2 windows Ralink Ralink 1 Ralink...
Страница 44: ...44 1 3 2 SSID SSID OK SSID 3 WEP WPA 4 OK 5...
Страница 45: ...45 Raling...


