background image

4. How to use the microscope 

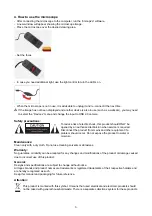
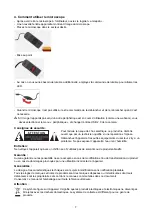
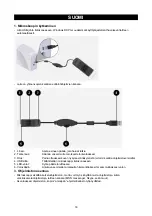
-  After connecting the microscope to the computer, run the “amcap2a” software. 
-   A new window will appear showing the microscope image. 
-  Place the microscope over the desired viewing area. 


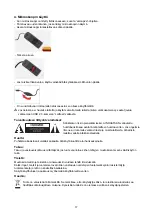
-  Set the focus. 


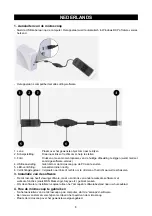
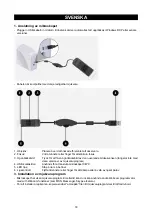
-  In case you need additional light, use the light control to turn the LED’s on. 


-  When the microscope is not in use, it is advisable to unplug it and re-connect it the next time. 


If the image has not been displayed and another device is also in use (such as a webcam), you may need 

to select the “Devices” menu and change the input to USB 2.0 camera. 


Safety precautions:   


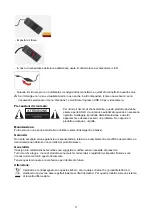
To reduce risk of electric shock, this product should ONLY be 
opened by an authorized technician when service is required. 
Disconnect the product from mains and other equipment if a 
problem should occur. Do not expose the product to water or 
moisture. 

Maintenance: 

Clean only with a dry cloth. Do not use cleaning solvents or abrasives. 

Warranty: 

No guarantee or liability can be accepted for any changes and modifications of the product or damage caused 
due to incorrect use of this product. 

General: 

Designs and specifications are subject to change without notice.   
All logos brands and product names are trademarks or registered trademarks of their respective holders and 
are hereby recognized as such. 
Keep this manual and packaging for future reference. 

Attention: 


This product is marked with this symbol. It means that used electrical and electronic products should 
not be mixed with general household waste. There is a separate collections system for these products.


Содержание CMP-USBMICRO30

Страница 1: ...roscoop MANUALE p 10 Microscopio USB MANUAL DE USO p 12 Microscopio USB HASZN LATI TMUTAT o 14 USB mikroszk p K YTT OHJE s 16 USB mikroskooppi BRUKSANVISNING s 18 USB Mikroskop N VOD K POU IT s 20 USB...

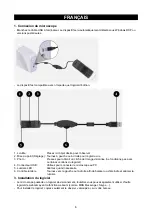
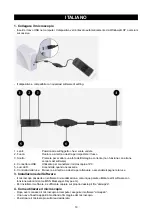
Страница 2: ...Snapshot Press to get a snapshot of the current image does not work with some software versions 4 USB connector Used to connect the microscope to the PC 5 LED lights Turn on when needed 6 Light contro...

Страница 3: ...ician when service is required Disconnect the product from mains and other equipment if a problem should occur Do not expose the product to water or moisture Maintenance Clean only with a dry cloth Do...

Страница 4: ...r den Anschluss des Mikroskops an den PC 5 LEDs Bei Bedarf einschalten 6 Lichtregler Zum Dimmen oder Ein Ausschalten nach links oder rechts drehen 3 Installation der Software Das Mikroskop verf gt be...

Страница 5: ...htigkeit in Ber hrung kommt Wartung Nur mit einem trockenen Tuch s ubern Keine Reinigungs oder Scheuermittel verwenden Garantie Es kann keine Garantie oder Haftung f r irgendwelche nderungen oder Modi...

Страница 6: ...obtenir un clich de l image visionn e ne fonctionne pas avec certaines versions du logiciel 4 Connecteur USB Utilisez pour connecter le microscope au PC 5 Lumi re LED Allumez quand n cessaire 6 Contr...

Страница 7: ...pareil et les autres quipements du secteur s il y a un probl me Ne pas exposer l appareil l eau ni l humidit Entretien Ne nettoyez l appareil qu avec un chiffon sec N utilisez pas de solvants ou de pr...

Страница 8: ...de microscoop op de PC aan te sluiten 5 LED verlichting Aanzetten indien nodig 6 Verlichtingsregelaar Verplaats naar links of rechts om te dimmen of het licht aan uit te schakelen 3 Installatie van de...

Страница 9: ...blemen voordoen Stel het product niet bloot aan water of vocht Onderhoud Uitsluitend reinigen met een droge doek Gebruik geen reinigingsmiddelen of schuurmiddelen Garantie Voor wijzigingen en verander...

Страница 10: ...B Utilizzato per connettere il microscopio al PC 5 Luci LED Accenderle quando necessarie 6 Controllo della luce Muovere a sinistra o a destra per attenuare o accendere spegnere la luce 3 Installazione...

Страница 11: ...esporre il prodotto ad acqua o umidit Manutenzione Pulire solo con un panno asciutto Non utilizzare solventi detergenti o abrasivi Garanzia Non sar accettata alcuna garanzia o responsabilit in relazi...

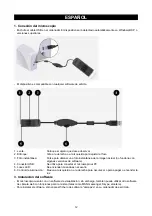
Страница 12: ...nea de la imagen actual no funciona con algunas versiones de software 4 Conector USB Se utiliza para conectar el microscopio al PC 5 Luces LED Se encienden cuando es necesario 6 Control de iluminaci...

Страница 13: ...paraci n Desconecte el producto de la toma de corriente y de los otros equipos si ocurriera alg n problema No exponga el producto al agua ni a la humedad Mantenimiento L mpielo s lo con un pa o seco N...

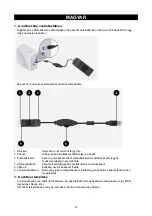
Страница 14: ...tfelv tel Ezzel a gombbal k sz thet pillanatfelv telt az aktu lis k pr l egyes szoftververzi kn l nem m k dik 4 USB csatlakoz Ezzel kell sz m t g phez csatlakoztatni a mikroszk pot 5 LED ek Sz ks g sz...

Страница 15: ...fel Hiba eset n h zza ki a term k csatlakoz j t a konnektorb l s k sse le m s berendez sekr l Vigy zzon hogy ne rje a term ket v z vagy nedvess g Karbantart s Csak sz raz ronggyal tiszt tsa Tiszt t s...

Страница 16: ...si 3 Otos Paina ottaaksesi kuvan nykyisest n kym st ei toimi kaikilla ohjelmistoversioilla 4 USB liitin T ll liitet n mikroskooppi tietokoneeseen 5 LED valot Kytke p lle tarvittaessa 6 Valos din Liiku...

Страница 17: ...en huoltoa varten Jos ongelmia ilmenee irrota laite verkkovirrasta ja muista laitteista l altista laitetta vedelle l k kosteudelle Huolto Puhdista ainoastaan kuivalla kankaalla l k yt liuottimia tai h...

Страница 18: ...blicksbild av den nuvarande bildsekvensen fungerar inte med vissa versioner av mjukvaruprogram 4 USB kontaktdon Anv nds f r att ansluta mikrosk pet till PC 5 LED ljus Sl p n r s beh vs 6 Ljuskontroll...

Страница 19: ...s Dra ut str mkabeln fr n eluttaget och koppla ur all annan utrustning om n got problem skulle uppst Uts tt inte produkten f r vatten eller fukt Underh ll Reng r endast med torr trasa Anv nd inga reng...

Страница 20: ...ek Stiskn te pro po zen sn mku aktu ln ho obrazu s n kter mi verzemi softwaru nefunguje 4 Konektor USB Pou v se pro p ipojen mikroskopu k PC 5 Sv tlo LED V p pad pot eby zapn te 6 Ovl d n sv tla Posun...

Страница 21: ...n V p pad e dojde k z vad odpojte v robek ze s t a od jin ch za zen V robek nevystavujte vod nebo vlhkosti dr ba K i t n pou vejte pouze such had k Nepou vejte istic rozpou t dla ani abrazivn prost ed...

Страница 22: ...USB Este utilizat pentru a conecta microscopul la PC 5 LED uri Porni i le atunci c nd este nevoie 6 Controlul luminozit ii Roti i spre st nga sau dreapta pentru a diminua sau aprinde stinge lumina 3...

Страница 23: ...i probleme Nu expune i produsul apei sau umezelii ntre inere Cur area trebuie f cut cu o c rp uscat Nu folosi i solven i sau agen i de cur are abrazivi Garan ie Nu oferim nicio garan ie i nu ne asum m...

Страница 24: ...A USB 2 0 1 USB Windows XP 1 2 3 4 USB 5 LED 6 3 web web MSN messenger Skype amcap2a 4 amcap2a 24...

Страница 25: ...LED web USB 2 0 25...

Страница 26: ...shot Tryk for at tage et snapshot af det nuv rende billede virker ikke med nogen software udgaver 4 USB forbindelse Bruges til at s tte mikroskopet til PCen 5 LED lys T nd n r der er brug for dem 6 Ly...

Страница 27: ...es af en autoriseret tekniker Frakobl produktet stikkontakten og andet udstyr hvis der opst r et problem Uds t ikke produktet for vand eller fugt Vedligeholdelse Reng r kun med en t r klud Brug ikke o...

Страница 28: ...fokusere 3 Stillbilde Trykk for f et stillbilde av det aktuelle bildet virker ikke med noen programvareversjoner 4 USB kobling Brukes for koble mikroskopet til datamaskinen 5 LED lys Skru p etter beho...

Страница 29: ...er n dvendig Koble produktet fra str mmen og annet utstyr dersom et problem oppst r Ikke utsett produktet for vann eller fuktighet Vedlikehold Rens bare med en t rr klut Ikke bruk rensemidler eller sk...

Страница 30: ...Omschrijving USB microscoop Descrizione Microscopio USB Descripci n Microscopio USB Megnevez se USB mikroszk p Kuvaus USB mikroskooppi Beskrivning USB Mikroskop Popis USB mikroskop Descriere Microscop...

Отзывы: