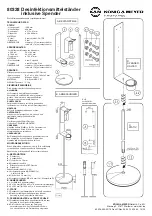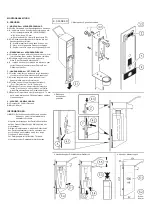
INSTALLATION INSTRUCTIONS
E. DISPENSER
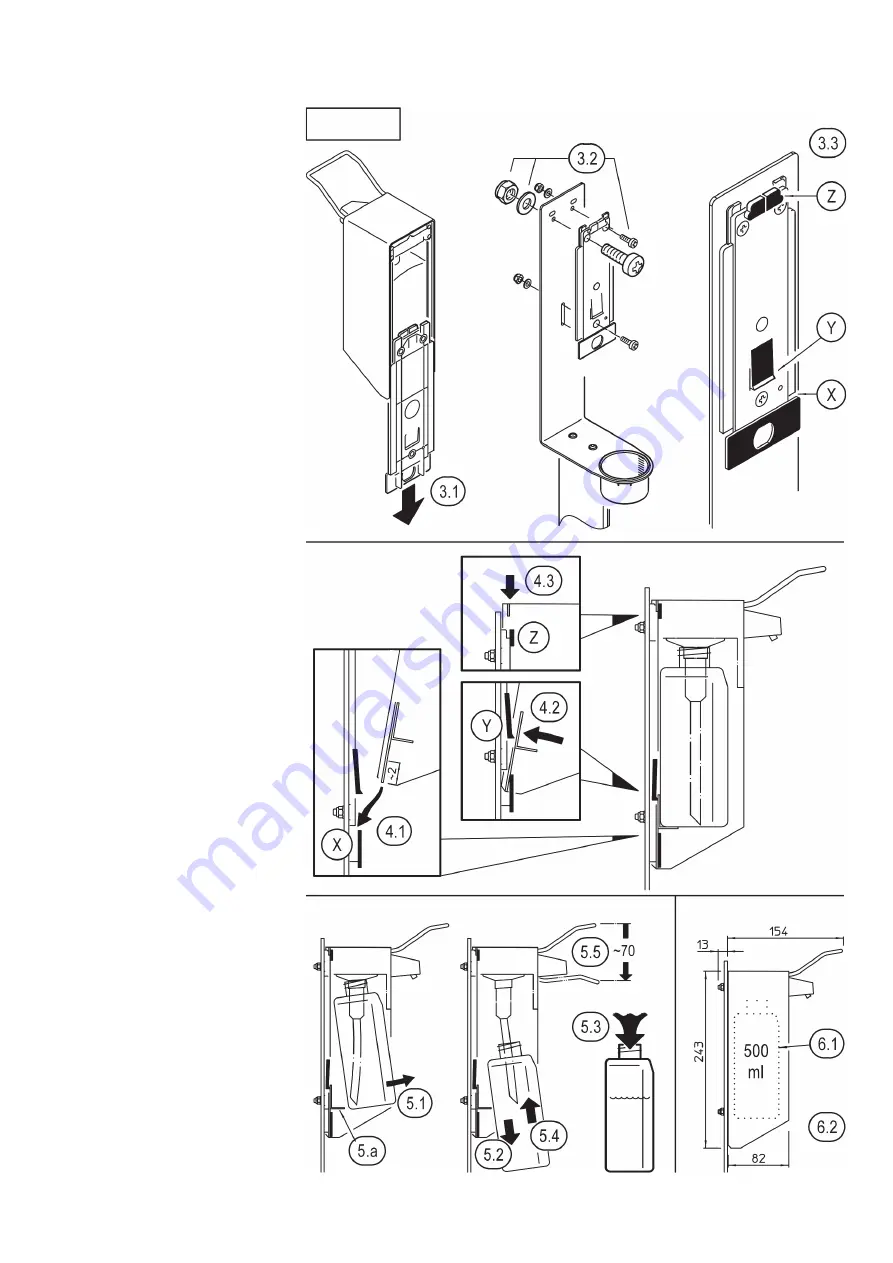
3 - MOUNTING the REAR PANEL of the DISPENSER
3.1
Remove the white rear panel from the dispenser
3.1
housing...
3.2
...and screw it onto the dispenser holder:
3.2
-
e.1
lock nuts M5 / SW8 (DIN985)
3.2
-
e.2
washers ø 5,3 mm
3.2
-
e.3
screws M5 x 16 mm (Phillips screw Z2)
3.3
The rear panel has three points that fix the
3.3
dispenser housing:
3.3
X
- Slot: holds right and left rail
3.3
Y
- Nose: presses against the rear panel
3.3
Y
-
of the housing
3.3
Z
- Pin: plunges into upper transverse rail
4 - ATTACHING the DISPENSER HOUSING
4.1
Attach the housing and push the side rails approx.
4.1
2 cm into the slots
X
in the white rear panel.
4.2
Now press the housing against the nose
Y
4.2
of the rear panel as far as it will go and...
4.3
...immediately push down until the upper transverse
4.3
rail is fixed behind the pin
Z
of the rear panel
5 - HANDLING the DISINFECTANT BOTTLE
5.1
Grip the bottle at the bottom and pull it forward
5.1
until it no longer rests on the mounting bracket
5.a
.
5.2
Slowly pull the bottle down until the suction hose
5.2
is no longer immersed.
5.3
Now fill the bottle with suitable contents:
5.3
- gel, - disinfectant, - soap, - shampoo
5.4
Installing the bottle: immerse the suction hose,
5.4
push the bottle upwards, place it on the mounting
5.4
bracket
5.a
and press it against the rear panel.
5.5
Press the bow down approx. 70 mm with your
5.5
finger, hand or elbow and collect the filling material
5.5
with your other hand.
6 - DISPENSER - DIMENSIONS
6.1
Suitable for 500 ml bottles
6.2
Width: 84 mm
INFORMATION
NOTE: Stand, dispenser holder and dispenser are not
NOTE:
medically certified product.
- Negative effects of the disinfectant on the products
-
(surfaces, material) are not known to us.
- Nevertheless, we recommend to always remove
possible
-
residues of the disinfectant in order to avoid possible
-
damage and to enjoy the product as long as possible.
- For cleaning purposes use a slightly damp cloth and
-
a non-abrasive cleaning agent.
5. Handling the disinfectant bottle
4. Attaching the
4.
dispenser housing
3. Mounting the rear panel of the dispenser
D. DISPENSER
6. Dispenser - Dimensions
width:
84 mm
dispenser housing


