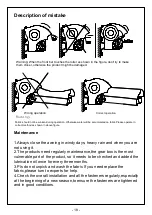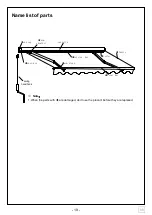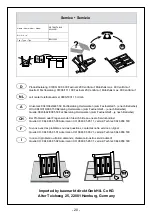
- 6 -
4
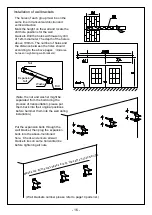
Installation of wall brackets
The holes of each group must be on the
same line in transversal direction and
vertical direction.
Mark the height on the wall and locate the
drill hole positions for the wall
brackets.Drill the holes with masonry drill
of 12mm diameter,The depth of the hole is
above 100mm. The number of holes and
the distance between the holes should
according to the above pages
《
Distance
between neighboring wall brackets
》
Put the expansion bolts through the
wall bracket, then plug the expansion
bolts into the above-mentioned
hole
,
Check and ensure all wall
brackets lies on same horizontal line
before tightening all nuts.
(Note: the nut and washer might be
separated from the bolt during the
process of transportation, please put
them back into their original positions
before hammer them into the wall during
installation.)
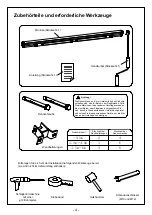
Expansion
bolt
Washer
Nut
Bolt
Make
sure a
ll the w
all bas
es are
on the
same
horizo
ntal lin
e
(Wall brackets number please refer to page 2 parts list.)
Einbau der Wandhalterungen
Die Löcher jeder Gruppe müssen in transversaler
und in vertikaler Richtung auf derselben Linie sein.
Markieren Sie die Höhe an der Wand und ermitteln
Sie die Lage der Bohrlöcher für die Wandhalterun-
gen. Bohren Sie die Löcher mit einem Steinbohrer
von 12 mm Durchmesser.
Die Tiefe des Lochs beträgt mehr als 100 mm.
Die Anzahl der Löcher und der Abstand zwischen
ihnen sollte wie vorangehend im Abschnitt „Ab-
stand zwischen benachbarten Wandhalterungen“
angegeben sein.
(Anmerkung: Die Mutter und die Unterlegscheibe
können während des Transports von der Schrau-
be getrennt werden. Bitte bringen Sie sie jedoch
wieder an ihren angestammten Platz, bevor Sie
sie während des Einbaus in die Wand hämmern.)
Führen Sie die Dehnschrauben durch die
Wandhalterungen und stecken Sie sie danach
in die vorgenannten Löcher. Vergewissern Sie
sich, dass sich alle Wandhalterungen auf der-
selben horizontalen Linie befinden, bevor Sie
alle Muttern festziehen.
(Die Anzahl der Wandhalterungen wird in der Teileliste
auf Seite 4 angegeben.)
Vergewissern Sie sich, dass sich alle W
andsockel auf
derselben horizontalen Linie befinden.
Mutter
Boden
Schrau-
be
Unterleg-
scheibe
Dehn-
schraube


