


E-11
(8) Load paper and let the machine produce another
test print. Then, check width A.
Note:
Make the adjustment until width A falls within the
specified range.
<Centering (Duplex 2nd side)>
(1) Touch “Prt. Image Center. Side 2 (Dup).”
(2) Touch “LCT” and then press the Start key.
A test print will then be produced.
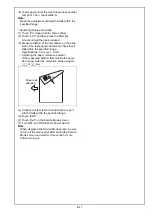
(3) Measure width A of the test pattern on the back-
side of the test print produced and check that it
falls within the specified range.
Specifications: 3.0 mm ± 1.0 mm
• Adjusting the paper reference position
If the measured width A falls outside the speci-
fied range, enter the correction value using the
or
key.
(4) Produce another test print and check to see if
width A falls within the specified range.
(5) Touch “END.”
(6) Touch “Exit” on the Service Mode screen.
(7) Turn OFF and ON the Main Power Switch.
Note:
When displayed the Service Mode screen, be sure
to turn off the main power after exiting the Service
Mode screen and wait for 10 seconds or more
before turning on.
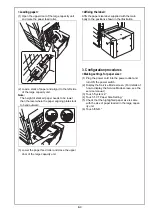
Paper exit
direction
A