background image

bizhub C4000i/C3300i

33

8

8.4.3

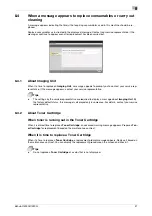
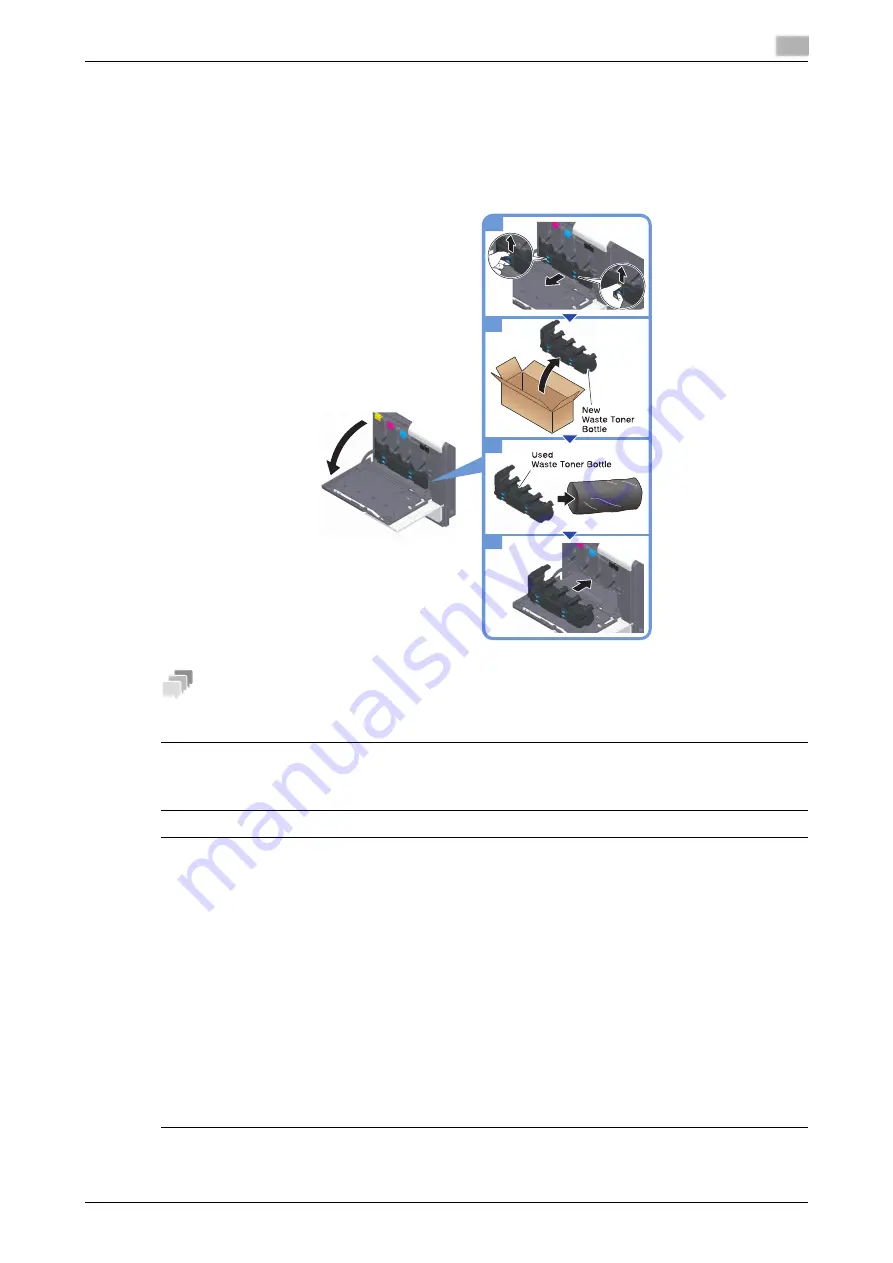
About Waste Toner Bottle

When the 

Waste Toner Bottle

 is full, a message appears to prompt you to replace it (at replacement by user). 

Follow the displayed guidance to take an action.

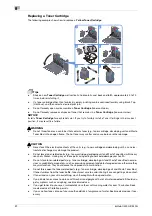
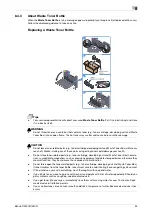
Replacing a Waste Toner Bottle

Tips

-

Your service representative will collect your used 

Waste Toner Bottle

. Put it in a plastic bag, and store 

it in a box by itself.

7

WARNING

-

Do not throw toner or a container that contains toner (e.g., toner cartridge, developing unit and Waste 
Toner Box) into an open flame. The hot toner may scatter and cause burns or other damage.

7

CAUTION 

-

Do not leave toner-related parts (e.g., toner cartridge, developing unit and Waste Toner Box) within easy 
reach of children. Licking any of these parts or ingesting toner could damage your health.

-

Do not store toner-related parts (e.g., toner cartridge, developing unit and Waste Toner Box) near de-
vices susceptible to magnetism, such as precision equipment and data storage devices, otherwise they 
may malfunction. They could cause these products to malfunction.

-

Do not force open the toner-related parts (e.g., toner cartridge, developing unit and Waste Toner Box). 
If toner tumbles from the toner bottle, take utmost care to avoid inhaling it or even getting skin contact.

-

If toner lands on your skin or clothing, wash thoroughly with soap and water.

-

If you inhale toner, move to a place with fresh air and gargle with a lot of water repeatedly. Should you 
get symptoms such as coughing, seek medical advice.

-

If you get toner into your eyes, immediately rinse them with running water for over 15 minutes. Seek 
medical advice if irritation persists.

-

If you swallow toner, rinse out your mouth and drink a few glasses of water. Seek medical advice if nec-
essary.

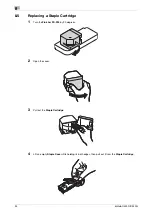
1

3

2

4

Содержание bizhub C3300i

Страница 1: ...About Panels Loading Paper Available Operations in this Machine Safety Information 1 8 10 11 16 20 24 25 Before Using this Machine How to Use the HTML User s Guide About This Machine Read this if You Have a Problem ...

Страница 2: ...e instructions in this manual Please read the following section before connecting the machine to the supply It contains important information related to user safety and pre venting equipment problems Make sure that you observe all of the precautions that appear in different sections of this manual KMI_Ver 03_E Reference Some parts of the contents of this section may not correspond with the purchas...

Страница 3: ...posed to soot or steam near a kitchen table bath or a humidifier A fire electrical shock or breakdown could result Do not place this product on an unstable or tilted bench or in a location subject to a lot of vibration and shock It could drop or fall causing personal injury or mechanical breakdown Do not let any object plug the ventilation holes of this product Heat could accumulate inside the pro...

Страница 4: ...tains toner e g toner cartridge developing unit and Waste Toner Box into an open flame The hot toner may scatter and cause burns or other damage Do not leave toner related parts e g toner cartridge developing unit and Waste Toner Box within easy reach of children Licking any of these parts or ingest ing toner could damage your health Do not store toner related parts e g toner cartridge developing ...

Страница 5: ...ect field of view at visual dis play workplaces To avoid incommoding reflexions at visual display work places this device must not be placed in the direct field of view Das Gerät ist nicht für die Benutzung im unmittelbaren Gesichtsfeld am Bildschirmarbeitsplatz vorgesehen Um störende Reflexionen am Bild schirmarbeitsplatz zu vermeiden darf dieses Produkt nicht im unmittel baren Gesichtsfeld platz...

Страница 6: ...te rial This perchlorate warning applies to perchlorate containing lithium batter ies sold or distributed in California USA Perchlorate Material Special handling may apply See www dtsc ca gov hazardouswaste perchlorate Recycling batteries for Taiwan users only For EU member states only This product complies with RoHS 2011 65 EU Directive USB host Connect USB devices Memory Authentication Hub etc d...

Страница 7: ...ful that an accident does not occur when operations such as removing paper jams and staple jams are performed NOTICE Do not remove caution labels or notations If any caution label or caution notation is soiled please clean to make legible If you cannot make them legible or if the caution label or notation is damaged please contact your service representative ...

Страница 8: ...age backup contact your service representative Precautions for carrying the machine Lifting the machine in an awkward position or transporting it in a poorly balanced position could result in personal injury When transporting the machine use an adequate number of persons and ensure that each per son can take a good position without being excessively burdened 1 8 Legal restrictions on re production...

Страница 9: ...vals have been exceeded Mechanical or electrical functions do not work as they should Exclusion of liability The manufacturer of the system assumes no liability for damages if the system was operated under impermissi ble conditions 2 3 Target groups The user s guides are intended for the following users of the system Everyone who uses this system must have read and un derstood the related user s g...

Страница 10: ...to this ma chine or documents Follow the instructions to avoid property damage This check mark symbol shows a precondition of a procedure This symbol indicates a supple mentary explanation of a proce dural instruction This symbol indicates supple mental information of a topic as well as options required to use a function This symbol indicates reference functions related to a topic This shows the s...

Страница 11: ...ed Web browsers Windows Microsoft Internet Explorer 10 11 Desktop version Microsoft Edge Firefox latest version Google Chrome latest version Mac OS Safari latest version Display resolution 1024 e 768 pixels or more Tips We recommend that you use the latest Web browser that is compatible with your operating system to help you use this machine more conveniently and comfortably Check that JavaScript ...

Страница 12: ...compatible Android terminal The Mount Kit MK P08 is required to install the Authentication Unit AU 201S This unit can also be installed on the Working Table WT P03 4 Working Table WT P03 Provides an area to temporarily place an original or other materials This is also used when the Authentication Unit AU 102 or Authenti cation Unit AU 201S is installed The Finisher FS P04 can be installed as neede...

Страница 13: ...ticles UFP generated in this machine to prevent them from escaping this machine Clean Unit CU 202 is only available in some areas No Name Description 1 Local Interface Kit EK P08 The speaker and USB port are added 2 Local Interface Kit EK P09 Install this unit to link this machine with a Bluetooth LE compatible iOS terminal The speaker USB port and receiving device for Bluetooth LE com munication ...

Страница 14: ...ch to turn the machine on or off 5 USB Port Type A USB2 0 1 1 Used to connect an external memory unit USB memory unit to this machine 6 Tray 1 Allows you to load up to 500 sheets 7 Mobile Touch Area This area is used to associate this machine with an NFC compatible Android terminal or an iOS terminal compatible with Bluetooth LE This item is available when the optional Local Interface Kit EK P10 i...

Страница 15: ...nd No 2 A port is activated when a network port inserts a cable No Name Description 1 Ethernet LAN Port 1000Base T 100Base TX 10Base T Connect to this port when using this machine as a network printer 2 USB Port Type B Connect to this port when using this machine as a USB connected printer 1 2 ...

Страница 16: ...wer Switch The Start key lights up orange and the start screen is displayed on the Touch Panel 2 When turning the main power off open the Main Power Switch Cover and press r of the Main Pow er Switch NOTICE When restarting this machine turn the Main Power Switch off and on again after 10 or more seconds have passed Not doing so may result in an operation failure No Name Description 1 Main Power Sw...

Страница 17: ...e 4 Reset Returns the setting you entered or changed to the default 5 Access Use this key to perform authentication in the Login screen if user au thentication or account track is installed on this machine Pressing the Access key while logged in will log you out of this ma chine 6 Menu Displays the home screen 7 Power key Switches this machine to the Power Save mode For details on how to use the P...

Страница 18: ...ice information icon You can check the current date and time free space in memory and toner level The corresponding device information is displayed when A nonstandard USB flash drive is connected to this machine Device information logs are spooled This machine is receiving data The enhanced security mode is enabled 5 Information icon Displays a message for users 6 Function key Displays shortcut ke...

Страница 19: ...efault authentication server is selected by default 3 When Operation Rights is displayed select the login user s operation privileges To log in as a registered user select User To log in as an administrator select Administrator 4 When Authentication Method is displayed select the authentication method 5 Tap Login When authentication succeeds you can operate this machine The user name is displayed ...

Страница 20: ...sword is numeral alone it is possible to enter the password using the keypad If the password contains a character tap the Password entry area and then enter the password 2 Tap Login When authentication succeeds you can operate this machine The account name is displayed on the screen during the log in process When user authentication and account track are enabled together the user name is displayed...

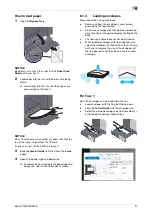
Страница 21: ...er 1 Pull out the tray NOTICE Be careful not to touch the surface of the Paper Feed Rollers with your hand 2 Slide the Lateral Guide to fit the size of the loaded paper 3 Load paper into the tray with the print side facing up 4 When you load paper other than plain paper or change the paper size specify the paper type and paper size For details on how to specify the paper type and paper size refer ...

Страница 22: ... type and paper size refer to the HTML User s Guide 6 1 3 Loading envelopes Precautions when using envelopes Remove air from the envelope s and securely press along the flap fold line Do not use envelopes that have glue or release pa per on the flap or the part covered by the flap on the body The flap side of envelopes cannot be printed on When loading envelopes with flaps opened also select the s...

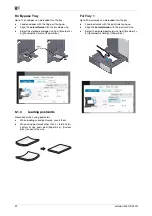
Страница 23: ...er Size 6 1 4 Loading postcards Precautions when using postcards When loading curled postcards uncurl them When using postcards other than 4 e 6 A6 Card confirm its size and select Paper Size Custom Size to specify the size For Tray 1 Up to 20 postcards can be loaded into the tray Load postcards with the print side facing up Align the Lateral Guide with the postcard size Select the desired postcar...

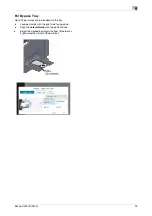
Страница 24: ...ypass Tray Up to 20 postcards can be loaded into the tray Load postcards with the print side facing down Align the Lateral Guide with the postcard size Select the desired postcard size from Envelop 4 e 6 Envelop A6 Card of Paper Size ...

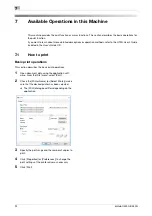
Страница 25: ...User s Guide CD 7 1 How to print Basic print operations This section describes the basic print operations 1 Open document data using the application soft ware From the File menu select Print 2 Check the Printer Name or Select Printer make sure that the desired printer has been selected The Print dialog box differs depending on the application 3 Specify the print range and the number of copies to p...

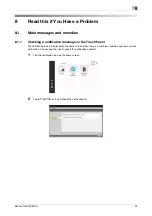
Страница 26: ...tification message on the Touch Panel The notification icon is displayed on the home screen when there is a machine condition warning or notice notification You can tap the icon to check the notification contents 1 Tap the notification icon on the home screen 2 Tap ATTENTION List and check the notification list ...

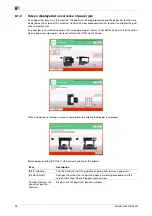
Страница 27: ...details on how to take an action when a paper jam message is not reset refer to the HTML User s Guide When a paper jam is cleared a screen showing how to correctly load paper is displayed Return paper and tap OK the system restarts printing of the original Item Description Start Guidance Tap this button to start the guidance showing how to clear a paper jam Display Switch Changes the screen that s...

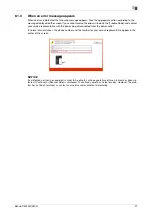
Страница 28: ...epresentative with the power plug disconnected from the power outlet In normal circumstances the phone number and fax number for your service representative appear in the center of the screen NOTICE If a defective part can be separated in order to be able to continue operations after a problem has been de tected Continue or Recover Data is displayed To continue operations select any key However th...

Страница 29: ...wer Sleep mode this machine returns from Power Save mode when the Touch Panel is touched or a key on the Control Panel is pressed and the Touch Panel appears normally On the Control Panel press the Power key If the Weekly Timer setting has put the machine in Erp Auto Power off mode press the Power key to display the Touch Panel To use it outside the preset operating hours follow the on screen inst...

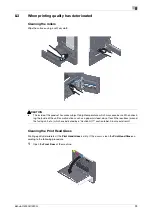
Страница 30: ... burns When check ing the inside of the unit for malfunctions such as a paper misfeed do not touch the locations around the fusing unit etc which are indicated by a Caution HOT caution label A burn could result Cleaning the Print Head Glass Printing quality deteriorates if the Print Head Glass is dirty If this occurs clean the Print Head Glass ac cording to the following procedure 1 Open the Front...

Страница 31: ...ly insert the Printhead Cleaner all the way to the back end of the Print Head Glass and then slowly pull it out Repeat this operation approximately three times for all the Print Head Glass sections 5 Mount the Printhead Cleaner onto the Front Door of this machine 6 Mount the Waste Toner Bottle 7 Close the Front Door of the machine ...

Страница 32: ...e Tips The settings by the service representative are required to display a message about Imaging Unit By the factory default status this message is displayed only in some area For details contact your service representative 8 4 2 About Toner Cartridge When toner is running out in the Toner Cartridge When it is almost time to replace a Toner Cartridge an advanced warning message appears Prepare a ...

Страница 33: ...ping unit as an elec trostatic discharge may damage the product Do not leave toner related parts e g toner cartridge developing unit and Waste Toner Box within easy reach of children Licking any of these parts or ingesting toner could damage your health Do not store toner related parts e g toner cartridge developing unit and Waste Toner Box near de vices susceptible to magnetism such as precision ...

Страница 34: ...our health Do not store toner related parts e g toner cartridge developing unit and Waste Toner Box near de vices susceptible to magnetism such as precision equipment and data storage devices otherwise they may malfunction They could cause these products to malfunction Do not force open the toner related parts e g toner cartridge developing unit and Waste Toner Box If toner tumbles from the toner ...

Страница 35: ... 8 8 5 Replacing a Staple Cartridge 1 Turn the Finisher FS P04 by 90 degrees 2 Open the cover 3 Pull out the Staple Cartridge 4 Lift an empty Staple Case while holding its both edges then pull out it from the Staple Cartridge ...

Страница 36: ... C4000i C3300i 35 8 5 Mount a new Staple Case in the Staple Cartridge 6 Insert the Staple Cartridge until it clicks 7 Close the cover 8 Turn the Finisher FS P04 by 90 degrees to return it to the home position ...

Страница 37: ...http konicaminolta com AAJT 9576 22 Printed in China 2019 9 2018 ...

Отзывы: