background image

15

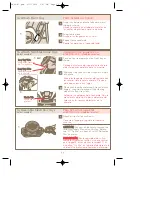
To fasten restraint system buckles - push

together. Be sure both buckles are fastened

to secure child safely.

Para abrochar la hebilla del sistema de

cinturones ensártela en el otro extremo del

cinturón. Asegure que las dos hebillas estén

abrochados para segurar el niño.

To unsnap restraint system buckles - press

tabs to release.

Para desabrochar la  hebilla del sistema de

cinturones, presione las lengüetas.

For proper fit, adjust shoulder straps and

waist band as shown.

Para un ajuste apropiado, ajuste las cintas de

los hombros y el cinturón como se muestra

en el dibujo.

T

TO

O  A

AD

DJJU

US

ST

T  S

SH

HO

OU

ULLD

DE

ER

R  S

ST

TR

RA

AP

P  H

HE

EIIG

GH

HT

T

P

PA

AR

RA

A  A

AJJU

US

ST

TA

AR

R  LLA

A  A

ALLT

TU

UR

RA

A  D

DE

E  LLA

AS

S  C

CIIN

NT

TA

AS

S

D

DE

E  LLO

OS

S  H

HO

OM

MB

BR

RO

OS

S

N

NO

OT

TE

E:: For a secure fit, straps should be at or

below the child's shoulder.  Adjust straps to

higher position as your child grows.

N

NO

OT

TA

A:: Para que estén ajustadas de forma

adecuada, las sujeciones deben estar en, o

de abajo, del hombro del niño. Ajuste las

sujeciones a una posición más alta a medida

que su hijo crece. 

Push buckle through slot as shown. Repeat

for second side

Presione la hebilla a través de la ranura como

se muestra. Repita para el otro lado. 

From the back side of the stroller, fasten

buckles together to secure restraint.

Desde la parte trasera de la carriola, conecte

las hebillas para asegurar la sujeción.

4

5

6

1

4

6

Adjust Restraint System Harness

Ajuste con segurida el sistema de

cinturones

2

1

2

S45J-R7.qxd  2/17/2006  3:47 PM  Page 15

Содержание Jeep Liberty S45J-R7

Страница 1: ...aft Enterprises Inc All Rights Reserved S45J R7 2 06 by Jeep Liberty 3 Wheel Stroller Series Instructions Hoja de instrucciones de la carriola de 3 ruedas serie Jeep Liberty S45J R7 qxd 2 17 2006 3 46...

Страница 2: ...DO O N NO OT T use any infant car seat with this stroller Serious injury may occur T TH HI IS S I IS S N NO OT T A AN N E EX XE ER RC CI IS SE E S ST TR RO OL LL LE ER R Do not use this product while...

Страница 3: ...us se e t th hi is s s st tr ro ol ll le er r o on n s st ta ai ir rw wa ay ys s o or r e es sc ca al la at to or rs s A Al lw wa ay ys s f fa as st te en n t th he e h ho oo od d o on nt to o t th h...

Страница 4: ...eria E ES ST TA A C CA AR RR RI IO OL LA A N NO O E ES ST T D DI IS SE E A AD DA A P PA AR RA A H HA AC CE ER R E EJ JE ER RC CI IC CI IO O No utilize este producto para correr trotar patinar o partic...

Страница 5: ...u ut to om m t ti ic ca as s A Ab br ro oc ch he e s si ie em mp pr re e e el l t to ol ld do o e en n l la a p pa ar rt te e p po os st te er ri io or r d de el l a as si ie en nt to o c cu ua an nd...

Страница 6: ...p Pompa de aire Select Models Modelos selectos B Br ra ak ke e A As ss se em mb bl ly y w wi it th h R Re ea ar r A Ax xl le e Montaje de freno con eje trasero F Fr ro on nt t T Tr ra ay y Charola de...

Страница 7: ...las ruedas traseras Remove and discard protective plastic sleeve from ends of rear axle assembly Quite y deseche el pl stico protector de los extremos del eje trasero Position rear brake assembly as s...

Страница 8: ...ale la rueda hacia afuera N NO OT TE E Keep wheels at a recommended tire pressure of 35 p s i 241 kPa select models N NO OT TA A Mantenga las ruedas infladas a la presi n recomendada de 241kPa 35p s i...

Страница 9: ...through frame If your spring loaded button becomes out of place take pliers and feed button into hole N NO OT TA A Aseg rese de que los botones con muelle salen a trav s del marco Si el bot n con res...

Страница 10: ...line up the footrest is not correctly installed Repeat steps 1 3 If you are still having trouble call customer service for assistance Alin e los topes del apoyapi s con los dos agujeros del marco de...

Страница 11: ...de la charola P Pl la as st ti ic c T Ta ab b Leng eta de pl stico Attach mirror to toy as shown Conecta el espejo al juguete tal como se muestra C CA AU UT TI IO ON N For your childs safety remove t...

Страница 12: ...largo timepo 1 To Install Batteries in Electronic Toys select models Para instalar las pilas en los juguetes electr nicos modelos selectos 2 ON OFF 1 Place electronic toys so that they face the child...

Страница 13: ...ter as y sit e la espuma 1 2 1 2 3 4 3 To Attach Music On The Move Parent Tray select models Para situar la charola para adultos Music On The Move modelos selectos To attach Music On The Move align tr...

Страница 14: ...N NO O coloque liquidos calientes en esta charola Los l quidos calientes pueden quemar a su ni o To Secure Child In Stroller Para asegurar al ni o en la carriola Lock foot brake to keep stroller from...

Страница 15: ...S ST TA AR R L LA A A AL LT TU UR RA A D DE E L LA AS S C CI IN NT TA AS S D DE E L LO OS S H HO OM MB BR RO OS S N NO OT TE E For a secure fit straps should be at or below the child s shoulder Adjust...

Страница 16: ...NO OT TE E On rough surfaces lock the wheel to keep straight On smooth surfaces unlock to allow the wheel to swivel N NO OT TA A En las superficies speras asegure la rueda para mantenerla recta En las...

Страница 17: ...la bomba Screw air tube to opposite end of pump Enrosque el tubo de aire en la punta contrario de la bomba Attach air pump to fill tube on tire Sujete la bomba de aire al tubo de llenar en la rueda Pu...

Страница 18: ...ound system to its lowest level Turn on your personal sound system and slowly increase volume to a comfortable listening level for you and your child Para evitar asustar al ni o ajuste el volumen de s...

Страница 19: ...n el dedo pulgar para destrabar la posici n B B y luego empuje la palanca roja en el mango para doblar la carriola N NO OT TE E If 1 Hand fold feature does not oper ate properly pull up latches on fra...

Страница 20: ...o d de eb be e s su up po on ne er rs se e q qu ue e h ha an n a ap pr ro ob ba ad do o e el l p pr ro od du uc ct to o Care Maintenance Cuidado Manteniniento To keep your stroller running smoothly a...

Страница 21: ...lcraft DaimlerChrysler Corporation 2006 Kolcraft garantiza que este producto estar libre de defectos en materiales y fabricaci n de la siguiente manera Por un per odo de UN A O despu s de la fecha de...

Страница 22: ...ted necesitar esta informaci n para obtener los servicios incluidos en la garant a Usted puede encontrar el n mero del modelo y la fecha de fabricaci n en una etiqueta situada en la parte trasera de l...

Страница 23: ...y Charola delantera 13 00 E El le ec ct tr ro on ni ic c T To oy ys s Juguetes electr nicos Select Models Modelos selectos 20 00 N No on n E El le ec ct tr ro on ni ic c T To oy ys s Juguetes no elect...

Страница 24: ...jeta de cr dito Visa Mastercard Account No de Cuenta Expiration Date Fecha de vencimiento Signature Firma Ship to Enviar a Name Nombre Address Direcci n City State Zip Ciudad Estado C digo postal Tele...

Отзывы: