background image

Kohler Co.

7

1274372-A05-C           May 2018

Press this button to adjust wand position. 

N – Dryer

Press this button once to activate dryer function after seating; press this button again to adjust dryer dials. Function will

O – UV Sterilization

Press this button to enter UV sterilization function under unseated status. Icon will blink.

P – Water Pressure

Press this button to adjust water pressure dials when front wash or rear wash is activated.

Low-Voltage Warning

Note: Please charge immediately after voltage warning.

When

button blinks, this indicates remote internal battery will be exhausted, the remote requires charging.

Pairing

Note: Pairing process shall only be performed when unseated.

Press remote top ON button to activate toilet when under normal powered on status. 

Hold remote dryer button, after bottom row of icons quick blinking, toilet operation starts.

Hold toilet

button and

button on toilet side panel, release button when heard one short beep.

When the bottom row of icons on remote stop blinking, this indicates successful pairing.

Remote to Toilet Communication

Stop Function

Whenever pressing and holding

button, remote shall enter stop mode.

Remote Setting Guide

When remote moves outside of detection area, bottom row of icons on remote will auto flash (indicating searching toilet

signal). When moved back into toilet detection area, if toilet is powered on and under normal operation, signal will be

automatically reconnected, and icon will stop blinking after successful connection.

M – Wand Move

stop automatically after about 4 minutes or can be turned off immediately by pressing the OFF button. 

UV


B

G

H

D

C

I

J

F

N

O

E

P

M

L

K

Cover

Stop

Water temp

Messagep

Spiral

Wand

Pressure

Front

Rear

Dryer

Clean

Seat

Flush-eco

Flush-full 

Seat temp

Содержание VEIL K-5402A-0

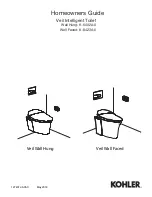
Страница 1: ...Homeowners Guide 1274372 A05 C May 2018 Veil Intelligent Toilet Wall Hung K 5402A 0 Wall Faced K 8423A 0 Veil Wall Hung Veil Wall Faced...

Страница 2: ...Do not immerse product within water IMPORTANT Risk of product damage Do not install seat in a location where water might be splashed on the product IMPORTANT Risk of product damage Do not install this...

Страница 3: ...unit Keep the cord away from splash water Avoid low grade burn from exposed skin contact heating seat for a long time Only authorized persons from manufacture maintenance or similar departments may r...

Страница 4: ...Thermal protection Temp fuse overheat breaker Back flow prevention Check valve Thermal Temp adjustment OFF 1 5 dials ambient temp 31 39 Safety device Temp fuse overheat breaker Cover Auto OPEN CLOSE s...

Страница 5: ...the care and cleaning instructions All information in this manual is based upon the latest product information available at the time of publication At Kohler we constantly strive to improve the quali...

Страница 6: ...after about 5 minutes or will turn off immediately upon pressing the OFF button H Stop Press this button to stop front wash rear wash dryer and deodorizer manual wand clean and UV etc functions Pressi...

Страница 7: ...e dryer button after bottom row of icons quick blinking toilet operation starts Hold toilet button and button on toilet side panel release button when heard one short beep When the bottom row of icons...

Страница 8: ...Press and hold manual clean wand function under unseated status to extend wand to perform manual clean on nozzle Press and hold this button again or press STOP button to deactivate this function Remot...

Страница 9: ...nking during this process When night light stops blinking self checking procedure is complete Default status settings for initial use Front wash Water temp mid Water flow mid Wash position 3rd dial Re...

Страница 10: ...e OPEN CLOSED manually When user opens closes cover normally cover shall automatically open close based on the movement trend Do not continue to apply force to cover Cover shall automatically stop whe...

Страница 11: ...when meeting with an obstruction during movement Note During cover and seat OPEN CLOSE process do not apply excessive force to cover or seat Any man made interference on cover or seat during automatic...

Страница 12: ...flush is deactivated Press manual flush button on flush control board Left button flush full Right button flush ECO half flush Note 1 User shall be able to use remote to control flush water or manual...

Страница 13: ...e by E water Toilet shall activate E water sterilization function after user completes front wash rear wash or spiral wash etc E water sterilization function with automatically activate every 8 hrs wh...

Страница 14: ...completely with water immediately after applying cleanser Rinse and dry any overspray that lands on nearby surfaces Cleaning seat Do not use abrasive detergent and sterilizing aerosol spray products N...

Страница 15: ...panel when not sitting on toilet to extend the wand for cleaning or inspection Clean the spray wand without removing the tip Just use a wet soft bristled brush to clean Clean the spray wand by removin...

Страница 16: ...e filter screen and clean Reinstall filter screen connect to hose connector open valve Turn on power supply and check for leaks Reinstall side panel 2 Concealed water tank filter screen clean Please f...

Страница 17: ...rrs Deodorizer block exchange steps Remove deodorizer screen and deodorizer block Screen After exchanging deodorizer block re install back to the toilet Deodorizer block Deodorizer block bracket Note...

Страница 18: ...ED OFF Note 1 Residual water may freeze in winter and cause damage if toilet is not discharged completely over long idle times 2 Any water remaining in the seat may freeze during winter allow the unit...

Страница 19: ...P button during operation C Auto deodorizing function is disabled A Remove object or wipe seat B If needed sit on again after 2 seconds C Refer to Remote setting guide section working 9 Unable to open...

Страница 20: ...ith float C Clean float with water from inlet valve 17 No water when A Wrong adjusting board and screw rod installation B Discharge valve lever and barb is not connected A Re install screw rod B Re in...

Отзывы: