3.2
Initial commissioning
On taking delivery and commissioning the unit:
1.
Check that it is complete and not damaged in any way.
2.
If the unit is fitted with a transport bracket, remove it.
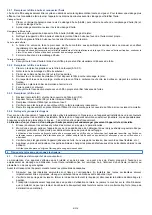
The transport bracket is a metal plate located underneath the engine, close to the
earth terminal. Although useful for transportation, it will prevent optimum operation
of the unit (noise, vibration).
To remove it: lift the unit slightly and place it on a block then remove the nut (1) and
the clamp (2).
3.
Check the oil and fuel levels and top them up if necessary.
4.
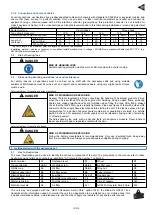
If necessary, connect the battery, starting with the positive terminal.
Observe the polarity of the battery terminals when connecting it: as this could cause serious damage to the electrical equipment.
Some units require a running-in period. Contact your nearest agent for more information.
3.3
Connecting Generator Smart Care
The unit may be equipped with the "GS101-Generator Smart Care" option (A14):
1.
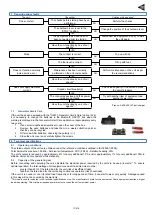
Secure the Bluetooth GSC101 box to the unit,
2.
Download and install the free Generator Smart Care* application onto a mobile phone or tablet,
3.
Create an account,
4.
Activate Bluetooth on the phone or tablet,
5.
Follow the instructions on the application to pair the phone or the tablet with the Bluetooth GSC101 box.
Generator Smart Care displays all the information needed to monitor the unit in the application; this includes maintenance date
alerts and reminders, a maintenance aid, and the map of approved resellers for any spare parts required.
*Available free from the App Store and Google Play (excluding any connection fees charged by the phone system operator).
4 Using the generator set
Before using the unit, always:
1.
Check that the unit is correctly installed and that it is ready to start.
2.
Make sure you have understood all of the operating procedures.
To stop the generating set in an emergency, activate the stop lever (
A7
).
4.1
Positioning the generating set for operation
1.
Choose a site that is clean, well-ventilated and sheltered from bad weather, and which does not obstruct the passage of
vehicles or pedestrians, and store the additional supplies of oil and fuel within close proximity, although respecting a
certain distance for safety.
2.
Set the motor pump down on a flat, horizontal surface which is firm enough to ensure it does not sink (the angle must not
exceed 10° in any direction).
3.
Ensure that the motor pump is stable and cannot move when in operation.
Do not forget that the suction pipe tends to pull the motor pump towards the water source during pumping.
4.
Position the motor pump as close as possible to the liquid to be aspirated.
The shorter the vertical distance between the motor pump and the surface of the liquid, the quicker the priming and the greater the volume
of liquid pumped.
4.2
Check the generating set is in a good general condition (bolts, hoses)
Inspect the entire unit before start-up and after each use to prevent any faults or damage.
1.
Check that the unit is clean, in particular the air intake zones (engine air intake, air vents, air filter, etc.).
2.
Check all of the unit's pipes and hoses to ensure they are in good condition and that there are no leaks.
Pipes or hoses must be replaced by a specialist technician. Please contact your nearest agent.
3.
Tighten any loose bolts.
The cylinder head bolts must be retightened by a specialist technician. Please contact your nearest agent.
4.3
Checking the engine oil level and topping up
1.
If the unit has been used, leave to cool for at least 30 minutes.
2.
Remove the dipstick (A2-B1) and wipe it clean.
3.
Reinsert the dipstick then remove it again.
4.
Visually check the level: it must be between the upper limit (B2) and lower limit (B3) on the dipstick.
If the oil level is too low: open the oil filler cap (
A3
), use a funnel to top up the oil, then screw the oil filler cap back in.
If the oil level is too high: drain some of the oil into a suitable container.
5.
Check the level again before screwing the dipstick back in.
6.
Check that there are no oil leaks, and wipe away any traces of oil with a clean cloth.
4.4
Checking the fuel level and topping up
1.
Unscrew the fuel tank cap (A4).
2.
Visually check the level of fuel.
3.
If necessary, fill the fuel tank using a funnel, taking care not to spill any fuel.
Do not overfill the tank; there should not be any fuel in the filler neck.
4.
Screw the fuel tank cap back on.
5.
All traces of fuel should be wiped off with a clean cloth.
4.5
Starting the generating set
Once the daily checks have been performed and having read the safety instructions carefully:
1.
Pull the starter-recoil reel (A5) once until it engages, then allow it to gently return.
2.
Then pull the starter-recoil reel quickly and sharply until the engine starts.
3.
If the unit does not start, repeat the operation until it starts up.
4.
Wait until the engine temperature starts to rise before using the unit.
1
2
14/218
Содержание SDMO DIESEL 4000 C5
Страница 2: ...A 11 2 7 STOP 1 3 4 5 8 9 10 12 6 13 14 ...
Страница 3: ...B C 2 1 4 5 6 3 1 3 2 ...
Страница 4: ...D FRANCE 0 806 800 107 Prix appel 5 2 1 3 4 ...


