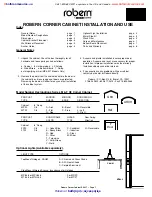


Robern Corner Cabinet SS437 • Page 3
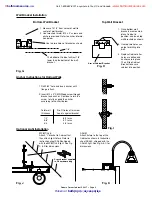
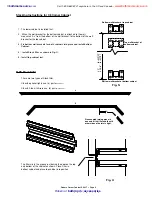
This bracket is only for side mirror
kit, and is attached from inside the
Cabinet at these two points. Using
two
#
10 x
3
/
8
” self threading
machine screws.
These two holes in the bracket,
will line up with predrilled holes in
the Cabinet.
This bracket hole will line up with an
already installed screw. Remove
screw and place bracket in position
then replace screw.
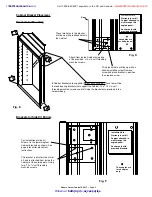
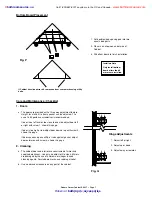
Cabinet Bracket Placement
Brackets for Mounting
8 Cabinet Brackets are supplied. Install Four as shown. These four will be
the load bearing brackets that support the Cabinet. The
#
10 x
3
/
8”
self
threading machine screws used for fixing the brackets are provided in the
hardware bag.
These holes are
for shelf pins
only.
These holes are
for shelf pins only
Door
For Installation of side Kit
Mirrors, fix the remaining four
Cabinet brackets as shown. See
page 5 for mirror placement
instructions.
Installers Note
Attach from inside Cabinet using one
of the provided
#
10 x
3
/
8”
self threading
machine screws.
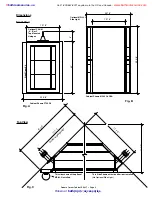
Installers Note
Warranty is void if
Cabinet attached to
wall through this
angled panel.
Anchor only with
provided brackets.
Brackets for Side Kit Mirrors
Fig. D
Fig. E
Fig. F
Warranty is void if
Cabinet attached to
wall through this
angled panel.
Anchor only with
provided brackets.
::
bathroomsource
.
com
Call 1-800-667-8721 anywhere in the US and Canada -
www.bathroomsource.com
Robern at
bathroom
::
accessories
U N L I M I T E D


