background image

1.

Prepare the Site

Flooring

NOTICE:

Adequate floor support must be provided. Consult the rough-in guide

packed with the bath for specific floor loading requirements.

Install adequate floor support.

NOTICE:

To ensure a successful installation, it is critical that the bath be installed on

a level subfloor.

Verify the subfloor is level. Adjust for level, if necessary.

Framing

CAUTION: Risk of property damage.

Do not support the bath by the rim. The

bath must be supported by the feet only.

NOTICE:

Take into account the thickness of the finished wall materials when

constructing the framing. If these factors are not taken into account, the bath will not

fit in the installation area.

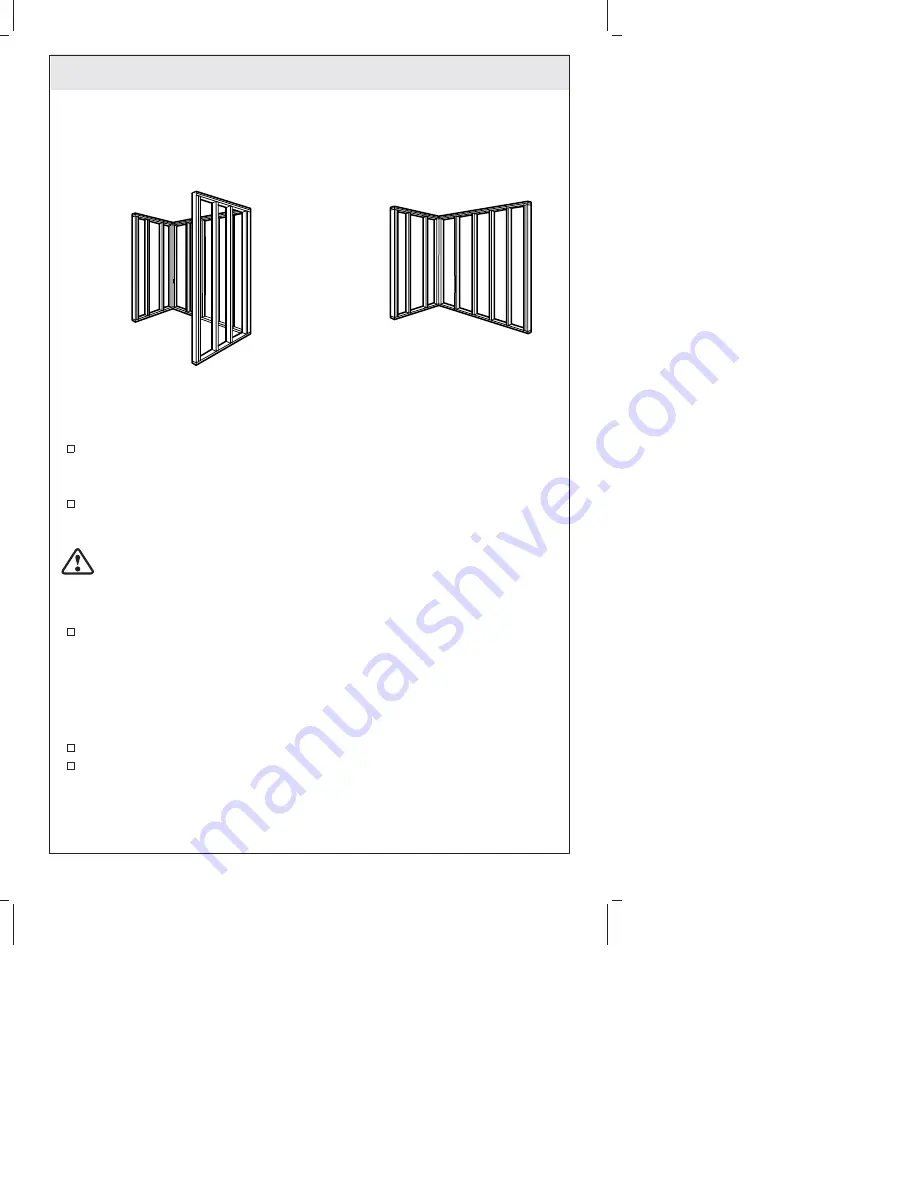
Construct the framing with 2x4 or 2x6 studs according to the rough-in guide

packed with the bath.

Plumbing

NOTE: For through-the-floor drain installations:

A drain hole will need to be cut to

accommodate the drain connections.

For corner bath drain installations:

Cut a hole

large enough to allow for diagonal positioning of the drain.

For above-the-floor drain

installations:

A hole will not need to be cut.

Position the plumbing according to the roughing-in guide packed with the bath.
Cap the supplies and check for leaks.

Corner Installation
Installation en angle
Instalación en esquina 

Alcove Installation
Installation dans une alcôve
Instalación encajonada entre tres paredes 

Kohler Co.

5

1084177-2-A

Содержание K-721

Страница 1: ...do esmaltado K 505 K 506 K 515 K 516 K 519 K 520 K 713 K 714 K 715 K 716 K 721 K 722 K 745 K 746 K 785 K 786 K 804 K 821 K 824 K 855 M product numbers are for Mexico i e K 12345M Los números de productos seguidos de M corresponden a México Ej K 12345M USA 1 800 4 KOHLER Canada 1 800 964 5590 México 001 877 680 1310 kohler com 2007 Kohler Co 1084177 2 A ...

Страница 2: ...la publication A la compagnie Kohler nous aspirons à remplir notre mission d améliorer le niveau de vie gracieux pour chaque individu affecté par nos produits et services Nous nous réservons le droit d apporter toutes modifications aux caractéristiques emballages ou disponibilités des produits et ceci à tout moment et sans préavis Veuillez prendre s il vous plaît quelques minutes pour étudier ce g...

Страница 3: ...t supplies are located on the left end of the alcove area the installation requires a left outlet bath The illustrations shown may not represent your actual product The installation instructions still apply This bath conforms to ASME standard A112 19 1 All dimensions are nominal Kohler Co reserves the right to make revisions in the design of products without notice as specified in the Price Book A...

Страница 4: ...nales Utilice equipo de protección personal y obtenga suficiente ayuda para levantar o desplazar la bañera con cuidado Las bañeras de hierro fundido son sumamente pesadas Si la bañera de hierro fundido no se levanta correctamente pueden ocurrir lesiones personales PRECAUCIÓN Riesgo de daños a la propiedad No apoye la bañera por los bordes Sólo los pies de la bañera deben soportarla Cumpla con todo...

Страница 5: ...hese factors are not taken into account the bath will not fit in the installation area Construct the framing with 2x4 or 2x6 studs according to the rough in guide packed with the bath Plumbing NOTE For through the floor drain installations A drain hole will need to be cut to accommodate the drain connections For corner bath drain installations Cut a hole large enough to allow for diagonal position...

Страница 6: ...der les connexions de drain Pour des installations de drain de baignoire en angle Découper un orifice assez large pour permettre un positionnement en diagonale du drain Pour des installation de drain au dessus du sol Un orifice ne devra pas être découpé Positionner la plomberie selon le plan de raccordement emballé avec la baignoire Boucher les alimentations et vérifier s il y a des fuites Prepare...

Страница 7: ...Place a clean drop cloth in the bottom of the bath This will prevent the surface of the bath from scratching during the installation process Préparer la baignoire AVERTISSEMENT Risque de blessures corporelles Porter un équipement de protection et obtenir suffisamment d aide pour soulever ou déplacer la baignoire Les baignoires en fonte sont très lourdes Si la baignoire en fonte n est pas soulevée ...

Страница 8: ... occur NOTE The illustration shown may not represent your actual product The installation instructions still apply For All Installations With help carefully move the bath into the installation area Connect the tailpiece of the drain to the trap Verify the bath is 1 level across the top of the bath 2 plumb along the drain side and 3 resting on all four feet If the bath is not level metal shims must...

Страница 9: ... ayuda para levantar o desplazar la bañera con cuidado Las bañeras de hierro fundido son sumamente pesadas Si la bañera de hierro fundido no se levanta correctamente pueden ocurrir lesiones personales NOTA Es posible que la ilustración mostradas no representen su producto real Las instrucciones de instalación aun aplican Para todas las instalaciones Con ayuda mueva con cuidado la bañera al lugar d...

Страница 10: ...uites Remplir la baignoire jusqu au trop plein Vérifier s il y a des fuites Instale la plomería PRECAUCIÓN Riesgo de daños a la propiedad Debe existir un sello hermético en todas las conexiones del desagüe de la bañera Este sello hermético evitará daños a la propiedad Conecte la trampa al desagüe Instale las válvulas de la grifería según las instrucciones del fabricante de la grifería No instale l...

Страница 11: ...e water resistant wall material Install the finished wall material 1 16 2 mm above the cast iron surface This will create a groove to apply the silicone sealant Rim Rebord Borde Rim Rebord Borde Rim Rebord Borde 2x4 Studding Montant 2x4 Postes de 2x4 Apply silicone sealant Appliquer du mastic à la silicone Aplique sellador de silicona Finished Deck Material Matériau du comptoir fini Material de ac...

Страница 12: ...ésistant En utilisant du mastic à la silicone sceller les joints entre le matériau hydrorésistant du mur et le rebord Poser et appliquer le matériau hydrorésistant du mur Installer le matériau du mur fini à 1 16 2 mm au dessus de la surface en fonte Ceci va créer une rainure pour appliquer du mastic à la silicone Appliquer du mastic à la silicone dans la rainure entre le mur fini et le rebord Pour...

Страница 13: ... soak on the surface Wipe surfaces clean and rinse completely with water immediately after cleaner application Rinse and dry any overspray that lands on nearby surfaces Use a soft dampened sponge or cloth Never use an abrasive material such as a brush or scouring pad to clean surfaces For detailed cleaning information and products to consider visit www kohler com clean To order Care Cleaning infor...

Страница 14: ...tion scratching staining and alkaline etching of the finish over time due to use cleaning practices or water or atmospheric conditions are not manufacturing defects but are indicative of normal wear and tear This warranty applies only for KOHLER Cast Iron products installed in the United States of America Canada or Mexico North America If a defect is found in normal residential use Kohler Co will ...

Страница 15: ...ectuer les réglages appropriés Un endommagement causé par un accident mauvais usage ou mauvais traitement n est pas couvert par cette garantie Un entretien et un nettoyage non appropriés annuleront cette garantie Une preuve d achat ticket de caisse original doit être présentée à Kohler Co avec tous les recours en garantie Kohler Co n est pas responsable des coûts de main d oeuvre d installation ou...

Страница 16: ... instalación u otros gastos incidentales o indirectos En ningún caso la responsabilidad de Kohler Co excederá el precio de compra del producto En caso de que el producto de hierro fundido sea utilizado comercialmente o instalado fuera del territorio de Norteamérica Kohler Co garantiza la carencia de defectos de material o mano de obra por un 1 año a partir de la fecha de instalación del producto e...

Страница 17: ...roduct is beyond repair without any charge to the consumer 4 The time of repair will not exceed six 6 weeks commencing on the date the product is received 5 It is recommended that the consumer save the invoice or receipt as additional protection as it may substitute the warranty in the case that there is a discrepancy in the validity of the warranty EXCEPTIONS AND RESTRICTIONS The Warranty will no...

Страница 18: ...or que conserve el recibo o factura de compra como protección adicional pues el mismo puede sustituir a la garantía en caso de que exista discrepancia en cuanto a la validez de la misma EXCEPCIONES Y RESTRICCIONES La garantía no tendrá validez en los siguientes casos 1 Cuando el producto no se haya utilizado conforme a las instrucciones de uso y funcionamiento incluidas en el manual del usuario o ...

Страница 19: ...Garantía de un año cont TEL 52 14 29 11 11 Kohler Co 19 1084177 2 A ...

Страница 20: ...1084177 2 A ...

Отзывы: