8. Clean-Up After Installation
When cleaning up after installation, do not use abrasive cleansers, as they may scratch and dull the
whirlpool surface. Use warm water and a liquid detergent to clean the surface.
Remove stubborn stains, paint, or tar with turpentine or paint thinner. Do not allow cleaners
containing petroleum distillates to remain in contact with any whirlpool surfaces for long periods
of time.
Remove plaster by carefully scraping with a wood edge. Do not use metal scrapers, wire
brushes, or other metal tools. Use a powder-type detergent on a damp cloth to provide mild
abrasive action to any residual plaster.
9. Confirm Proper Operation
Fill the Whirlpool
NOTE:
Please read these steps carefully before you operate your whirlpool.
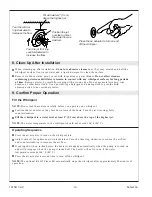
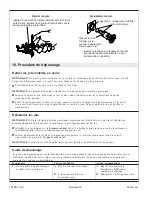
Position the jet nozzles so they face down toward the basin. Turn the jet trim rings fully
counterclockwise.
Fill the whirlpool to a water level at least 2
″
(5.1 cm) above the top of the highest jet.
NOTE:
The water temperature in the whirlpool should not exceed 104° F (40° C).
Operating Sequence
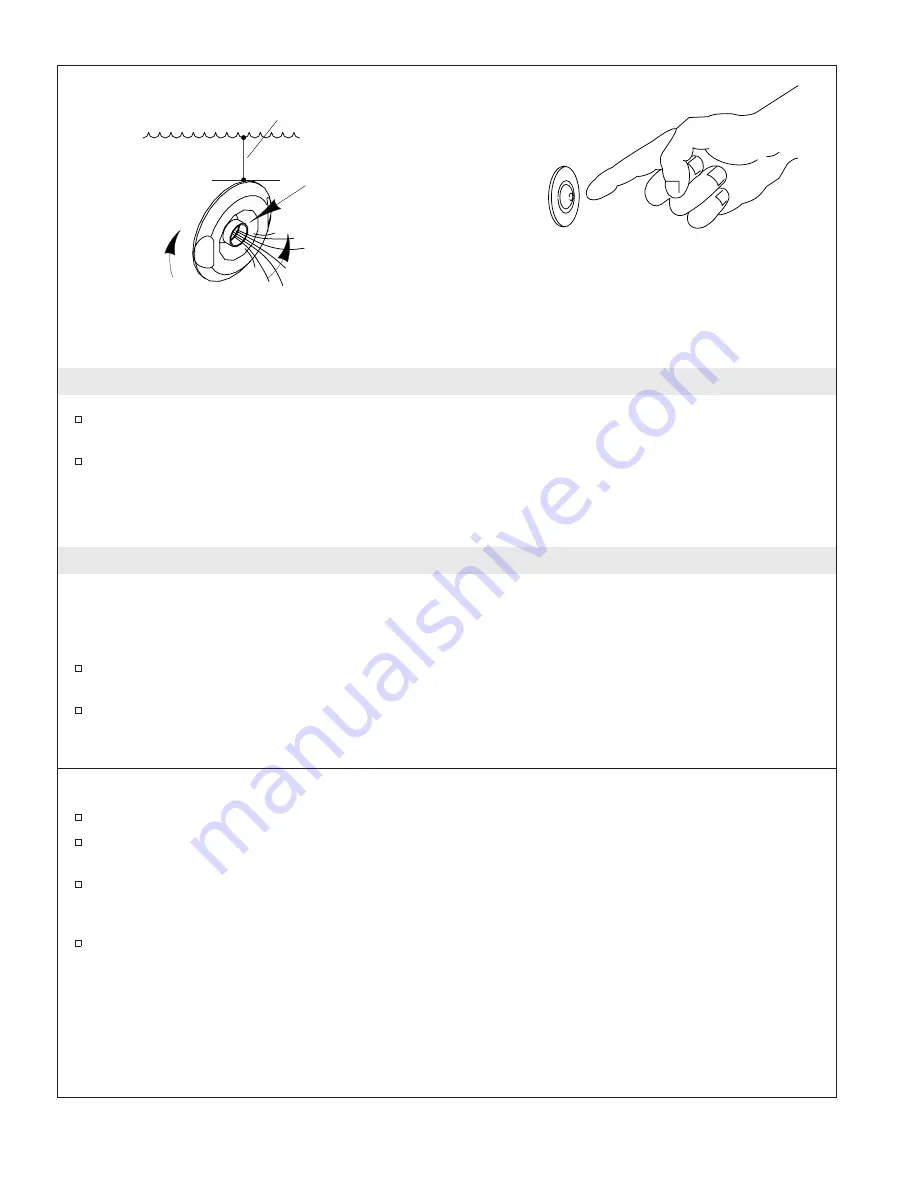
Press the air actuator to turn on the whirlpool jets.
Adjust each jet for optimum air/water mixture. Turn the trim ring clockwise to reduce the air flow,
and counterclockwise to increase the air flow.
If equipped with an in-line heater, the heater will engage automatically when the pump is turned on
and will disengage when the pump is turned off. The heater will not turn on if the water
temperature exceeds 104° F (40° C).
Press the air actuator a second time to turn off the whirlpool.
NOTE:
The optional K-1639 Timer Kit automatically stops the whirlpool after approximately 20 minutes of
operation.
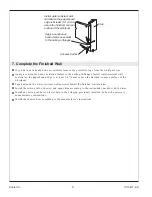
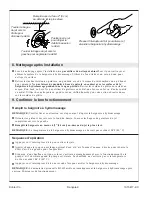
Fill with water 2" (5 cm)
above the highest jet
Turn the jet trim
ring clockwise to
decrease the flow
Position the jet
nozzles to direct
the water flow as
desired
Turn the jet trim ring
counterclockwise to
increase the flow
Press the air actuator to turn on and
off the whirlpool
1015417-2-C
10
Kohler Co.


