background image

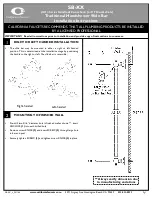
Push top of column
into jamb assembly

until it locks in place

PROCEED TO

STEP 47

Support the weight of the column. Connect

the water pipe to the connector from

at the top of the column.

Plug the electrical cable into the connector

from the Water Delivery System at the top

of the column.

Caution

Carefully lift the Water

Delivery System column

and place the bottom

into the jamb assembly

Be very careful not

to scratch or damage

the tray

Slider Rail Water Delivery Only

(See Step 42 for the Fixed Head Water Delivery)

Place the cable in the

suppression ferrite. Wrap

the cable around the cover

and through the ferrite

again and then close the 

cover until it snaps shut

Fit the Suppression Ferrite close to

the Water Delivery connector

Note:

The Suppression Ferrite is packed with the

Digital Mixer

Fit the fixed roller to the tray on the same side as

lintel wall fixing.

Note: The seal ‘A’ on the glass panel will need

to be pulled away, to allow the roller to be fitted,

and re-fitted afterwards.

Push the roller onto the slot in the tray until it

locks in place ensuring the plastic glass

guide is retained inside the roller body 

16

CFI230G

13

CFI230G

STEP

29

Fit the blanking cover on the other side

of the tray.

Note: The seal ‘A’ on the glass panel will need

to be pulled away, to allow the cover to be fitted,

and re-fitted afterwards.

STEP

28

STEP

26

STEP

27

STEP

38

STEP

40

STEP

39

STEP

41

A

Carefully lift door into the enclosure

Important:

 Requires a minimum of 2 people

Caution

Push the door stop vinyl into the track and

against the fixed roller

Содержание CFI230G

Страница 1: ...ra Magna Shower System 646 Fitting Instructions 1 2 3 4 1 2 3 4 Slide Rail Fixed Head Kohler Daryl Limited Alfred Road Wallasey Wirral CH44 7HY England Tel 44 0 151 606 5000 Fax 44 0 151 638 0303 www...

Страница 2: ...olumn box The Shower Enclosure is subject to the Daryl Showering Lifetime Guarantee and for the Shower System the Mira Showers 5 year guarantee applies Please refer to the Guarantee Registration Docum...

Страница 3: ...r Daryl Glass Treatment and Daryl Glass Protector Available in one care kit the Treatment and Protector are used on new or existing shower installations where Protector has not already been applied an...

Страница 4: ...ith a pH value of 4 to 8 applied with a soft cloth Under no circumstances should scourers or powerful detegents be used as these can damage the metallic surface of the frame and also tarnish the glass...

Страница 5: ...ctrical supply isolated or fuse blown Digital Mixer Valve breakdown Spray plate assembly blocked Hose blocked or twisted A small amount of water may be retained in the shower fitting after the shower...

Страница 6: ...of the glass panel fits into slot A on the tray The wall channel end sits on the flat section of the tray B A B Handset Adjustment To adjust the height of the handset press the release button A and sl...

Страница 7: ...tart Soothe and Massage and an Eco setting To adjust the spray setting turn the spray plate as follows 1 Start Water flows from the outer set of holes To select the Start setting turn the spray plate...

Страница 8: ...r To Operate the Shower 1 Press the Low Medium or High flow push button 2 Water will come out of the handset at the desired temperature 3 To alter the showering temperature turn the temperature contro...

Страница 9: ...STEP 17 Take care not to damage pipe and cable protruding from wall The lock mode may be activated when the unit is OFF in which case the unit cannot be switched ON unless the mode is cancelled as ab...

Страница 10: ...d momentarily hold the Warm Up and High keys at the same time Release the push button and reselect within 2 seconds The two keys will flash twice and beep three times to confirm the selection is succe...

Страница 11: ...EP 22 Note The lintel is supplied as a RH unit For LH versions loosen the panel clamps and turn them through 180o Ensure glass panels are parallel to each other Loosely fit the parking block into the...

Страница 12: ...screw B on each panel clamp until it grips the glass IMPORTANT DO NOT OVER TIGHTEN Fit caps to lintel C A B Remove the lintel from glass and remove the parking block 1 Match parking block to mark on...

Страница 13: ...he Suppression Ferrite close to the Water Delivery connector Note The Suppression Ferrite is packed with the Digital Mixer Fit the fixed roller to the tray on the same side as lintel wall fixing Note...

Страница 14: ...ller and plastic glass guide Caution Whilst supporting the weight of the door slide the bottom roller into the bottom track Caution 14 CFI230G 15 CFI230G STEP 32 STEP 33 STEP 31 STEP 35 STEP 37 STEP 3...

Отзывы: