background image

Using the features

EN-27    Digital LED LCD Television Instruction Manual 

 Note

If this is not the first time the USB has been used to 


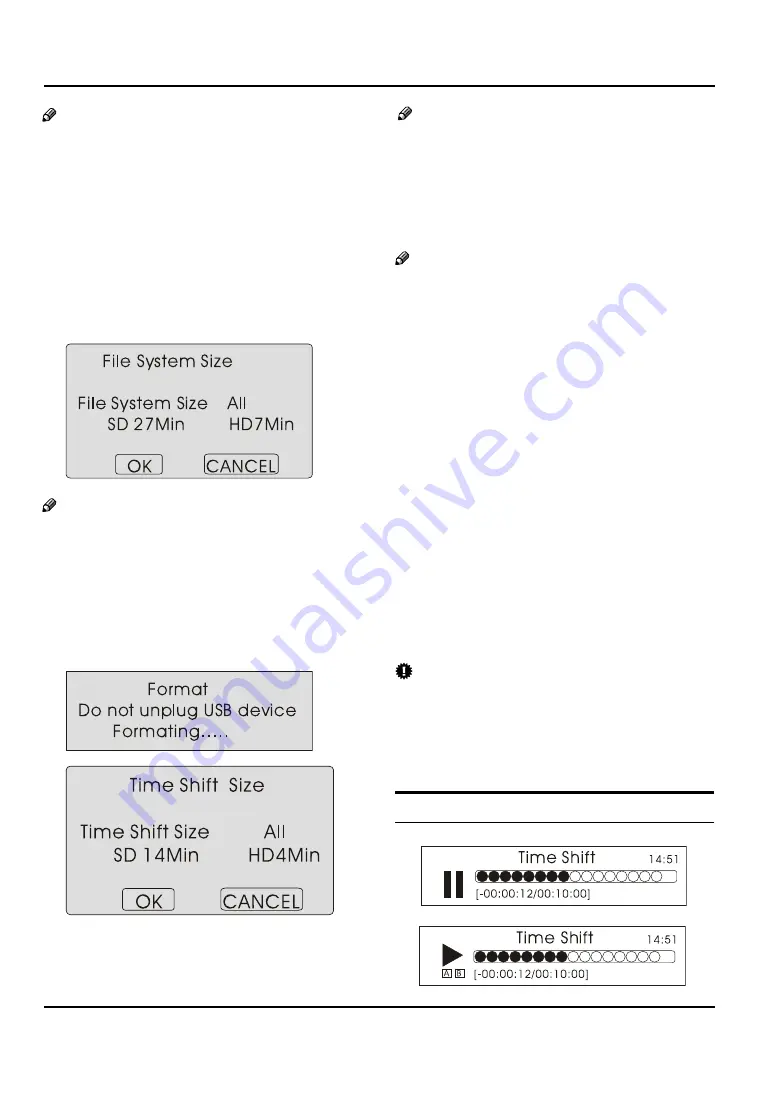
record you can check the device Time Shift size and 

speed by selecting Check File System.  
Press 

5 

buttons to select Check File System, 

press the OK button and after a short delay the 

on screen display will show Time Shift size, the 

streaming speed and the picture standard, either 

HD, SD or REC. For first time use of the USB device:

Press 

5 

button to select Format and press 

4

to 

enter. Press 

34

button to select the size you wantto 

format. Press OK button to format the USB Disk.

 Note

The system will format the whole device and if your 


device size is bigger than 1 GB, you can set the size 

which is used for time shift.

Format may take several minutes and the time 

isdepending on the memory size. Press

34

buttonto 

select the Time Shift Disk Size. The max device sizefor 
Time Shift is 8GB. Then, press OK button to save.

   Note

If you select all the size format for time shift, you 


cannot do any recording

Waiting for the system to finish checking.You can 

seethe speed data displayed on screen after the 
checking is completed.

 Note

You only have to format when you use the device 


for  recording for the first time.

The minimum device size for record is 1GB. 


Providedevice formatting function is up to 2TB. 

The maxMulti-Partition is 16 partitions and one is 

active ata time.

Bit rate:


Device bit-rate>4.5MB/s REC is is good at HD 


streaming speed.

Device bit-rate>1.5MB/s REC is good at 


SDstreaming speed.

Device bit-rate<600KB/s REC is bad for REC.


Keep all cables as short as possible the keep 


streaming speed as high as possible.

The system cannot work normally if the USBdevice 


has the problems listed below:

The device has bug.


The device has error block.


The device size less than 1GB or exceeds the 


Time Shift maximum.
The device is not FAT32 format


 IMPORTANT

The USB device should be formatted as FAT32 


format. This can be done by your PC (refer to PC 

software instructions for formatting a device to 

FAT32 format) before inserting the USB device into 

the USB Port.

TIME SHIFT

Содержание KGNFHDLEDH32VA

Страница 1: ...KGNFHDLEDH32VA USER MANUAL...

Страница 2: ...XTERNAL SOURCE OTHER THAN THE TV 12 AUTO SEARCH 12 DIGITAL MANUAL SEARCH 12 Analog Manual Search 12 Channel Edit 13 RENAME 13 MOVE 13 Setting favourite channel 13 SKIP 13 GUIDE Electronic Program Guid...

Страница 3: ...r Used when wall mounting the TV Now you can get started IMPORTANT INFORMATION READ ALL INSTRUCTIONS BEFORE USE AND KEEP FOR FUTURE REFERENCE WARNING To avoid fire or electric hazards never place your...

Страница 4: ...Safety Warningss EN 3 Digital LED LCD Television Instruction Manual If fixing TV to the wall please make sure unit is securely fixed or close to any heat sources al...

Страница 5: ...nual EN 4 Do not Do not kept Unplug the TV if you are going to clean the product use soft fabric never chemicals make sure that no water drops are in the product Always make sure the TV is securely pl...

Страница 6: ...table We suggest that you place the wrapping material from the TV package on the table top to protect the screen from damage 2 Position the stand with the bottom of the TV as shown below 4 Attach the...

Страница 7: ...racket not supplied to the back of the TV using 4 x 4mm screws not supplied Fit the TV to the wall referring to the wall mounting manufactures instructions WARNING Take secure when fitting the TV to t...

Страница 8: ...confirm selection 4 CH5 Touchtochangechannels Note Touchtomovetheon screenselectionup ordownwhenSourceisselected 5 Touch to turn theTV On and again to Standby HDMI 1 IN USB DIGITAL AUDIO OUT OPTICAL A...

Страница 9: ...OK button L Cursor Mover button M Back button only for USB N Exit Screen Display O REPEAT only for DVD USB CANCEL button P Zoom only for DVD USB Teletext index only forTV REC index Q Play Pause butto...

Страница 10: ...s if there is noise present F change the VGA mode to another resolution change the refresh rate to another rate or adjust the brightness and contrast on the menu until the picture is clear CONNECT A D...

Страница 11: ...AAA 1 5V batteries Do not mix battery types Install the batteries at the correct polarities Do not use rechargeable batteries If your TV is to be stored for a period of time remove the batteries from...

Страница 12: ...RCE OTHER THAN THE TV If you have attached a DVD player or similar external device to the TV you will need to tell the TV to display the content from it Simply press SOURCE which will bring up the sou...

Страница 13: ...sed to select the lower frequency channel And then select Storage To press E 34 button to select the position number you want the channel on Once a channel is located you can press red button to save...

Страница 14: ...on to select the position Press B 56 button to select the number position you want to remove to press yellow button to confirm You can press the C EXIT button to cancel the changes at anytime Setting...

Страница 15: ...Common Interface slot Insert the CAM correctly then Smart Card to the CI A slot that is located at the side of the TV CI Slot CAM Smart Card Turn on the TV and it will display the below message B if...

Страница 16: ...n to upgrade Or else the TV will go back to the DTV source Load the receiver identification This process may G also take several minutes You can press EXIT button to cancel the download and your TV se...

Страница 17: ...icture Colour This will adjust the saturation level of the colours to suit your personal preference Sharpness This will adjust the sharpness of fine details in the picture Tint Allows you to select th...

Страница 18: ...omatic volume control This will reduces the differences in volume level among broadcasters SRS TS XT This will control the Woofer output Press button to select SRS TS XT Press 34 button to set SRS TS...

Страница 19: ...1 when you want to view the picture without any alteration However the top and bottom portions of the picture will be cropped Zoom2 Choose Zoom2 when you want the picture to be altered both vertically...

Страница 20: ...ff the TV in ATV mode then turn on the TV Off Time Press A MENU button Press B 34 button to select Time menu press button to enter Press C button to select Off Time item press button to enter setting...

Страница 21: ...on to set On or Off mode If lock on mode is set Child Lock is in activated automatically In such case if the buttons on the television is pressed the screen will display Child Lock which will disappea...

Страница 22: ...n to select OFF or 4 18 to limit the age of children who will watch TV Clear Lock Press 56button to select Unlock mode Press 34 button to unlock all set modes setting all lock options to off and the m...

Страница 23: ...nd When you need to pay attention to surrounding sounds or there is a telephone call or there are some guests visiting you the sound elimination mute function is very convenient Press the A MUTE butto...

Страница 24: ...us page Page number entering To select a Teletext page enter the page number using the numeric key pad on the remote control or use the P or P buttons or the coloured Fast text buttons Mix mode To vie...

Страница 25: ...e above mentioned file system To achieve smooth playing ensure the following C The file code rate should be lower than 300KB S Due to the limitation of USB signal transmission distance it is recommend...

Страница 26: ...e picture file list Press C 5 6 to select the picture you want to play press OK to confirm and then press PLAY PAUSE button to play the pictures If you want to pause the picture which is being D playe...

Страница 27: ...e text file list Press C 5 6 and OK button to select the text you want to play and then press PLAY PAUSE button to play the text Press PREV NEXT to select the last or next text Toexit the Text D mode...

Страница 28: ...ote If you select all the size format for time shift you cannot do any recording Waiting for the system to finish checking You can H seethe speed data displayed on screen after the checking is complet...

Страница 29: ...g being played For Playback of the recorded program Press C INDEX button to open the recorded list Press 56 button to select the content you recorded Press the 4 button to display the program informat...

Страница 30: ...re in some channel Verify if correct channel is selected Adjust the antenna No color for some channel program black and white Verify if the same problem exists in other channels Check out of picture a...

Страница 31: ...ND 83CREWS FOR 46 STAND OMPONENT ADAPTER OMPONENT AUDIO ADAPTER 3 24 ADAPTER OVER BOTTOM 8W 8W 4FF SBUJOH QMBUF 4FF SBUJOH QMBUF 41 5 0 PC DVI Audio input 5IF QBSU TQFDJmDBUJPOT PG UIJT 57 TFU QSPWJEF...

Отзывы: