background image

<                                                >

PVR File System

OSD Language English

OPTION

Audio Languages 
Subtitle Languages
Country Australia 

Restore Factory Default

Check PVR File System Start

USB Disk

Format

Time Shift Size

Speed

Free Record Limit 6 Hr.

Select Disk                    C:

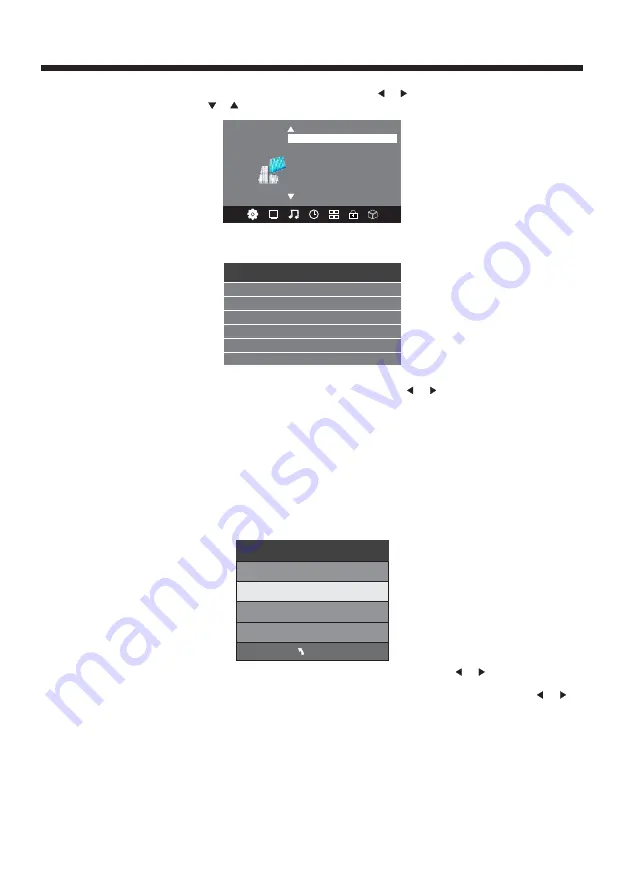
In PVR File System Menu  you will be asked to format your USB Disk or Hard Disc for PVR Operation.

Select Disc
To view and select the USB file or the allocated space on your Hard Disc that you would like to record to,
press OK button to enter the  Select Disc Sub- Menu and then press    or    buttons on your remote control 
to select the particular partition/file for recording. 
Press the Menu Button to return to the Main Menu.

Check PVR File System
Press the OK Button to start checking the file system of your USB storage or Hard Disk. Once Success
is shown after checking, you will then be able to begin recording or or use Time Shift function. If FAIL is 
shown after checking, you then need to format your USB or Hard Disc and to be able to record or use 
Time Shift.

Format 
When you format your USB or  Hard Disc partition any saved data will be lost. Please ensure 
that you start with a blank partition on your Hard Disc to ensure you don't lose any data. 

PVR File System Type 
There are two types of format s:  FAT32 and Hi Speed Format.  You can press    or     buttons to choose 
the type of formatting. If  FAT32 is selected, you will have to format whole size of your USB or the 
allocated partition for recording. If Hi Speed Format is selected, you will then be able to press    or     
buttons to select the size you wish to use (for example 1G, 10G, 20G... or All). Once a particular size is 
booked for recording, you will be able to use the remaining space of your USB or Hard Disc for other data 
storage. 
Please note no matter which size is booked for recording, all the data in the allocated partition of the 
Hard Disc will be lost after formatting. 

Speed
This will show the supported speed of recording.  

Record Limit
This will show the approximate time you will be able to record on to  your USB or Hard Disc.

File System Size

PVR File System Type                  FAT32                                     

                                                        MENU

PVR File System Size                   All                             

SD 13 Mins

HD 3 Mins

-15-

OPERATION

5.OPTION MENU

To enter the Option Menu, press MENU button and then press    or    buttons to select the Option Menu. 
Once in Option Menu, press    or     buttons to select the settings you wish to adjust. Press MENU button 
to return to the Main Menu. 

NOTE:
Restore Factory Default will clear all the programs and password.

Содержание KALED26DVDYA

Страница 1: ...KALED26DVDYA USER MANUAL ...

Страница 2: ...INGS 2 4 BASE STAND 5 INSTALLATION 6 9 REMOTE CONTROL 10 11 OPERATION 12 17 DVD OPERATION 18 21 DVD TROUBLE SHOOTING 22 TROUBLE SHOOTING 23 TECHNICAL SPECIFICATIONS 24 ASSEMBLY INSTRUCTION WALL MOUNTING INSTALLATION GUIDELINES 5 ...

Страница 3: ...sconnect the television quickly Please keep the power plug easily accessible 14 The ventilation should not be impeded by covering the ventilation openings with items such as newspapers table cloth curtains etc 15 No naked flame sources such as lighted candles should be placed on the apparatus 16 This device is not suitable for use in unreasonably hot cold or humid environments 17 The apparatus sha...

Страница 4: ...attention to children Serious injury may result if it falls Do not place your television on an unstable cart stand shelf or table Serious injury to an individual and damage to the television may result if it falls When the television receiver is not used for an extended period of time it is advisable to disconnect the AC power cord from the AC outlet Avoid exposing the television receiver to direc...

Страница 5: ...eration KOGAN bears no responsibility for improper mounting that results in accident or injury This television can be wall mounted as follows 1 Place the LED LCD Television face down onto a solid surface Please place some soft material over the front of the screen to protect it from any damage The LCD panel is a fragile component and must be suitably protected when removing the base stand Be sure ...

Страница 6: ... the sound level In MENU mode press VOL or VOL to adjust the item that you have selected 5 STANDBY Once the TV s main power switch has been activated press this button to turn the unit ON from STANDBY mode Press it again to return the set back to STANDBY 30 30 1 Remote control sensor 2 Indicator LED BLUE POWER ON RED Stand by 3 Key board on side of TV 4 Main Power Switch on bottom rear of TV SOURC...

Страница 7: ...t composite video and audio SIDE AV Connections All the terminals are from left to right USB HDMI2 input HDMI1 input Headphone output PC Audio input VGA input Note When receives a DVI signal the matching audio signal is received from the PC Audio input Antenna socket HDMI1 HDMI2 Plug not supplied Outdoor antenna not supplied For optimum digital TV reception the use of high quality shielded 75 coax...

Страница 8: ... 31 47 35 156 37 88 48 08 48 36 56 48 RESOLUTION V Freq Hz H Freq kHz STEPS Be sure both the TV and computer are set to Power off 1 Connect a VGA and audio cable 2 Connect the power cord 3 Power on the TV switch to PC mode 4 Power on the PC This connection and power up sequence is very important VGA and audio cable not supplied ...

Страница 9: ... YPbPr can support these video formats 480i 576i 480p 576p 720p 1080i Use an HDMI connection to support 1080p operation component video Yellow video White audio L Red audio R or Pr Y W R W R G B R Blue Pb Green Y B G VIDEO EQUIPMENT with YPbPr W R G B R W R W R TO AUDIO OUTPUTS VIDEO EQUIPMENT TO VIDEO OUTPUTS HDMI Y Pb Pr R L VIDEO R L VIDEO AV OUTPUT Y Y W R W R TO AUDIO INPUTS VIDEO EQUIPMENT T...

Страница 10: ...s index 25 MENU INFO During DVD playback press MENU to display the disc menu of the current title During VCD SVCD playback press MENU to control PBC ON OFF In DTV mode used as info In USB playback mode provides control tab at bottom of screen 27 Press to display and select the available video input sources 28 EXIT To return to the previous menu or exit menu 29 CH CH To access the next or previous ...

Страница 11: ...age acquisition The indication appears top left To freeze the page To display or hide the concealed information games solutions The user can set four favourite pages to be directly linked to the four color keys While list mode is activated it is not possibility to use TOP or FLOF navigation with the colourkeys The favourite page numbers should be stored and restored to from nonvolatile memory for ...

Страница 12: ...e USB Software Update OAD off Dansk Deutsch Hrvatski Italiano Please select an OSD Language OK Magyar Nederlands Norsk Polski English Cesky E ka Espanol Fran ais Portugues Pycck Austria Belgium Country OK Australia Croatia Finland Greece Luxembourg Czech France Hungary Netherlands Bulgaria Denmark Germany Italy Tune Type DTV ATV MENU Austria Belgium Australia Croatia Czech Bulgaria Finland France ...

Страница 13: ...ove Skip or FAV most TV programs 13 Rename You can only rename ATV programs Move the cursor to the program press the teletext green button to rename the program Press to choose the character Press to move the cursor Press MENU button to exit edit Press EXIT to exit the menu Note ATV program names can only be 5 characters long DTV program names can be up to 25 characters Press to choose the program...

Страница 14: ...1 Tint is available in NTSC system only 2 There are four color temperature modes that can be selected medium warm cool user 3 The Screen option is only available in PC mode which allows you to adjust Horizontal position vertical position size and phase 3 SOUND MENU The third item of the MENU is the SOUND MENU You can adjust the sound effect here such as treble bass balance etc Press to move press ...

Страница 15: ...lank partition on your Hard Disc to ensure you don t lose any data PVR File System Type There are two types of format s FAT32 and Hi Speed Format You can press or buttons to choose the type of formatting If FAT32 is selected you will have to format whole size of your USB or the allocated partition for recording If Hi Speed Format is selected you will then be able to press or buttons to select the ...

Страница 16: ...66 Please set a new password so it is easy to remember Follow the on screen steps to set Set Password Lock System LOCK Block Program Parental Guidance Off 7 USB MENU To enter the USB Menu press MENU button and then press or buttons to select the USB Menu This is where you will be able to view and play various low data rate USB media files USB DMP The supported formats are as below Photo JPEG Press...

Страница 17: ... channel you are currently watching as well as programmes in the near future 28 Apr 04 39 800 SZTVM01 No Information 801 SZTVM02 802 SZTVM03 803 SZTVM04 804 Date No Information No Information No Information No Information PROGRAMME GUIDE TIME Schedule INFO Remind OK INDEX 2 Press the teletext yellow key to list all the reminder schedule press to choose the list press red key to delete the schedule...

Страница 18: ... intellectual property rights Use of this copyright protection technology must be authorized by Rovi Corporation and is intended for home and other limited viewing uses only unless otherwise authorized by Rovi Corporation Reverse engineering or disassembly is prohibited The product complies with the KODAK Picture CD format and will display KODAK Picture CDs The KODAK Picture CD Compatible logo is ...

Страница 19: ...n provides the preset subtitle language Audio Select the built in disc dubbing language options DVD Menu This option provides the film s menu language options VIDEO SETUP Select Video in the setup menu and display the Video submenu SYSTEM SETUP Aspect Ratio Select the aspect ratio Notes TV System Select a different TV system The image display ratio is related to the recorded disc format Some discs...

Страница 20: ...elect the mode press LEFT Direction key to directory and press ENTER OK to choose the desired track and press Add to program and press Program view and press the Edit mode to cancel the edit mode At last press Left key to display program track and press ENTER OK to start program playback Program view Display program track Browser view Display track directory Add to program Choose the track press A...

Страница 21: ...ying with PBC off press the 0 9 keys to select a track directly 17 AUDIO Changes the audio language or audio channel 19 A B Press to repeat a segment of the disc you are watching between A and B DVD mode Function Buttons 20 DVD SETUP Press the button to enter the system setting menu Press the button again to exit the menu 21 PREV During DVD CD MP3 or VCD playback press PREV to play the previous ch...

Страница 22: ... then turn it on again NO DISC DISPLAYED Ensure you have put the disc in the slot Ensure the disc is not upside down the silver data side should be facing you when viewed from the front of the TV Ensure the disc is not distorted stained or scratched Ensure you have set the player s AUDIO settings correctly PICTURE BUT NO SOUND Ensure the audio is not set to mute POOR PICTURE OR SOUND Ensure you ha...

Страница 23: ...ed or if the audio system connections are not correct No picture Mute Mains Power cord Mains Power switch is not activated Contrast and brightness volume setup Press Power Stand by key on the remote control is not inserted No colour Normal audio Colour control Picture breaking up Normal audio or weak retune channel No colour Noise TV system Normal audio antenna position direction or connection Tro...

Страница 24: ...omponent video Input VGA Input Audio L R Input Digital TV DVB T Analog TV PAL SECAM Audio MPEG2 Audio Layer I II Video MPEG2 Transport MP HL Demodulator COFDM OFDM Mod 2K 8K FFT SFN and MFN Packed Carriers 2K 8K Guard Interval 1 4 1 8 1 16 1 32 Viewing Picture Size diagonal Input Power Voltage 100V 240V 50 60Hz 2 x 3W Audio Output Power THD 7 PC Audio Input 1 Audio L R Output 1 Power consumption 5...

Отзывы: