background image

VinylJet 36

TM

Printer Reference Guide

Text P/N 219476-1

Copyright © Eastman Kodak Company, 2002

N

OVA

J

ET

®

, KODAK

®

, ENCAD

®

, CadJet

®

, Extreme Color Printing™, VinylJet™,

and Quality Imaging Supplies™ are trademarks of Eastman Kodak Company.

Other trademarks are the property of their respective owners.

Except as provided below, no part of this manual may be copied or distributed,
transmitted, transcribed, stored in a retrieval system, or translated in any human
or computing language, in any form or by any means, electronic, mechanical,
magnetic or otherwise, or disclosed to a third party without the express written
permission of Encad, Inc., 6059 Cornerstone Court West, San Diego, CA 92121,
U.S.A.

Certain manuals are distributed by Eastman Kodak Company in an electronic
format on CD-ROM or over the internet.  The registered user of a KODAK or
ENCAD product whose manuals are distributed in this fashion may print one
copy for their personal use only.

Revision History

Beta    September 6, 2002

Содержание Printe

Страница 1: ...bed stored in a retrieval system or translated in any human or computing language in any form or by any means electronic mechanical magnetic or otherwise or disclosed to a third party without the express written permission of Encad Inc 6059 Cornerstone Court West San Diego CA 92121 U S A Certain manuals are distributed by Eastman Kodak Company in an electronic format on CD ROM or over the internet...

Страница 2: ...y other damages or claims whatsoever This Warranty gives Buyer specific legal rights and Buyer may also have other rights that vary from state to state This Warranty applies only to printers purchased from ENCAD or authorized ENCAD distribu tors or dealers The intent of this Warranty is to repair or replace defective Products subjected to normal wear and tear when operated according to ENCAD instr...

Страница 3: ...llowing measures Reorient or relocate the receiving antenna Increase the separation between the equipment and receiver Connect the equipment into an outlet on a circuit different from that to which the receiver is connected Consult the dealer or an experienced radio TV technician for help Changes or modifications not expressly approved by ENCAD could void the user s authority to operate the equipm...

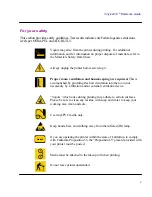
Страница 4: ...ntact their local dealer or distributors General operating safety The use of a HAR cord set rated 10A 250VAC with the proper plug configuration for the country where the device will be used is required for continued safety compli ance Ein harmonisiertes HAR Netzkabel min 10A 250V mit dem vorgeschriebenen Netzstecker für das entsprechende Land in dem das Gerät installiert wird ist unbedingt notwend...

Страница 5: ...s is accomplished by providing fresh air circulation into the room not necessarily by a filtration and or external ventilation device Vapors which arise during printing may adhere to certain surfaces Please be sure to clean any residue with soap and water to keep your working area clean and safe Use vinyl PVC media only Keep hands hair and clothing away from the infrared IR lamp If you are operati...

Страница 6: ...r suggestion that can make using the printer easier or improve your printed images Other reference materials In addition to this guide the following additional documentation is included with your printer Quick Start Guide Tells you how to attach the printer stand load media install car tridges and connect the printer to your computer CD ROM contains the following Documents EFPU Guide Reference Man...

Страница 7: ...lor mode 2 2 Choosing quality mode options 2 2 Choosing feed media options 2 3 Media counter 2 3 Choosing paper options 2 4 Auto load delay 2 4 Save media 2 5 Auto Wipe 2 5 Defining user setup 2 5 Choosing a language 2 6 Choosing ink options 2 7 Printer default settings 2 9 Chapter 3 Printing 3 1 Chapter 4 HP GL 2 4 1 CAD printing modes 4 1 Printing vector data 4 1 Accessing HP GL 2 features 4 2 P...

Страница 8: ...nu at a glance Bold indicates the default B 3 Utility menu at a glance Bold indicates the default B 4 Setup menu B 5 Utility menu B 8 Appendix C Technical information C 1 Appendix D Error messages D 1 Cartridge errors D 1 Appendix E Troubleshooting E 1 roubleshooting quick list E 1 Isolating problems E 1 Printer health E 2 Data Transfer E 9 Application Software E 11 Calling for Help E 13 Customer ...

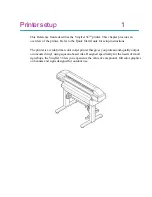
Страница 9: ... Guide for setup instructions The printer is a wide format color inkjet printer that gives you professional quality output on uncoated vinyl using aqueous based inks Designed specifically for the needs of small sign shops the VinylJet 36 lets you experience the value of exceptional full color graphics on banners and signs designed for outdoor use ...

Страница 10: ...er for an up to date listing If your applications do not support HP RTL there are several software utilities available to convert various raster file formats TIFF GIF BMP etc into HP RTL Obtaining quality results You have probably seen a demonstration of your printer s capabilities or sample output If so you are aware of the superb color graphics which can be obtained on uncoated vinyl media Note ...

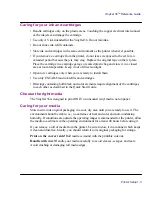
Страница 11: ...artridges Drawings containing both black and color elements require alignment of the cartridges to each other as described in the Quick Start Guide Choose the right media The VinylJet 36 is designed to print ONLY on uncoated vinyl media not on paper Caring for your media Store media in its original packaging in a cool dry area until you are ready to use it The environment should be stable i e no e...

Страница 12: ...e areas of color always choose one of the enhanced printing modes Enhanced or Best Use the right software The quality of the software driver or the RIP can be very important especially when printing continuous tone images Error diffusion or stochastic screening algorithms can yield photo like images even when these images are scaled to full size Software without advanced imaging features may produ...

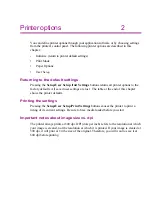
Страница 13: ...ts All saved user settings are lost The table at the end of this chapter shows the printer defaults Printing the settings Pressing the Setup User Setup Print Settings buttons causes the printer to print a listing of its current settings Be sure to have media loaded before you start Important notes about image size vs dpi The printer always prints at 600 dpi DPI dots per inch refers to the resoluti...

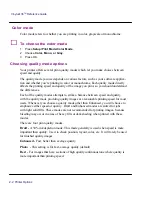
Страница 14: ...nce between speed and quality with the quality mode providing quality images at a reasonable printing speed for most users Whenever you choose a quality mode other than Enhanced you will choose to emphasize either speed or quality Draft and Enhanced modes are suited for jobs with light solid fills These modes are not recommended for printing images because bleeding may occur in areas of heavy fill...

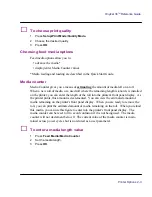
Страница 15: ...ter the length of the roll into the printer s front panel display As the printer prints this amount is decremented You can view the estimated amount of media remaining on the printer s front panel display When you are ready to remove the roll you can print the estimated amount of media remaining on the roll When you reload this media you can use this figure to enter into the printer s front panel ...

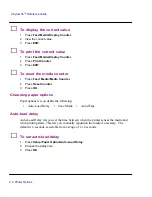
Страница 16: ...a Media Counter 2 Press Reset Counter 3 Press OK Choosing paper options Paper options let you define the following Auto Load Delay Save Media Auto Wipe Auto load delay Auto Load Delay lets you set the time between when the printer senses the media and when printing starts This lets you manually reposition the media if necessary The default is 6 seconds selectable from a range of 1 12 seconds To se...

Страница 17: ...problem by setting the wiper to OFF however this can cause clogging of the inkjets To turn off the wiper 1 Press Setup Paper Option Auto Wipe 2 Choose Off 3 Press OK Defining user setup You can save the options you use most frequently so you don t have to reconfigure the printer each time you print an image You can define up to eight different combinations of options and save them with a user numb...

Страница 18: ...Italian Portuguese Spanish traditional and simplified Chinese Japanese and Korean To choose a language 1 Press Setup User Setup Language 2 Choose the language to display 3 Press OK Printing the settings Pressing the SetupMenu User Setup Menu Print Settings buttons causes the printer to print a listing of its current settings and configuration Be sure to have media loaded before you start Returning...

Страница 19: ...Ink options let you define the following Ink reduction Ink Preheat Dry EOP Manual EOP Ink reduction Ink reduction lets you reduce the percentage of ink laid down by the printer This feature applies only to HPGL 2 format images vector based images and has no effect on continuous tone images It is especially useful for images with large amounts of printed area and helps to avoid bleeding or oversatu...

Страница 20: ...settings to accommodate the new ink type Only the default setting is recommended However if you are working in a cold or dry environment try turning the heat up for a larger dot size If the heat is turned up too far the ink may run or sputter Settings which are too low may result in reverse ghosting If you are working in a humid or hot environment turn the heat down for a smaller dot size Generall...

Страница 21: ... TO 8 UNITS SELECT ENGLISH METRIC LANGUAGE ENGLISH GERMAN FRENCH ITALIAN SPANISH PORTUGUESE JAPANESE TRADITIONAL AND SIMPLIFIED CHINESE KOREAN SYSTEM SETTINGS DEFAULT OTHER OPTIONS LCD CONTRAST 9 1 16 MEDIA COUNTER 0 1 500 FT DRY EOP ON OFF CALIBRATION SETTINGS DEFAULT OTHER OPTIONS DEADBAND N A 0 20 SLOW DEADBAND 0 2 2 CYAN VERTICAL 0 9 9 MAGENTA VERTICAL 0 9 9 YELLOW VERTICAL 0 9 9 CYAN HORIZONT...

Страница 22: ...rinter 4 Click Features 5 From here Page Setup and Advanced tabs allow you to adjust printer specific options for your print file Generally you should only need to set paper size and orientation options 6 Click OK then click OK again to send your file to the printer Notes about printing Print only on untreated vinyl This printer is not intended for printing on coated vinyl or other media This prin...

Страница 23: ... to cure it However this does not work at the end of a roll Vinyl media is taped to the core of the supply roll Before printing be sure there is sufficient media left on the roll to do the print and advance the entire print past the IR bulb to cure it You can determine whether there is sufficient media by choosing Feed Media Menu Media Counter ...

Страница 24: ...us factors such as your drawing application whether you re printing in color or monochrome and what type of media you re using Each print mode directly affects the printing speed and quality of the image you print so you should understand the differences Draft or Photo modes are suited for drawings with light solid fills These modes are not recommended for continuous tone printing images because b...

Страница 25: ...th further options Palette select Palette select lets you choose either the HP GL 2 or AutoCAD palette Both palettes allow 256 active colors with eight colors predefined The predefined colors for each palette are shown in the following table HP GL 2 AutoCAD Pen 0 White White Pen 1 Black Red Pen 2 Red Yellow Pen 3 Green Green Pen 4 Yellow Cyan Pen 5 Blue Blue Pen 6 Magenta Magenta Pen 7 Cyan Black ...

Страница 26: ...t override software control when sending merged raster vector data to the printer To set control 1 From the main menu choose Setup Menu HP GL 2 Options Control 2 Press Select 3 Use the up or down arrow button to display either Software or Printer 4 Press Select Rotation The printer automatically prints an image with the long side on the paper axis To better fit images and save media you can use th...

Страница 27: ...play the desired rotation angle 0 90 180 270 Auto 4 Press Select Reprints You can print up to 99 copies of a specific vector file When Reprint is set to 0 only one image is printed To make multiple prints 1 From the main menu choose Setup Menu HP GL 2 Options Reprints 2 Press Select 3 Use the up or down arrow button to display the desired number of reprints 0 to 99 4 Press Select ...

Страница 28: ... further jobs can be fitted across the page Nest timeouts are governed by the Nest Time parameter which is set via the printer s front panel If the printer runs out of memory the current nest will be printed immediately so that memory may be reclaimed for use by new plots An incompatible plot is either a non HP GL 2 plot or an HP GL 2 plot which has different job characteristics than the current n...

Страница 29: ...ter the nest To enable nesting 1 F r o m t h emai nmenu chooseSetup Menu HP GL 2 Options Nest Enable 2 Press Select 3 Use the up or down arrow button to display Nest On or Off 4 Press Select Nest time Nest time is the amount of time the printer waits for the next plot to fill the current nest The printer will begin printing whenever the printer has been idle for the speci fied time interval The ti...

Страница 30: ...ors This helps prevent bleeding The default for this option is On If you are using high quality media this option may not be needed and can be turned off To enable the ink limit 1 From the main menu choose Setup Menu HP GL 2 Options Ink Limit 2 Press Select 3 Use the up or down arrow button to display ON 4 Press Select ...

Страница 31: ...ny currently installed SIMM s install new SIMM s and replace the cover You will need a 2 Phillips screw driver to complete the procedures ALWAYS UNPLUG THE POWER CORD BEFORE BEGINNING To avoid static damage to the printer never touch the circuit board or its components without first touching the bright metal portions of the printer Static damage is more likely when the relative humidity is low If ...

Страница 32: ...l out being careful not to damage the fingers on the top To install the new SIMM 1 Insert at a 45 degree angle and slowly push the SIMM to a 90o angle until the two side clips snap into place Make sure the SIMM is fully seated 2 Carefully reconnect the ribbon cable harness to the connector on the PC board Reattach the other connectors removed earlier 3 Reinstall the right cover and top cover ...

Страница 33: ...re the default option Main menu at a glance Main Menu Load Media Cut Pause Reset Feed Media Menu Forward Media Counter Display Counter Backward Exit Setup Menu Print Mode Menu Paper Option Menu HP GL 2 Menu User Setup Menu Ink Option Menu Serial Comm Menu Exit Utility Menu Prime Menu Access Cartridge Color Calib Menu Calibration Menu Display Settings Print Settings Service Menu Exit Exit ...

Страница 34: ...Main menu Main menu Load Media moves media into or away from the platen Cut cuts media Pause provides access to further options for canceling print jobs reinitializing the printer or examining the job Reset clears the print buffer When cancelling a print first remove it from the computer s print queue then press the Reset button on the printer Feed Media Menu provides access to further options for...

Страница 35: ...HP GL 2 AutoCAD Control Software Printer Rotation 90 180 270 Auto Nesting Menu Reprints 0 99 0 Ink Limit On Off Exit User Setup Menu Select User 1 8 1 Save User 1 8 1 Units Select English Metric Language English German French Italian Spanish Portuguese Japanese simplified and traditional Chinese Korean Init Settings Print Settings LCD Contrast 1 16 9 16 is less contrast Exit Ink Option Menu Ink Re...

Страница 36: ...ime Single Start Routine Access Cartridge Color Calib Menu color vertical color horizontal Calib Print Test Calibration Menu Use Calib XY On Off Paper Axis Test Color Db Menu Open Jet Menu Paper Axis 32 00 34 00 33 00 default Display settings Print settings Service menu Calibration menu Diagnostics menu About Cartridge Info Test Print ...

Страница 37: ...cess to a further menu to select color default mono chrome or grayscale printing Quality mode provides access to a further menu to select the print mode Exit returns to the Setup menu Paper Option Menu Auto Load Delay provides access to a further menu to change the delay between when the media is positioned for loading and when loading occurs This allows users to adjust the media if necessary Sele...

Страница 38: ...etup Menu Select user provides access to a further menu to select a previously saved user configuration Default User 1 Save user provides access to a further menu to save the current printer configura tion to the selected user number Default User 1 Units select provides access to a further menu to choose the calibration units English default or Metric Language provides access to a further menu to ...

Страница 39: ...ch you want to set the preheat value Then you can set the ink preheat value for each cartridge Options are 7 off to 7 max default 0 EOP_Dry EOP End of page drying ON enables the printer at the completion of the print job to automatically advance the media at the printing speed 12 inches to fully pass the IR heater The media is then fed back into the printer at 25 of the normal reserve speed to avo...

Страница 40: ...moves the ink carriage away from the service station for installing and replacing cartridges and the media cutter Color Calib Menu provides access to further menus for printing the color calibration test pattern and for entering values determined by examining the test patterns Calibration Menu provides access to a further menu for calibration options and diagnos tics Display Settings displays info...

Страница 41: ...ets you enter the number which corresponds to the best horizontal alignment in the test pattern for C M and Y cartridges Calib Print Test prints the current heads current horizontal head to head and other calibration patterns described in the Quick Start Guide Calibration Menu Bold indicates the default Use Calib XY provides access to a further menu in which you can set this function On default or...

Страница 42: ... firmware version BROM RAM and printer size Cartridge Info provides information about the type and color of ink in each cartridge stall and the extent to which the cartridge is used Cartridge usage is displayed in milliliters The display changes in 2ml increments 300ml indicates that the cartridge should be replaced When 700ml is displayed the cartridge will stop functioning Test Print automatical...

Страница 43: ...me length x axis variation 0 2 and with y axis variation 0 06 0 024 6mm BUFFER Two 72 pin 32 bit wide DRAM sockets 32 MB standard User upgradeable to 128 MB 60 ns or faster ENCAD approved INTERFACES Bidirectional Parallel IEEE 1284 10 100BaseT optional POWER 200 240 VAC 50 60 Hz 7 amps Consumption 20 W Idle 1000 W Typical 1500 W Maximum OPERATING ENVIRONMENT 59 85 F 15 30 C 20 70 RH Non condensing...

Страница 44: ...rmation C 2 VInylJet 36TM Reference Manual DIMENSIONS Height with stand platen above floor 44 1120 mm Width 87 2209 8 mm Depth 28 710 mm Weight printer and stand 140 lbs 62 2 kg Print width 24 min to 36 max printable ...

Страница 45: ...ip on the cartridge it is not actually detecting the cartridge type Replace the cartridge if necessary Cartridge end of life attained Replace cartridge You can check cartridge status by choosing Disp Cart Info from the Service menu End of cartridge life is indicated as 700ml Unrecognized ink type Be sure the cartridge is the appropriate ENCAD cartridge for your printer model Your printer will not ...

Страница 46: ...Error messages D 2 VinylJet 36TM Reference Guide Memory Errors If the Insufficient raster memory message displays press the Reset button on the Main Menu to clear the message and abort the print job ...

Страница 47: ...then run a prime to assure that all jets fire 3 Perform a color calibration If your printer fails during any of the above steps call your ENCAD distributor dealer or call ENCAD Technical Support Otherwise continue with the steps that follow 4 Send a sample print directly to the printer through the parallel port For example on Windows 95 98 type copy b filename rtl lpt1 On Windows NT type print d l...

Страница 48: ...g from the media This is actually water vapor coming off the media as it cures This is normal Printer will not turn on Make sure the power cord is securely attached to the printer and plugged into an operat ing outlet Make sure the power switch is turned on Be sure that the grill in front of the IR bulb is securely engaged in the interlocking switch clip Printer intermittently reboots Clean and re...

Страница 49: ...ure the cutter is properly installed See Quick Start Guide TURN POWER OFF and clean the inside of the black belt using alcohol and a lint free cloth Push the carriage back and forth to access all areas of the belt Manually push the carriage all the way to the left to force the cutter to drop Turn power on If the cutter is worn replace it Carriage jams Check for media jams or blockage Be sure the s...

Страница 50: ...binding and that nothing is blocking the carriage movement Clean the top and bottom of the encoder strip using a cotton swab and distilled water let it dry completely approximately 30 minutes before trying to operate the printer Remove the cutter from the left side of the carriage and check it for visible damage Make sure cutter version 3 or newer is installed see the figure which follows 3 Check ...

Страница 51: ...as dried on it Clean service station clean cartridge again Clean cartridge electrical contacts using a cotton swab moistened with water Dry contact Do not use acetone or any other harsh cleaner as this may cause damage to the flex cable Jet may have failed Bypass the jet using the Open Jet menu available from Utility Menu Calibration Menu If that doesn t help replace cartridge Check to see whether...

Страница 52: ...e ROM file to the printer Print Quality Many of the print quality concerns can be resolved by priming cleaning and calibrating the cartridges When this is the case clean calibrate or replace is indicated with other solutions Refer to the following chapters for details Clean see Maintenance Guide Calibrate see Quick Start manual Replace see Quick Start manual No print appears Check that tape has be...

Страница 53: ... and lengthen the cartridge life Dry blot with a lint free cloth and make sure ink comes out Run the prime pattern Streak marks Clean the service station daily or more often depending on the number of prints you are running See the Maintenance Guide Clean calibrate or replace cartridges Ink is not cured properly If the IR bulb has more than 1000 hours of printing it may need to be replaced See the...

Страница 54: ...WEB site or bulletin board and download the latest Windows drivers These drivers have calibrated color tables which act as a filter to your file and make the colors come out closer to what is on your computer screen If you are using a third party RIP contact the RIP vendor to determine whether they have updated their color tables to work with ENCAD inks Image is the wrong size Be sure that your im...

Страница 55: ...peat prime Clean carriage flex cable and cartridge electrical contacts repeat prime Do not use alcohol acetone or other cleansers Use a cotton swab moistened in distilled water Use tap water if distilled water is not available Poor vertical or horizontal line quality Perform color calibration See Quick Start Guide Data Transfer Printer doesn t generate a print Be sure your printer is connected to ...

Страница 56: ...he printer hardware Check that the printer is plugged in and turned on Check that the cable is connected to the port on the printer and the port on the workstation or server Check that the cable is the correct cable and is not defective Check that hardware switches for the port are correctly set Run the demo print available from Utility Menu Service Menu Test Print to assure that the printer is fu...

Страница 57: ...server and print client make sure the printer is enabled to print requests On the print server make sure the printer is connected to the correct serial port On both the print server and print client make sure the printer is config ured properly On the print server make sure the printer is not waiting because of a fault Make sure the printer is not set up as a login terminal Application Software Is...

Страница 58: ...e printer has a resolu tion of 300 Dots Per Inch DPI To find the largest size divide 16 000 by 300 to get the size in inches 53 333 The limitation of 109 is for the size of the digital word that is sent between the application and the driver This word is 16 bits long The maximum positive value that can be placed in a 16 bit word is 32 767 Therefore by dividing 32 767 by 300 we get 109 223 Many Win...

Страница 59: ...imitations Some programs with internal drivers to print from include AutoCAD MicroStation FlexiSign Pro PosterShop CactusJet etc External printer driver RIPs are made by Pisa Fiery EFI ZenoGraphics Intelligent Systems Wasatch etc It should also be noted that this limitation is only because of the GDI limitations ENCAD printers do not have this limitation Length limitations are a function of softwa...

Страница 60: ...ost of 2 50 per minute is billed directly to your phone bill Be sure to have your printer s serial number when calling available for all customers warranty and non warranty For non warranty customers the cost is 25 00 per call which can be billed to a credit card Be sure to have your printer s serial number when calling Customer Technical Support To resolve printer problems use the suggestions pro...

Отзывы: