


11
21. CONNECTING EXTERNAL DEVICES
A. USB Drives and SD Cards
To access photos, videos, or music stored on any USB drive or memory card, simply insert the
removable storage device into the corresponding port on the side. The projector will read the files
directly from the drive. You can access them from the Main Page by selecting the Music, Photos, or
Movies options on the home screen. However, you’ll need to make sure you have correctly selected the
input source from the source menu first: USB drives are denoted as USB, and SD™ cards are
denoted as TF.
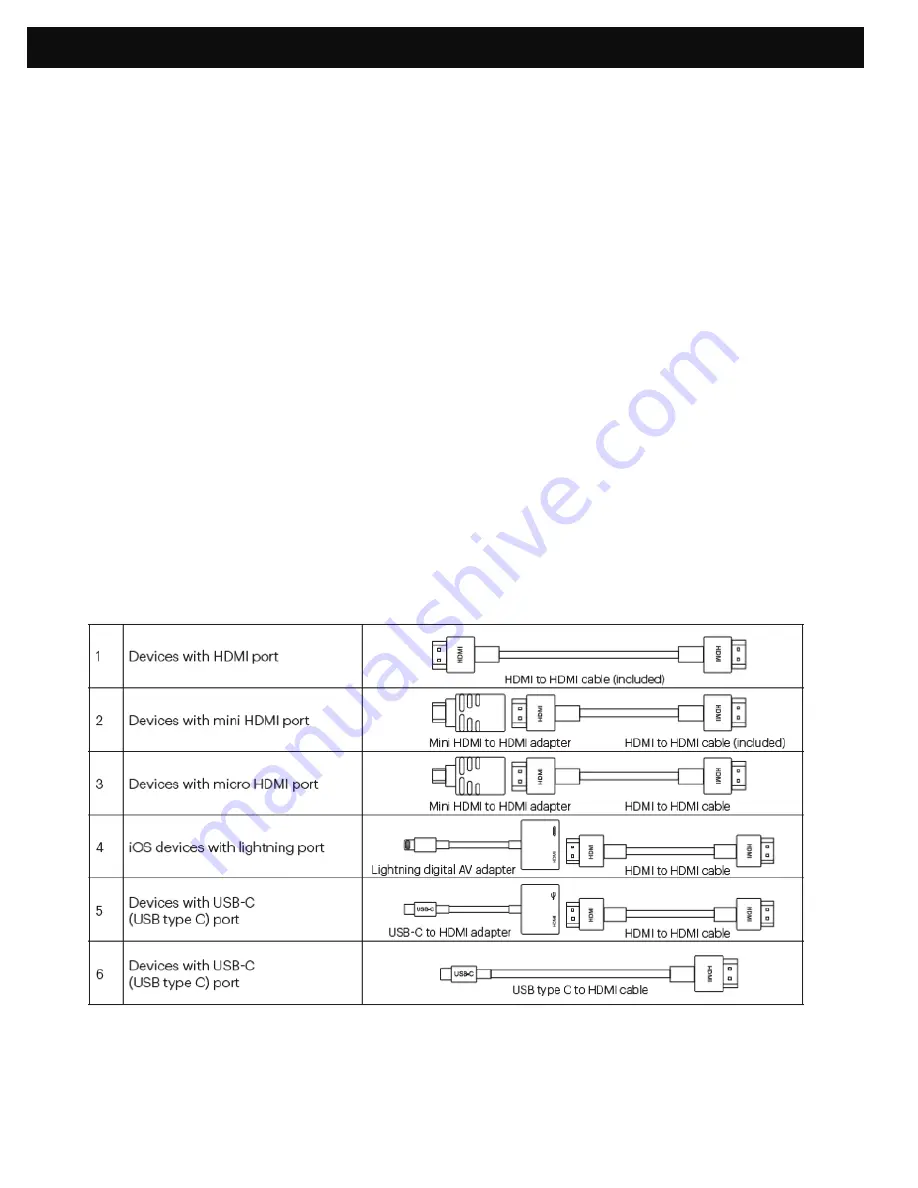
B. HDMI®/VGA Compatible Devices
If you’re using a VGA compatible device, connect the cable to the port on the side and gently screw the
pins down to hold the connection in place. You should then be able to access your photos, videos, or
music.
If you’re using an HDMI compatible device, such as a laptop, personal computer, smartphone, tablet,
or video game console, connect an HDMI cable from the device to your projector to access photos,
videos, or music.
For some devices, you will require an HDMI-to-HDMI cable and/or adapters, which you will need to
purchase separately. To make things a little easier, we’ve compiled this table of devices and adapters
for your convenience.


