background image

4

www.kodak.com/go/support

2

Taking pictures/videos

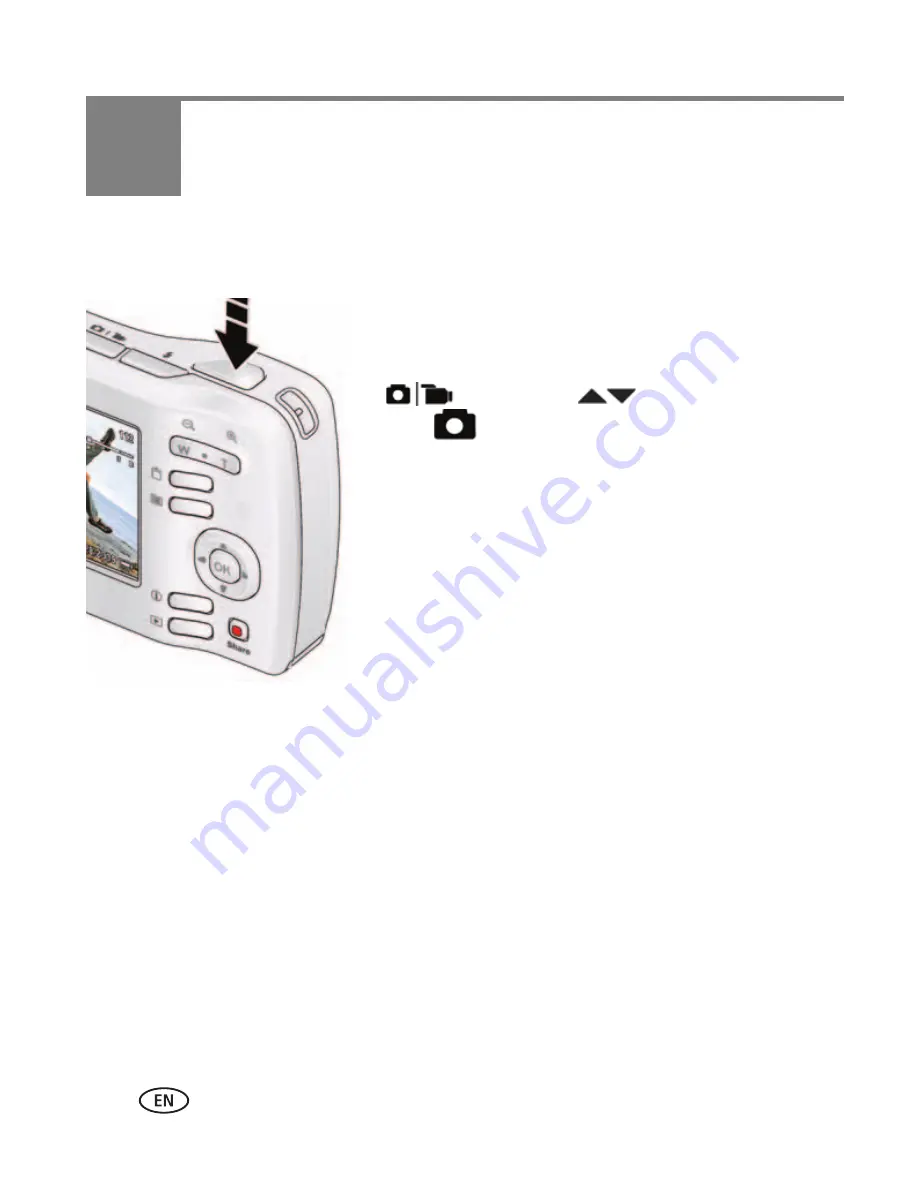
Taking pictures

To get clear, focused pictures:

1

The camera turns on in Auto mode. 
If it turns on in a different mode, press the Mode 

button, then 

 until the LCD displays 

Auto 

, then press OK.

2

Compose the picture.

3

Press the Shutter button 

completely down

.

Содержание Easyshare C15

Страница 1: ...KODAK EASYSHARE Camera C15 Extended user guide www kodak com For help with your camera www kodak com go C15support ...

Страница 2: ...Eastman Kodak Company Rochester New York 14650 Eastman Kodak Company 2011 All screen images are simulated Kodak EasyShare and Pulse are trademarks of Eastman Kodak Company 4H8696_en ...

Страница 3: ...Product features www kodak com go support i Front view Lens Microphone Flash Self timer Video light Power button Mode button Shutter button Beeper Flash button ...

Страница 4: ...pport Product features Back view OK Zoom button Battery compartment SD SDHC Card slot and LCD Share button USB port Delete button Strap post Menu button Info button Review button Tripod socket SD SDHC Card Optional accessory ...

Страница 5: ... icons 6 Watch the battery level 7 Using the digital zoom 7 Using the flash 8 Using different modes 9 Using shortcuts 11 Using the self timer 12 Using burst 12 3 Sharing and tagging pictures 13 Sharing pictures videos through social networks 13 Tagging pictures 15 Marking pictures videos for emailing 16 4 Reviewing and editing 17 Reviewing pictures videos 17 Deleting pictures videos 18 Viewing pic...

Страница 6: ... 27 Using the Setup menu 30 6 Transferring printing pictures 32 Transferring pictures to your computer 32 Printing pictures 33 Marking your pictures for print 34 7 Troubleshooting 35 Getting help from your camera 35 Troubleshooting 36 Getting help on the Web 39 8 Appendix 40 Specifications 40 Care and maintenance 42 Upgrading your software and firmware 42 Storage capacities 42 Important safety ins...

Страница 7: ...ng up your camera Attaching the wrist strap Loading the batteries Purchase extra batteries for your event www kodak com go accessories Watch the battery level See page 7 All batteries lose power over time even if they re not being used ...

Страница 8: ...the camera Setting the language and date time NOTE To change language in the future use the Setup Menu see page 30 Press the Power button to change current field for previous next field OK to accept At the prompt press OK to change OK to accept Language Date Time ...

Страница 9: ... or the camera IMPORTANT When turned on the camera checks to see if a card is inserted If so new pictures videos are stored on the card If no card is inserted new pictures videos are stored in the camera s internal memory If pictures videos are detected in internal memory and a card is inserted the camera prompts you to move the pictures to the card and erase those in internal memory Purchase acce...

Страница 10: ...s Taking pictures To get clear focused pictures 1 The camera turns on in Auto mode If it turns on in a different mode press the Mode button then until the LCD displays Auto then press OK 2 Compose the picture 3 Press the Shutter button completely down ...

Страница 11: ... with videos see page 17 Reviewing the picture video just taken After you take a picture video the LCD briefly displays the picture or the first frame of a video NOTE Audio is captured during video recording Audio can be heard when the video is played on a computer or when the camera is connected to a TV see page 22 To review pictures videos anytime see page 17 Mode button Delete the current pictu...

Страница 12: ...brightness You can adjust the LCD brightness for your environment or to conserve battery power see page 30 Understanding the picture taking icons Battery level Capture mode Pictures time remaining Zoom indicator Self timer Flash mode Exposure compensation Date stamp ...

Страница 13: ... zoom Full Three quarters Half Critical AC Power Purchase extra batteries www kodak com go accessories 1 Use the LCD to frame your subject 2 To zoom in press Telephoto T To zoom out press Wide Angle W 3 Take the picture or video NOTE For focus distances see Specifications starting on page 40 NOTE You may notice decreased image quality when using digital zoom ...

Страница 14: ... Flash modes Flash fires Auto When the lighting conditions require it Fill Flash On Every time you take a picture regardless of the lighting conditions Use when the subject is in shadow or is backlit when the light is behind the subject Off Never Red eye Reduction A preflash fires shrinking the eye pupil before the picture is taken Flash button ...

Страница 15: ...ndings then press OK Use this mode For Auto General picture taking it offers excellent image quality and ease of use You can choose the best picture size and aspect ratio just press the Menu button and choose Picture Size Scene Point and shoot simplicity when taking pictures in practically any situation See page 10 Video Capturing video with sound See page 5 Mode button ...

Страница 16: ...K to enter that Scene mode The camera is now in the scene mode that you chose SCN mode For Portrait Full frame portraits of people Sport Action pictures Sunset Subjects at dusk or dawn Backlight Subjects that are in shadow or backlit Children Action pictures of children in bright light Bright Bright scenes Fireworks Fireworks For best results place the camera on a steady surface or tripod Night Po...

Страница 17: ...pture and review functions 1 Press the Info button The shortcuts appear To hide the shortcuts again press 2 Press to access functions like Exposure Compensation Self timer and Auto focus in Capture mode In Review mode access Keyword Tags You ll see different functions in different modes 3 Press to choose a setting Press to show hide shortcuts Shortcuts ...

Страница 18: ...aken after a 10 second delay 2 Picture Timer The first picture is taken after a 10 second delay A second picture is taken 8 seconds later 3 Compose the scene Press the Shutter button completely down The camera takes the picture pictures after the delay Using burst Use the burst feature to take up to 3 pictures in rapid succession You can turn on burst using a shortcut see page 11 or these steps 1 ...

Страница 19: ...screen appears 2 Press to choose a social networking site then press OK A check mark appears Repeat this step to choose more sites You can press OK again to remove a check mark 3 Press to choose Done then press OK The picture is displayed with the Share icon When you transfer the picture to your computer it will be uploaded to the networking site s that you chose Tip Do you send pictures to the sa...

Страница 20: ... and KODAK PULSE Digital Frames You can add edit or delete email addresses and KODAK PULSE Digital Frames on your camera 1 Press the Share button Press to choose Manage Email Addresses or Manage Frames then press OK 2 To add an email address or frame press to choose Add Email or Add Frame then press OK Use the on screen keyboard to make the addition Example JohnDoe domain com Add a familiar unique...

Страница 21: ... also access Keyword Tag using a shortcut see page 11 3 Press to choose an existing keyword or New Keyword see Using the keyboard page 15 to add a new one then press OK 4 Press to add keywords to other pictures When finished press to choose Done then press OK To return to picture taking mode press the Menu button Using the keyboard The keyboard appears when you need to enter text 1 Press to choose...

Страница 22: ...ng the keyboard 1 Press the Share button Press to find a picture 2 Press to choose Email then press OK 3 Press to find an email address then press OK To mark other pictures videos with the same address press then press OK To send the pictures videos to more than one address repeat step 4 To return to picture taking mode press the Menu button When you transfer the marked pictures videos to your com...

Страница 23: ...more information see page 19 For tips on finding your pictures videos see page 20 Playing a video Press OK to play a video Press OK to pause resume During playback Press to play at 2X speed press again for 4X Press to reverse at 2X speed press again for 4X NOTE Audio is captured during video recording Audio can be heard when the video os played on a computer or when the camera is connected to a TV...

Страница 24: ...eve it This feature is only available immediately after you delete a picture Protecting pictures videos from deletion 1 Press the Review button 2 Press the Menu button 3 Press to choose Protect then press OK 4 Press to choose Protect then press OK A padlock indicates that the picture video is protected Clicking OK again removes the padlock Press to protect other pictures videos or press to choose ...

Страница 25: ...button The camera shows the last picture video that was taken 2 Press the Wide Angle W button to view pictures videos as thumbnails Press it again to see more smaller thumbnails To view all pictures videos choose the All tab To sort pictures videos by date favorites or keywords press and choose the appropriate tab 3 To see a single picture video press to choose it Then press the Telephoto T button...

Страница 26: ...ite 1 Press the Review button 2 Press the Wide Angle W button to view pictures by thumbnail or choose View Thumbnails shortcut 3 Press to choose a tab and sort pictures videos by All Date Favorite or Keyword 4 Press to choose a picture or picture stack Press Telephoto T see pictures in a stack or to see an individual picture Press Wide Angle W to see thumbnails or picture stacks To return to pictu...

Страница 27: ...Understanding the review icons For more about shortcuts see page 11 Email Favorite Print number of prints Protected Picture Video number Upload Video duration Select picture video Battery level Keyword Tag Edit tags View thumbnails Play video Shortcuts ...

Страница 28: ...or any device equipped with a video input To connect the camera directly to a television use an A V cable may be sold separately NOTE Verify that the camera Video Out setting NTSC or PAL is correct see page 30 Image quality is typically better on a computer monitor or when printed than on a television screen Purchase accessories www kodak com go accessories ...

Страница 29: ... portion of the picture remains 1 Press the Review button then to find a picture to crop 2 Press the Menu button then to choose the Edit tab Choose Crop then press OK 3 Press Telephoto T to shrink the crop area or Wide W to stretch it Press to move the crop box When satisfied with the crop box press OK 4 Follow the screen prompts The picture is cropped The original is saved Cropped pictures cannot...

Страница 30: ... the Review button to return to Capture mode Using KODAK PERFECT TOUCH Technology KODAK PERFECT TOUCH Technology helps ensure better brighter pictures 1 Press the Review button then for previous next picture 2 Press the Menu button then to highlight the Edit tab Highlight PERFECT TOUCH Tech then press OK The enhancement is previewed Press to view other parts of the picture 3 Press OK Follow the sc...

Страница 31: ...con then press OK Repeat this step to choose the last frame The video is trimmed You can save it as a new video or replace the original To return to picture taking mode press the Review button Making a picture from a video You can choose a single frame from a video then make a picture suitable for a 4 x 6 inch 10 x 15 cm print 1 Press the Review button then to find a video 2 Press the Menu button ...

Страница 32: ...king mode press the Review button Selecting multiple pictures videos Use the multi select feature when you have two or more pictures to print share delete protect unprotect tag with keyword etc Multi select is used most effectively in Multi Up mode see page 19 1 Press the Review button then and if you re in multi up mode to find a picture video 2 Press OK to select pictures videos A check mark app...

Страница 33: ...ose a tab Capture Video for the most common picture and video taking settings Setup for other camera settings 3 Press to choose a setting then press OK 4 Choose an option then press OK Using the capture tab available when the camera is in a capture mode Settings More information Picture Size Choose a picture resolution See Specifications starting on page 40 Self timer Burst Choose Self timer or Bu...

Страница 34: ...icture taking ISO 80 100 200 400 800 1000 1250 Long Time Exposure Choose how long the shutter stays open normally in low light conditions For best results place the camera on a tripod or steady surface See Specifications starting on page 40 Color Mode Choose color tones Unavailable in Video mode Vivid Color For increased saturation and exaggerated color Full Color For rich balanced color Basic Col...

Страница 35: ... natural lighting Tungsten Corrects the orange cast of incandescent light bulbs Ideal for indoor pictures under tungsten or halogen lighting without flash Fluorescent Corrects the green cast of fluorescent lighting Ideal for indoor pictures under fluorescent lighting without flash Open Shade For pictures in shade in natural lighting Sharpness Control picture sharpness or softness See Specification...

Страница 36: ...ettings Choose what is displayed when the Share button is pressed Show or hide Individual social networking sites E mail addresses all or none KODAK PULSE Digital Frames all or none Date Stamp Add a stamp showing the date time that a picture was taken to all future pictures On Off Camera Sounds Choose volume and sound effects for each function All on Shutter only All off Video Out Choose the regio...

Страница 37: ...cation APPLE IPHOTO etc Format CAUTION Formatting deletes all pictures videos including those that are protected Removing a card during formatting may damage the card Memory Card Deletes everything on the card formats the card Exit Exits without making a change Internal Memory Deletes everything in internal memory including email addresses and keyword tags formats the internal memory KODAK Camera ...

Страница 38: ... KODAK Share Button App 1 Turn off the camera 2 Use the KODAK Camera USB Cable Micro B 5 Pin to connect the camera to the computer Use only the cable included with this camera 3 Turn on the camera 4 After the software is installed follow the prompts to transfer pictures and videos to your computer IMPORTANT If the installer does not run choose and install the right version for your computer www ko...

Страница 39: ...e logo is displayed followed by the current picture and menu If no pictures are found a message is displayed If the menu turns off press any button to redisplay it If the printer sees the camera as a mass storage device turn the camera off and then back on 2 Choose a printing option then press OK Current Picture Press to choose a picture Tagged Pictures If your printer is capable print pictures th...

Страница 40: ...to your door Printing from an optional SD or SDHC Card Automatically print tagged pictures when you insert your card into a printer with an SD SDHC Card slot See your printer user s guide for details Make prints at an SD SDHC Card capable KODAK Picture Kiosk Go to www kodak com go picturemaker Take the card to your local photo retailer for professional printing Marking your pictures for print You ...

Страница 41: ...amera offers a built in Help system It describes every setting for every menu choice If you learn nothing else about your camera learn how to use on camera Help Turning on camera Help Press the Menu then make a menu choice Scroll through a Help topic Press the Info 1 button 2 button ...

Страница 42: ...h does not fire Check the flash setting and change as needed see page 8 NOTE The flash does not fire in all modes Memory card is almost or entirely full Transfer the pictures to the computer see page 32 Delete pictures from the card see page 18 or insert a new card Memory card not recognized or camera freezes with card Card may be corrupted Format the card in the camera see page 31 Use another mem...

Страница 43: ...lution Slide Show does not run on an external display device Adjust the camera Video Out setting to NTSC or PAL see page 30 Make sure the external device settings are correct see the user guide for the device Computer does not communicate with the camera Turn off the camera then turn on the camera Make sure the battery is charged and installed correctly see page 1 Make sure the KODAK Camera USB Ca...

Страница 44: ...amera for more available light Use Fill flash see page 8 in Program mode Backlight in SCN mode or change your position so light is not behind the subject Move so that the distance between you and the subject is within the effective flash range See Specifications page 40 In Program mode increase the Exposure Compensation see page 28 Picture is too light Reposition the camera to reduce the amount of...

Страница 45: ...odak com go C15support Purchase camera accessories www kodak com go accessories Download the latest camera firmware and software www kodak com go C15downloads Register your camera www kodak com go register Chat email write or phone Kodak Chat not available in all languages www kodak com go contact Get information on KODAK All in One Printers www kodak com go inkjet ...

Страница 46: ... 4 5 35 mm equivalent 35 mm Digital zoom 5X continuous Focus system Fixed Multi Zone Center Zone Face Priority Working range 1 3 m 4 27 ft infinity Face detection Yes Shutter speed 1 8 1 1400 seconds Long time exposure 0 5 8 seconds ISO speed Up to 1250 at full resolution Exposure metering Multi pattern center weighted center spot Exposure compensation 2 0 EV with 1 3 EV step White Balance Auto Da...

Страница 47: ...lor modes Vivid Color Full Color Basic Color Black White Sepia Sharpness modes Sharp Normal Soft Video capture 2 GB maximum VGA 640 x 480 30 fps Communication with computer USB 2 0 high speed PIMA 15740 protocol via KODAK Camera USB Cable Micro B 5 Pin Video output NTSC or PAL Microphone Yes Beeper Yes PICTBRIDGE Support Yes Power KODAK AA Alkaline Battery ENERGIZER L91 Lithium Battery rechargeabl...

Страница 48: ...tact a dealer of KODAK Products for more information For digital camera disposal or recycling information contact your local authorities In the US go to the Electronics Industry Alliance site at www eiae org or Kodak at www kodak com go support Upgrading your software and firmware Download the latest versions of KODAK Software and the camera firmware the software that runs on the camera Go to www ...

Страница 49: ...if you have questions If using this product in an airplane observe all instructions of the airline When removing the battery allow it to cool it may be hot Follow all warnings and instructions supplied by the battery manufacturer Use only batteries approved for this product to avoid risk of explosion Keep batteries out of the reach of children Do not allow batteries to touch metal objects includin...

Страница 50: ...Use power saving features such as LCD Brightness see page 30 Charge the battery whenever necessary Dirt on the battery contacts can affect battery life Wipe the contacts with a clean dry cloth before loading the battery in the camera Battery performance is reduced at temperatures below 41 F 5 C When using your camera in cold weather carry spare batteries and keep them warm Do not discard cold batt...

Страница 51: ... or 90 days after the date of repair or replacement whichever is longer Limitations This warranty does not cover circumstances beyond Kodak s control This warranty does not apply when failure is due to shipping damage accident alteration modification unauthorized service misuse abuse use with incompatible accessories or attachments such as third party ink or ink tanks failure to follow Kodak s ope...

Страница 52: ...liability exists beyond any minimum requirements imposed by law even though defect damage or loss may be by negligence or other act Regulatory compliance FCC compliance and advisory This equipment has been tested and found to comply with the limits for a Class B digital device pursuant to Part 15 of the FCC Rules These limits are designed to provide reasonable protection against harmful interferen...

Страница 53: ...ject to the following two conditions 1 This device may not cause harmful interference and 2 this device must accept any interference received including interference that may cause undesired operation Waste Electrical and Electronic Equipment Battery disposal Canadian DOC statement DOC Class B Compliance This Class B digital apparatus complies with Canadian ICES 003 Observation des normes Classe B ...

Страница 54: ...t Appendix CE Hereby Eastman Kodak Company declares that this KODAK Product is in compliance with the essential requirements and other relevant provisions of Directive 1999 5 EC Australian C Tick VCCI Class B ITE China RoHS N137 ...

Страница 55: ...Appendix www kodak com go support 49 Russian GOST R Korean Class B ITE Eastman Kodak Company Rochester NY 14650 ...

Страница 56: ...an compliance 47 care and maintenance 42 charging battery icon 7 children 10 clock setting 2 color mode 28 computer connect camera 32 transfer to 32 connector USB A V 22 copy pictures to computer 32 cropping pictures 23 customize camera 30 D date setting 2 deleting during quickview 5 from internal memory 18 from SD SDHC Card 18 protecting pictures videos 18 display brightness 6 disposal recycling ...

Страница 57: ...speed 28 K keyboard 15 keywords 15 KODAK EASYSHARE Software upgrading 42 KODAK PERFECT TOUCH Technology 24 KODAK Software download 32 Kodak Web sites 35 L language 30 LCD brightness 30 reviewing pictures 17 reviewing videos 17 LCD brightness 6 30 lens cleaning lens 42 loading battery 1 SD SDHC Card 3 locate pictures 20 long time exposure 28 30 M magnify a picture 19 maintenance camera 42 make pict...

Страница 58: ...18 review icons 21 reviewing 17 taking modes 9 transfer to computer 32 pictures video deleting 18 playing a video 17 power camera 2 power icon 7 printing from a card 34 optimizing printer 35 order online 34 PICTBRIDGE 33 tagged pictures 34 protecting pictures videos 18 Q quickview using 5 R recycling disposal 42 regulatory information 46 repair 39 reset camera 30 31 reviewing pictures video as you...

Страница 59: ... 32 sounds 30 specifications camera 40 strap 1 T tagging keywords 15 taking pictures videos 4 television slide show 22 time setting 2 timer shutter delay 12 tips battery guidelines 44 care maintenance 42 transfer pictures 32 trash can deleting 5 trimming a video 25 troubleshooting 35 turning camera on and off 2 typing 15 U undelete undo 18 upgrading software firmware 42 URLs Kodak Web sites 35 USB...

Страница 60: ...54 www kodak com go support Index W warranty 44 white balance 29 Z zoom optical 7 ...

Отзывы: