background image

Using the Projector

33

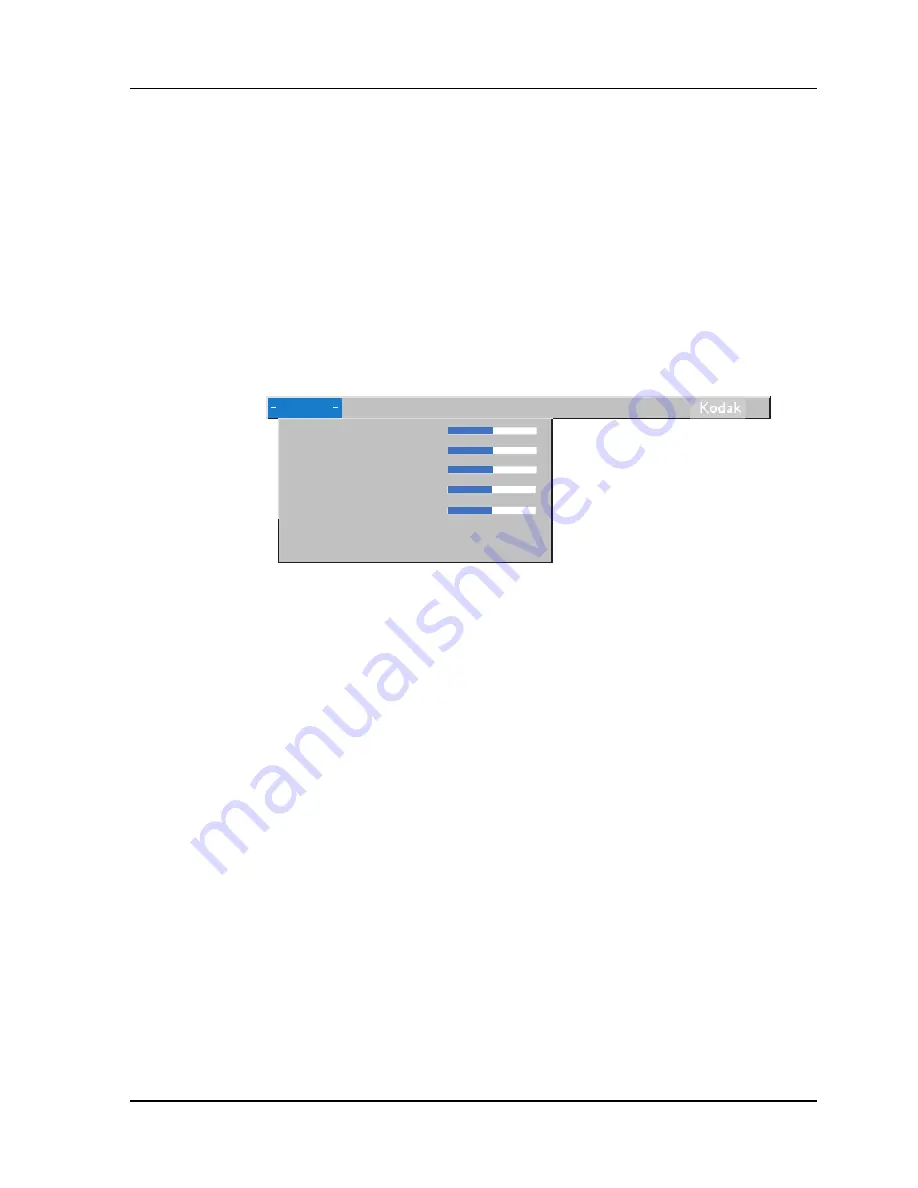
Some submenus, such as Brightness, consist of a slider bar you use to 
increase or decrease a value; some submenus, such as Standby Time, 
consist of options you scroll through to select the desired one. All 
changes are saved when you close the menus.

To access another menu, use the up and down navigation buttons or 
the disk mouse to move back to the top of the current menu, then use 
the left and right navigation buttons to move to another menu.

Display Menu 


Brightness

Adjusting the brightness changes the intensity of the image.

Press the left navigation button to darken the image.

Press the right navigation button to lighten the image.

Contrast

The contrast controls the degree of difference between the lightest 
and darkest parts of the picture. Adjusting the contrast changes the 
amount of black and white in the image.

Press the left navigation button to decrease the contrast.

Press the right navigation button to increase the contrast, making 

the blacks appear blacker and the whites appear whiter.

Display Audio Image Controls Language Status

>

>

Brightness

Contrast

Tint

Color

Sharpness

Blank screen

blue

Reset all

Содержание DP2900 - Digital Projector

Страница 1: ...KODAK DP2900 User Guide Digital Projector with Kodak s Exclusive Image Manager...

Страница 2: ......

Страница 3: ...is Class A digital apparatus complies with Canadian ICES 003 Cet appareil num rique de la classe A est conforme la norme NMB 003 du Canada Safety Certifications UL CUL T V NOM EN 55022 Warning This is...

Страница 4: ......

Страница 5: ...e Projector 23 Using the Projector 25 Basic Image Adjustment 25 Adjusting the Projector 26 Using the Remote Control 27 Using the Keypad and Remote Buttons 29 Using the On Screen Menus 32 Display Menu...

Страница 6: ...P2900 Digital Projector vi Appendix A 55 Appendix B 57 Portable and Laptop Activation Chart 57 Appendix C 67 Using Video Mirroring with a PowerBook Computer 67 Appendix D 69 Projected Image Size 69 In...

Страница 7: ...rovided by equipment Please save all safety instructions Safety Definitions Warning Statements identify conditions or practices that could result in personal injury Caution Statements identify conditi...

Страница 8: ...ty See the following page for the customer service contact information Caution Don t block ventilation openings Caution Don t set liquids on the projector Spilled liquids may damage your projector Cau...

Страница 9: ...emistries capacities brands or sizes together Leakage could result Do not disassemble recharge or short circuit batteries Do not subject batteries to high temperature or fire Discard used batteries ac...

Страница 10: ......

Страница 11: ...solution The XGA resolution of the DP2900 projected image is 1024x768 The projector cannot compress screen resolutions above 1024x768 If your computer s screen resolution is higher than 1024x768 reset...

Страница 12: ...ncluded in the box Register to receive product updates announcements and special offers from Kodak The contents of your shipping box may vary depending on the projector configuration you ve ordered 1...

Страница 13: ...ute before attempting to turn it back on Handle the projector as you would any product with glass components Be especially careful not to drop it Avoid leaving the projector in direct sunlight or extr...

Страница 14: ...ve the following information available the projector s serial number located on the bottom label the resolution of your computer Online Services Contact Kodak via Faxed Information Kodak offers automa...

Страница 15: ...and 8 00 p m Eastern Standard Time Monday through Friday The International Toll Line is 44 0 131 458 6714 In Europe call Austria Osterreich 01 795 67000 Germany Deutschland 069 9509 6055 Spain Espana...

Страница 16: ...613 9353 2567 Singapore Malaysia Indonesia India 65 4736 611 Fax 65 4798 397 Thailand 662 2713 040 Fax 662 6161 923 Philippines 632 8100 331 loc 223 or 416 Fax 632 8140 626 South Korea 822 7085 577 F...

Страница 17: ...en set up the projector behind your screen See Rear Projection on page 38 to reverse the image 1 Make sure your projector is on a flat surface It must be within 10 feet 3 m of your power source and wi...

Страница 18: ...formation visit our Web site at www kodak com go projectors Note Many laptop computers do not automatically turn on their external video port when a secondary display device such as a projector is con...

Страница 19: ...ly You do not need to restart your computer after connecting a USB mouse to use it it is hot pluggable 1 Plug the end of the M1 DA analog computer cable into the mouse connector on your computer Do yo...

Страница 20: ...video cable is sold separately To connect to a video source 1 Plug the composite video cable s yellow connector into the video out connector on your video source This connector may be labeled To Monit...

Страница 21: ...audio out connector on the video source Plug the audio adapter s other end into the audio cable 5 Plug the audio cable into the audio in connector on the projector The projector is compatible with th...

Страница 22: ...he first time you connect your computer to the projector the computer may display a message stating that new hardware was found The Add New Hardware Wizard may appear Use the Wizard to load the correc...

Страница 23: ...b menu For more information about the menus see page 32 Turning Off the Projector If you want to turn off the projector for a short period of time press the standby button on the keypad or remote This...

Страница 24: ......

Страница 25: ...focus lens page 26 If the image appears to shimmer or if it has blurry vertical bars after you have adjusted the focus turn Auto Image page 36 off and then back on to reset the automatic sync and trac...

Страница 26: ...g This adjusts the image size without affecting focus The projector is equipped with a self locking quick release elevator foot and button To raise the projector 1 Press and hold the elevator button 2...

Страница 27: ...to the screen and back to the projector must be less than or equal to 25 feet For best results point the remote directly at the projector Note If the remote is inactive for several minutes it sleeps t...

Страница 28: ...le in Slide Show mode To configure the POWERPOINT program for this choose Options from the Tools menu click the View Tab de select the Popup Menu on Right Mouse Click option in the Slide Show section...

Страница 29: ...page 32 for details The Keypad Buttons The Remote Control Buttons standby turns off the image without turning off the projector source button toggles back and forth between video and computer sources...

Страница 30: ...oling Do not press the lamp on off button when the LED is orange Menu Press the menu button to open the on screen menus Press menu again to close the menus When you close the menus the projector saves...

Страница 31: ...tails If you press standby again within 15 minutes the projector returns to normal operations immediately If you press standby again after 15 minutes there is about a 60 second delay before the lamp t...

Страница 32: ...enu button on the keypad or remote This changes the volume source and standby buttons on the keypad to menu navigation buttons Press the corresponding buttons to move the cursor up down left or right...

Страница 33: ...lay Menu Brightness Adjusting the brightness changes the intensity of the image Press the left navigation button to darken the image Press the right navigation button to lighten the image Contrast The...

Страница 34: ...ase the amount of color in the image Press the right mouse button to increase the amount of color in the image Sharpness This setting adjusts the sharpness of a video image Press the left mouse button...

Страница 35: ...er source only This option helps to keep the image square as the angle of projection is changed To adjust the keystone highlight Keystone then click the right navigation button Note Keystone correctio...

Страница 36: ...e projector makes the best fit of the image to the computer screen If you turn Resize off by highlighting it in the Image menu and clicking the left or right navigation button to select off the image...

Страница 37: ...rning Auto Image off then back on again If the image is still bad try adjusting the tracking manually 1 Turn Auto Image off 2 Highlight Manual tracking then press the left or right navigation button r...

Страница 38: ...herefore SECAM must be chosen manually If the projector is unable to detect the correct standard the colors might not look right or the image might appear torn If this happens manually select a standa...

Страница 39: ...ctive source checking the default source first Highlight Auto Source Select and click the left or right navigation button to turn this feature on and off Plug and Play This setting toggles between On...

Страница 40: ...ins until an active source is detected Click the left or right navigation button to turn this feature off and display a plain black or blue screen instead of the startup screen Language Menu You can d...

Страница 41: ...n Lamp on page 46 for details Computer resolution Shows your computer s resolution setting To change this go to your computer s Control Panel and adjust the resolution in the Display tab See your comp...

Страница 42: ...the projector s software version This information is useful when contacting Technical Support Startup screen version Indicates the projector s splash screen version This information is useful when co...

Страница 43: ...CINTOSH monitor It is generally used for images created on or for a MACINTOSH This setting also works well with a PC if you are using higher than normal contrast PC images Rich Colors results in an im...

Страница 44: ......

Страница 45: ...or Cleaning the Lens Follow these steps to clean the projection lens 1 Apply a non abrasive camera lens cleaner to a soft dry cloth Avoid using an excessive amount of cleaner Abrasive cleaners solvent...

Страница 46: ...Z DQG DQ DSSOLFDEOH ORFDO UHJXODWLRQV The lamp hour counter in the Status menu counts the number of hours the lamp has been in use Replace the lamp when the brightness is no longer acceptable To order...

Страница 47: ...e bulb ruptures small glass fragments may be generated The lamp module is designed to contain these fragments but use caution when removing the lamp module DXWLRQ 1HYHU RSHUDWH WKH SURMHFWRU ZLWK WKH...

Страница 48: ...r 9 Tighten the screws on the outside of the module 5HSODFH WKH ODPS GRRU E LQVHUWLQJ WKH KRRNV RQ WKH UHDU RI WKH ODPS GRRU LQWR WKH SURMHFWRU DQG SUHVVLQJ WKH ODPS GRRU LQWR SODFH I WKH ODPS GRRU GR...

Страница 49: ...your hand 2 Slide the battery cover off the end of the remote 3 Remove the old batteries and dispose of them in an environmentally proper manner 4 Install two new AAA alkaline batteries Make sure you...

Страница 50: ...e out jack on your desktop Make sure the volume setting on your computer is halfway No audio out port on the image source You are not able to connect audio to the projector Problem Cause and Solution...

Страница 51: ...Horizontal position computer source only on page 37 and Vertical position computer source only on page 37 Image is out of focus Turn the projection lens to focus the image Make sure that the projectio...

Страница 52: ...age is wider at the top or bottom of the screen This keystoning effect is caused by the projection angle not being perpendicular to the screen Adjust the keystoning See Keystone computer source only o...

Страница 53: ...the projector Make sure you have pressed the Power button and the Power light is a steady green Check the projector s lamp to make sure that it is securely connected to the projector Make sure that th...

Страница 54: ...hat the image source is turned on Turn off everything and power up again in the proper order Make sure that your laptop s external video port is turned on See the computer manual for details Make sure...

Страница 55: ...fied Temperature Operating 50 to 104 F 10 to 40 C Non operating 4 to 158 F 20 to 70 C Humidity Operating and non oper 5 to 95 relative humidity non condensing Dimensions 8 75 x 9 75 x 2 5 inches 22 2...

Страница 56: ...p Input Power Requirements 100 120VAC 6A 50 60Hz 200 240VAC 3A 50Hz Audio Input Input Impedance 10K ohm nominal AC coupled Maximum Input Voltage LIN RIN PEAK 4 5 V for THD 0 3 LIN or RIN 2 0 Vrms for...

Страница 57: ...tivation function key is labeled with an icon for example or the text CRT LCD Note Usually pressing the key commands once activates the external video port pressing it again activates both the externa...

Страница 58: ...ima Shift Ctrl Alt C setup VGA Conf Simulscan Shift Ctrl Alt L setup VGA Conf Simulscan Ambra FN F12 FN F12 FN F5 FN F5 F2 Choose Option F5 F2 Choose Option F5 Amrel setup menu setup menu Shift Ctrl D...

Страница 59: ...FN F4 FN F4 Chembook FN F6 FN F6 Commax Ctrl Alt 6 Ctrl Alt 5 Compaq Ctrl Alt Ctrl Alt FN F4 FN F4 automatic automatic mode for setup option mode for setup option Compuadd automatic automatic Alt F f...

Страница 60: ...Ctrl Alt Ctrl Alt F10 Ctrl Alt F10 FN F8 CRT LCD FN F8 FN D FN D FN F12 FN F12 Digital automatic reboot FN F2 FN F2 Dolch dip switch to CRT dip switch to LCD Epson dip switch to CRT dip switch to LCD...

Страница 61: ...Hitachi FN F7 FN F7 Honeywell FN F10 FN F10 Hyundai setup screen option setup screen option IBM 970 automatic warm reboot IBM ThinkPad reboot enter setup menu FN F2 FN F7 select choice from setup menu...

Страница 62: ...Mac PowerBook 140 145 150 170 no video port requires a 3rd party interface 160 165 180 520 540 5300 210 230 250 270 280 2300 Control Panel folder PowerBook Display folder Activate Video Mirroring war...

Страница 63: ...screen option CRT at the DOS prompt LCD at the DOS prompt FN F3 FN F3 Olivetti automatic automatic FN O FN O Packard Bell FN F0 FN F0 Ctrl Alt Ctrl Alt Panasonic FN F2 FN F2 Prostar Ctrl Alt S at boot...

Страница 64: ...creen option setup screen option Tangent FN F5 FN F5 Texas Instruments setup screen option setup screen option Top Link setup screen option setup screen option FN F6 FN F6 Toshiba Ctrl Alt End Ctrl Al...

Страница 65: ...tached These manufacturers offer more than one key command depending on the computer model Automatic Automatic WinBook Ctrl Alt F10 Ctrl Alt F10 Wyse software driven software driven Zenith FN F10 FN F...

Страница 66: ......

Страница 67: ...itor 2 2 Set the number of colors you want 3 Open the Control Strip then click on the monitor icon 4 Select Turn Video Mirroring On Now you can turn video mirroring on and off from the Control Strip w...

Страница 68: ...previous ones When using SimulScan the projector displays the same information that appears on your PowerBook To select SimulScan 1 Open the Control Panel then double click Monitors and Sound 2 In th...

Страница 69: ...e sizes Note Image sizes shown are based on a digital keystone correction of zero Image Size Width and Height for DP2900 maximum image size Distance to Screen feet Diagonal feet Width feet Height feet...

Страница 70: ...tal Projector 70 Image Size Width and Height for DP2900 minimum image size Distance to Screen feet Diagonal feet Width feet Height feet 4 9 2 5 2 0 1 5 8 4 1 3 3 2 5 12 6 2 4 9 3 7 16 8 2 6 6 4 9 20 1...

Страница 71: ...cable 18 S video 20 cleaning the projection lens 45 color adjusting 34 compatibility IBM compatible 11 Macintosh 11 composite video cable connecting 20 computer cable analog 12 computers compatible 1...

Страница 72: ...3 resolution 11 reversed 38 size 17 69 zooming 26 Image menu 35 Image menu options Auto Image 36 Horiz Position 37 Keystone 35 Manual Sync 37 Manual Tracking 37 Resize 36 Vert Position 37 K keypad usi...

Страница 73: ...replacing projection lamp module 46 re positioning image 37 resetting adjustments 34 resizing video 36 resolution 11 S safety guidelines vii screen projecting behind 38 sizes 17 69 SECAM video 34 38...

Страница 74: ...User Guide KODAK DP2900 Digital Projector 74 resizing 36 standards 38 Volume buttons 31 volume adjusting 31 W widescreen video 36 Z zooming the image 26...

Страница 75: ...T WITH THE ORIGINAL PRODUCT PACKAGING AND DAMAGE OCCURS DURING PRODUCT SHIPMENT THIS WARRANTY DOES NOT COVER CIRCUMSTANCES BEYOND KODAK S CONTROL SERVICES OR PARTS TO CORRECT PROBLEMS RESULTING FROM T...

Страница 76: ...packing will be at the owner s expense The repaired or replaced unit will be shipped from Kodak within five business days from the date of the digital projector receipt at the service center Unless a...

Страница 77: ......

Страница 78: ...Eastman Kodak Company 343 State Street Rochester New York 14650 Kodak is a trademark of Eastman Kodak Company PN 6b5276 5 00 Eastman Kodak Company Printed in the U S A...

Отзывы: