


2
14
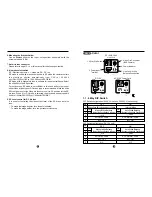
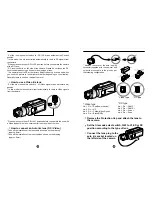
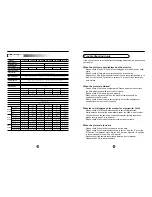
* Remove the cover of the auto iris plug
connector(supplied with the camera) and
solder the lens cable to the pins as per
the following configuration:
* Video type
No. 1 Pin --- Red(Power source)
No. 2 Pin --- N.C
No. 3 Pin --- Yellow(Video Signal)
No. 4 Pin --- Black(GND)
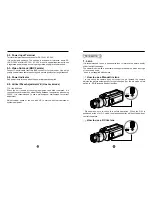
Remove the Protection Cap and attach the lens to
the camera.
Set the Iris mode select switch, S/W to VI, ES or DC
position according to the type of lens.
Connect the lens plug to the
auto iris socket located on
the left side of the camera.
* DC type
No. 1 Pin --- DAMP -
No. 2 Pin --- DAMP +
No. 3 Pin --- Drive +
No. 4 Pin --- Drive -
* Video type
* DC type
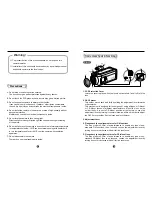
1
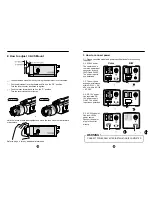
* Set the iris mode select switch to DC (DC driven automatic iris Control)
position.
* In this mode, the iris is controlled automatically to react to DC signals from
the camera.
* Please make sure to set S/W to DC position before you operate the camera
with a DC lens.
* DC level control is on the side of the camera. Please do not touch the DC
Level control when using a fixed or Video iris type of lens.
* The camera is set to DC at the factory. Adjust the pot up or down only when
you need the picture to look brighter or darker depending on the situation.
Generally there is no need to adjust the level.
How to use a Video Iris lens
* Set the iris mode select switch to VI (Video signal driven Automatic Iris)
position.
* In this mode the lens controls itself automatically to react to Video signals
from the camera.
* Please make sure to set S/W to VI position before you operate the unit with
a Video type auto iris lens. Level control is on the side of the lens .
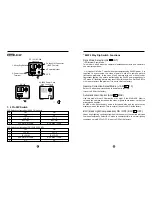
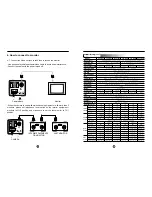
How to connect an Auto Iris lens (DC / Video)
* Take off the insulation of the lens cable as shown on the drawing.
(approx. 8mm)
* Take off the insulation of the inner cable as shown on the drawing.
(approx. 2mm)
13


