29
ASSEMBLY INSTRUCTIONS FOR ROUTER TABLE
22. Installing Tabletop Insert
WARNING
• Always unplug the router table before attaching
accessories or making any adjustment.
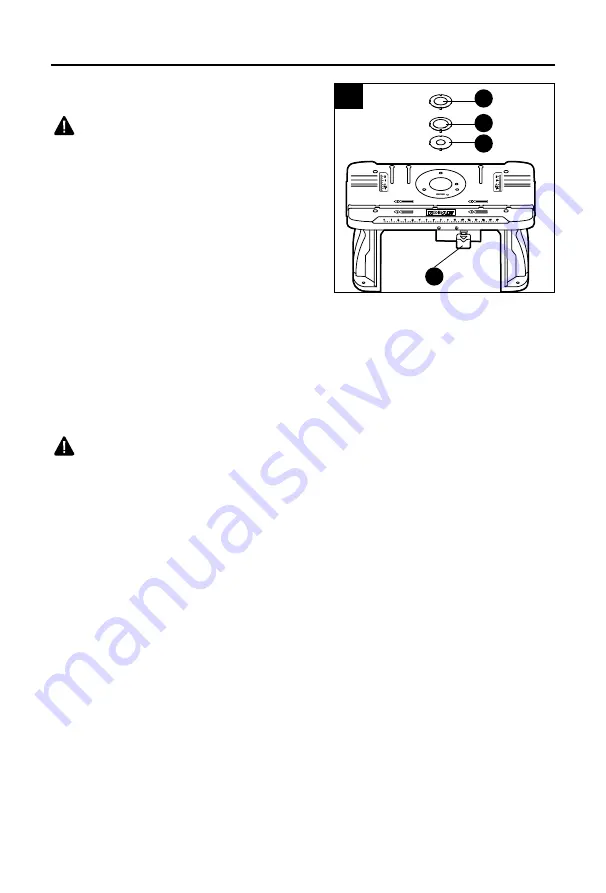
This router table includes three tabletop inserts,
each with an opening of different diameter: insert
with 1-1/4 in. diameter opening (am), insert with
1-7/8 in. diameter opening (an), and an insert with
2-1/8 in. diameter opening (ao).
Select a table top insert with a clearance hole that
is 3/4 in. larger than the diameter of the cutter bit
being used. When smaller diameter router bits are
used, use the smaller insert rings to provide additional support to the workpiece as it nears the
bit and to minimize the amount of debris that falls through the opening.
a. If the router is attached to the table, turn it off with the integrated safety switch (W) and
unplug the router table.
b. Position the tabletop insert over the insert opening in the router table.
c. Press down evenly over the tabs until the insert locks in place.
d. To remove, pull up gently until the tabs disengage.
e. When not in use, store the tabletop inserts in a convenient place.
WARNING
• DO NOT attempt to remove tabletop inserts from the insert opening until the router is turned
off and the router bit comes to a complete stop.
• DO NOT use bits that have a cutting diameter that exceeds the clearance hole in the table
inserts. Select a table insert that has a clearance hole that is 3/4 in. larger than the diameter
of the cutter bit being used.
22
W
ao
an
am
Содержание K11RTA-03
Страница 40: ...40 ...


