background image

20

x

6

x

1

1

42

-

1

39

-

41

40

42

40

41

40

40

40

40

40

Содержание Imagine-Build-Play HORNET SWARM DUELING...

Страница 1: ......

Страница 2: ...rotection against harmful interference in a residential installation This equipment generates uses and can radiate radio frequency energy and if not installed and used in accordance with the instructions may cause harmful interference to radio communications However there is no guarantee that interference will not occur in a particular installation If this equipment does cause harmful interference...

Страница 3: ...connectors with special long slots They slide together as you see in the pictures Push these parts together until you hear a click Spacers There are places in your model where you need to add blue and silver spacers Be sure to use the right color and count them carefully BUILDING BASICS Parts Count Before you start building be sure to compare the parts in your set with the parts listed here If any...

Страница 4: ...4 1 1 ...

Страница 5: ...5 2 3 1 3 1 2 2 3 3 ...

Страница 6: ...6 5 1 3 x9 1 5 1 6 4 6 3 7 3 2 2 ...

Страница 7: ...7 7 1 8 1 6 8 ...

Страница 8: ...8 10 1 10 1 8 9 ...

Страница 9: ...9 11 1 12 1 10 12 4 ...

Страница 10: ...10 1 13 1 12 13 ...

Страница 11: ...11 14 1 15 1 14 1 13 15 x8 x8 ...

Страница 12: ...12 16 1 17 1 15 17 3 3 2 2 3 ...

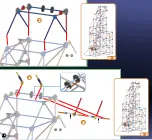
Страница 13: ...13 1 17 1 20 19 18 20 1 1 10 ...

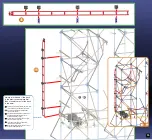
Страница 14: ...14 1 20 1 22 22 21 x5 x7 1 21 ...

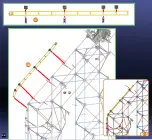
Страница 15: ...15 1 22 23 1 23 1 24 x6 1 23 24 ...

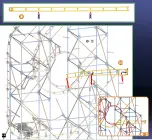
Страница 16: ...16 1 26 1 24 1 27 1 26 26 25 27 x1 ...

Страница 17: ...17 1 28 1 32 1 28 1 27 x4 29 28 32 31 30 ...

Страница 18: ...18 1 33 1 32 33 1 33 1 35 34 35 2 2 ...

Страница 19: ...é 2 piles AA ou LR6 dans le moteur Instalaste dos pilas AA o LR6 en el motor Heb je 2 AA of LR6 batterijen gestoken in de motor Hai installato 2 batterie AA o LR6 nel motore Foram instaladas as pilhas 2 AA ou LR6 no motor Heb je er 2 AA of LR6 batterijen ingestoken NL PT IT DE ES FR 38 37 36 36 38 ...

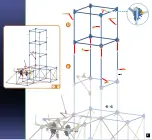
Страница 20: ...20 x6 x1 1 42 1 39 41 40 42 40 41 40 40 40 40 40 ...

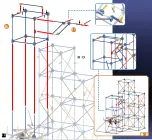
Страница 21: ... of Track 2 Attach the black chain guides to the top of the track and attach the connectors to the bottom of the track exactly as shown 3 Be sure to push the connectors on firmly until they click Track comes in two different shapes Track Building Tips for Instruction Updates Go to ...

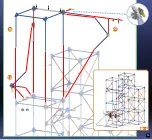
Страница 22: ...22 Track A 1 44 1 42 43 44 ...

Страница 23: ...n Al construir conecta siempre la pista de lado superior a lado superior Die einzelnen Schienenstücke müssen immer mit der Oberseite nach oben zeigen wenn sie miteinander verbunden werden Collega sempre la rotaia parte superiore a parte superiore in tutta la costruzione Liga sempre a face superior da pista à face superior durante a montagem Maak steeds de bovenkant van het spoor vast aan de bovenk...

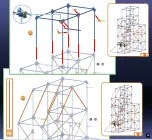
Страница 24: ...24 1 48 1 46 47 48 ...

Страница 25: ...25 1 50 1 48 49 50 ...

Страница 26: ...26 1 52 1 50 51 52 ...

Страница 27: ...27 1 54 1 52 53 54 ...

Страница 28: ...28 1 56 1 54 55 56 ...

Страница 29: ...29 1 58 1 56 57 58 ...

Страница 30: ...30 1 60 1 58 59 60 ...

Страница 31: ...31 1 62 1 60 61 62 ...

Страница 32: ...32 1 64 64 1 62 63 ...

Страница 33: ...33 1 66 1 64 65 66 ...

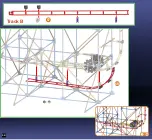
Страница 34: ...34 1 68 1 66 Track B 67 68 ...

Страница 35: ...35 1 70 1 68 69 70 ...

Страница 36: ...36 1 72 1 70 71 72 ...

Страница 37: ...37 1 74 1 72 73 74 ...

Страница 38: ...38 1 76 76 1 74 75 ...

Страница 39: ...39 1 78 78 1 76 77 ...

Страница 40: ...40 1 80 80 1 78 79 ...

Страница 41: ...41 1 82 82 1 80 81 ...

Страница 42: ...42 1 84 1 82 83 84 ...

Страница 43: ...43 1 86 1 84 85 86 ...

Страница 44: ...44 1 88 88 1 86 87 ...

Страница 45: ...45 1 90 90 1 88 89 ...

Страница 46: ...46 1 92 92 1 90 91 ...

Страница 47: ...47 1 94 94 1 92 93 ...

Страница 48: ... kettenglieder immer in die gleiche richtung IMPORTANTE Collegare le maglie della catena nella stessa direzione IMPORTANTE Prende os elos da corrente seguindo a mesma direcção BELANGRIJK Maak de ketenschakels vast in dexelfde richting NL PT IT DE ES FR 96 95 98 x32 95 x2 x7 96 95 95 95 95 95 95 95 95 95 95 95 95 95 95 95 Attaching Chain Links x10 96 95 97 95 95 95 95 95 95 95 95 95 95 95 95 95 95 ...

Страница 49: ...49 1 100 101 99 100 ...

Страница 50: ...h the cars slide them onto an open end of the track If the cars gets stuck on the way down make sure they are not hitting any K NEX parts Attaching Coaster Cars Attaching Sound Module 102 104 103 Attaching Graphic ...

Страница 51: ...X USA and Canada only See the back cover for other ways to contact K NEX If a car gets stuck on the track Is the model built correctly Make sure the car is not hitting any K NEX parts Are the track pieces connected properly Is the car attached to the track correctly Adjust the track to eliminate any flat or little bumpy spots on the track Need additional building help Go to the K NEX web site www ...

Страница 52: ...construcción Instrucciones de la prima en www knex com thrill rides Bauvorschlag Zusätzliche Bauanleitungen bei www knex com thrill rides Idea di costruzione Bonus Istruzioni a www knex com thrill rides Ideia de construção Instruções do bônus em www knex com thrill rides Idee voor bouwen De instructies van de bonus bij www knex com thrill rides NL PT IT DE ES FR ...

Страница 53: ... la cara y la ropa alejada de las piezas móviles PRECAUCIÓN Si el cabello del niño entra en contacto con las partes en movimiento del juguete puede quedar enredado Se requiere la supervisión por un adulto PRECAUCIÓN No uses el Módulo de Sonido cerca del oído El uso indebido puede producir daño al oído Se recomienda la ayuda de un adulto Compartan la experiencia K NEX con su niño y hagan que la con...

Страница 54: ...l cadmio Usare sempre batterie raccomandate dello stesso tipo o di tipo equivalente Rimuovere sempre batterie quasi scariche o completamente scariche dal prodotto non causare corto circuito ai terminali di alimentazione Inserire le batterie con la polarità corretta come illustrato Consigli importanti Si raccomanda l uso di batterie alcaline Non si raccomanda l uso di batterie ricaricabili Rimuover...

Страница 55: ...amilieavontuur Neem je tijd tijdens het bouwen en monteren Spoed je niet Tracht je model in dezelfde richting te plaatsen als de aanwijzingen terwijl je bouwt en monteert Produkt en kleuren kunnen afwijken Batterijgegevens OPGEPAST Verzeker je ervan dat de batterijen er op de juiste manier in te steken en volg steeds de aanduidingen van de speelgoed en batterijenfabrikanten Meng geen oude en nieuw...

Страница 56: ......

Отзывы: