CONTENTS
HORNET SWARM
DUELING COASTER . . . . . . . . . 4
Track Building Tips. . . . . . . . . . . . . . . . . .
21
Tips & Troubleshooting . . . . . . . . . . . . . .
51
WAVE COASTER. . . . . . . . . . . 52
Languages. . . . . . . . . . . . . . . . . . . . . . . .
53
CAUTION:
•
Be sure to insert the batteries correctly and
always follow the toy and battery manufacturers’
instructions.
•
Do not mix old and new batteries or alkaline,
standard (carbon-zinc) or rechargeable (nickel-
cadmium) batteries. Only batteries of the same
or equivalent type recommended should be used.
•
Always remove weak or dead batteries from the
product; do not short-circuit supply terminals.
•
Insert batteries with correct polarity (+/-) as
shown.
Important Tips:
•
Alkaline batteries are recommended.
•
Rechargeable batteries are not recommended.
•
Remove rechargeable batteries from toy before
charging; they must be charged only under adult
supervision.
•
Non-rechargeable batteries must not be
recharged.
•
Keep components free of dust; do not immerse
or use in water.
•
Do not dispose of batteries in a fire; they could
leak or explode and cause injury.
•
Remove all batteries if the toy will not be used
for a long period of time.
•
Do not put rods smaller than 2 inches in any
openings of the motor; they will damage the
motor, and cannot be removed.
•
Help the environment by disposing of your product
and packaging responsibly. The wheelie bin symbol
indicates that the product and batteries must not be
disposed of in the domestic waste as they contain
substances which can be damaging to the environ-
ment and health. Please use designated collection
points or recycling facilities when disposing of the
item or batteries.
BATTERY INFORMATION
FCC Statements:
WARNING:
Changes or modifications to this unit not expressly approved by the party responsible for the
compliance could void the user’s right to operate the equipment.
This device complies with Part 15 of the FCC Rules. Operation is subject to the following two conditions:
1. This device may not cause harmful interference and
2. This device must accept any interference received, including interference that may cause undesired
operation. This model is tested to comply with FCC standards - FOR HOME OR OFFICE USE.
This equipment has been tested and found to comply with the limits for a Class B digital device, pursuant
to part 15 of the FCC Rules. These limits are designed to provide reasonable protection against harmful
interference in a residential installation. This equipment generates, uses and can radiate radio frequency
energy, and, if not installed and used in accordance with the instructions, may cause harmful interference
to radio communications. However, there is no guarantee that interference will not occur in a particular
installation. If this equipment does cause harmful interference to radio or television reception, which can
be determined by turning the equipment off and on, the user is encouraged to try to correct the
interference by one or more of the following measures: (1) Reorient or relocate the receiving antenna.
(2) Increase the separation between the equipment and receiver. (3) Consult the dealer or an
experienced radio/TV technician. This Class B digital apparatus complies with Canadian ICES-003.
IMPORTANT STUFF
FOR PARENTS & KIDS
Keep these instructions in a handy location.
They contain important safety information.
Read all warnings and instructions before you
start to build and operate the model.
WARNING:
CHOKING HAZARD - Small parts.
Not for Children under 3 years.
CAUTION:
Keep hands, face, hair and clothing away
from all moving parts.
CAUTION:
Hair entanglement may result if hair
comes in contact with moving parts of motor.
Adult supervision is required.
CAUTION:
Do not use Sound Module close to ear!
Misuse may cause damage to hearing.
•
Adult building help is recommended.
•
Share the K'NEX experience with your child and make
building with K'NEX a family fun adventure.
•
Don't rush! Take your time to enjoy the building process.
•
Try to face your model in the same direction as shown
in the instructions while you build.
•
Product and colors may vary.
•
For additional building help go to the K'NEX web site:
www.knex.com/tips
How to Insert and Remove Batteries:
MOTOR:
•
Use a small Phillips head screwdriver to loosen
the screw. Insert 2 fresh AA batteries (LR6) into
the compartment with the correct polarity (+/-)
as shown.
+
-
2
!
SOUND MODULE:
•
Install all batteries in the Sound Module before
you start building.
•
Sound Module requires 3 AAA (or LR03)
batteries. Alkaline batteries are recommended.
•
Use a small Phillips head screwdriver to open
the Sound Module. Insert 3 fresh AAA batteries
(LR03), inside the compartment with correct
polarity (+/-).
•
Sound Module may not work properly in direct
sunlight.
•
Push the gray
button on the side
to activate sound.
The Sound
Module will shut
off after 10 min-
utes. Push the
button again to
reactivate the
sound.
+
+
+
Содержание Imagine-Build-Play HORNET SWARM DUELING...
Страница 1: ......
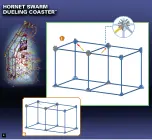
Страница 4: ...4 1 1 ...
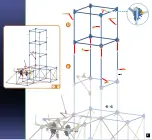
Страница 5: ...5 2 3 1 3 1 2 2 3 3 ...
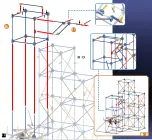
Страница 6: ...6 5 1 3 x9 1 5 1 6 4 6 3 7 3 2 2 ...
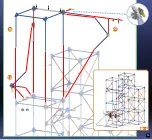
Страница 7: ...7 7 1 8 1 6 8 ...
Страница 8: ...8 10 1 10 1 8 9 ...
Страница 9: ...9 11 1 12 1 10 12 4 ...
Страница 10: ...10 1 13 1 12 13 ...
Страница 11: ...11 14 1 15 1 14 1 13 15 x8 x8 ...
Страница 12: ...12 16 1 17 1 15 17 3 3 2 2 3 ...
Страница 13: ...13 1 17 1 20 19 18 20 1 1 10 ...
Страница 14: ...14 1 20 1 22 22 21 x5 x7 1 21 ...
Страница 15: ...15 1 22 23 1 23 1 24 x6 1 23 24 ...
Страница 16: ...16 1 26 1 24 1 27 1 26 26 25 27 x1 ...
Страница 17: ...17 1 28 1 32 1 28 1 27 x4 29 28 32 31 30 ...
Страница 18: ...18 1 33 1 32 33 1 33 1 35 34 35 2 2 ...
Страница 20: ...20 x6 x1 1 42 1 39 41 40 42 40 41 40 40 40 40 40 ...
Страница 22: ...22 Track A 1 44 1 42 43 44 ...
Страница 24: ...24 1 48 1 46 47 48 ...
Страница 25: ...25 1 50 1 48 49 50 ...
Страница 26: ...26 1 52 1 50 51 52 ...
Страница 27: ...27 1 54 1 52 53 54 ...
Страница 28: ...28 1 56 1 54 55 56 ...
Страница 29: ...29 1 58 1 56 57 58 ...
Страница 30: ...30 1 60 1 58 59 60 ...
Страница 31: ...31 1 62 1 60 61 62 ...
Страница 32: ...32 1 64 64 1 62 63 ...
Страница 33: ...33 1 66 1 64 65 66 ...
Страница 34: ...34 1 68 1 66 Track B 67 68 ...
Страница 35: ...35 1 70 1 68 69 70 ...
Страница 36: ...36 1 72 1 70 71 72 ...
Страница 37: ...37 1 74 1 72 73 74 ...
Страница 38: ...38 1 76 76 1 74 75 ...
Страница 39: ...39 1 78 78 1 76 77 ...
Страница 40: ...40 1 80 80 1 78 79 ...
Страница 41: ...41 1 82 82 1 80 81 ...
Страница 42: ...42 1 84 1 82 83 84 ...
Страница 43: ...43 1 86 1 84 85 86 ...
Страница 44: ...44 1 88 88 1 86 87 ...
Страница 45: ...45 1 90 90 1 88 89 ...
Страница 46: ...46 1 92 92 1 90 91 ...
Страница 47: ...47 1 94 94 1 92 93 ...
Страница 49: ...49 1 100 101 99 100 ...
Страница 56: ......


