EN - 10
2. INSTALLATION AND
PREPARATION FOR USE
WARNING:
This appliance must be
installed by an authorised service
person or qualified technician,
according to the instructions in this guide
and in compliance with the current local
regulations.
• Incorrect installation may cause harm
and damage, for which the manufacturer
accepts no responsibility and the
warranty will not be valid.
• Prior to installation, ensure that the local
distribution conditions (electricity voltage
and frequency and/or nature of the gas
and gas pressure) and the adjustments
of the appliance are compatible. The
adjustment conditions for this appliance
are stated on the label.
• The laws, ordinances, directives and
standards in force in the country of use
are to be followed (safety regulations,
proper recycling in accordance with the
regulations, etc.).
2.1
inStruCtionS for the inStaller
General instructions
• After removing the packaging material
from the appliance and its accessories,
ensure that the appliance is not
damaged. If you suspect any damage,
do not use it and contact an authorised
service person or qualified technician
immediately.
• Make sure that there are no flammable
or combustible materials in the close
vicinity, such as curtains, oil, cloth etc.
which may catch fire.
• The worktop and furniture surrounding
the appliance must be made of
materials resistant to temperatures
above 100°C.
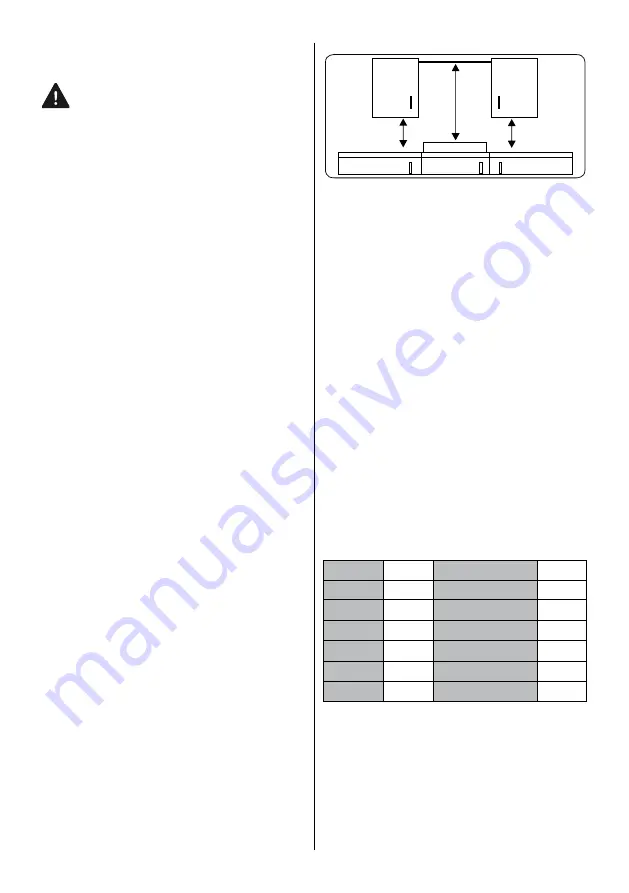
• If a cooker hood or cupboard is to be
installed above the appliance, the safety
distance between cooktop and any
cupboard/cooker hood should be as
shown below.
HOB
Minimum
42 cm
Minimum
42 cm
Minimum 65 cm (with
hood)
Minimum 70 cm (without
hood)
• The appliance should not be installed
directly above a dishwasher, fridge,
freezer, washing machine or clothes
dryer.
• If the base of the appliance is accessible
by hand, a barrier made from a suitable
material must be fitted below the base
of the appliance, ensuring
that there is
no access to the base of the appliance.
• If the hob is installed above an oven, the
oven should have a cooling fan.
• Make sure that the induction hob is well
ventilated and the air inlet and outlet are
not blocked.
2.2
inStallation of the hob
The appliance is supplied with an
installation kit including adhesive sealing
material, fixing brackets and screws.
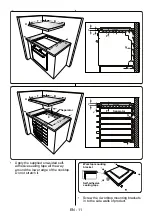
• Cut the aperture dimensions as
indicated in the figure. Locate the
aperture on the worktop so that, after
the hob is installed, the following
requirements are followed.
B (mm)
590
min. A (mm)
50
T (mm)
520
min. C (mm)
50
H (mm)
56
min. E (mm)
500
C1 (mm)
560
min. F (mm)
10
C2 (mm)
490
G (mm)
20
D (mm)
50
I (mm)
38
J (mm)
5
Содержание KPI6020B
Страница 9: ...CZ 9 kter ho jste v robek zakoupili...
Страница 106: ...SK 12 4 4 N N PE PE L2 L3 L1 L 5 5 3 3 2 2 1 1...

