21
EN
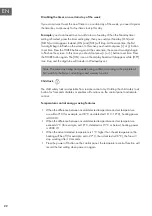
Set the day timer
Press TIMER button on remote control, you can set day timer. Press [+] and [-] button to
set the day time. Press [+] to set the time to 30 (min) - 1H - 2H - 3H ... up to 8H - 00.
Press [-] to set the time to 8H - 7H - 6H ... down to 30 minutes.
Note: While making any settings relevant to timer setting, the screen will also display
the timing icon. When the timer setting has only 99 seconds left, the digital tube will
show the seconds left.
Set the week timer
Press this TIMER button 3-5 seconds to set the weekly timer. Press the TIMER button for 5
seconds, and the display panel will show [ON] and [MON] , while the digital display
showing […].
Weekly timer set, start from Monday, for example setting Monday: Monday [ON]
status - Monday [OFF] status - Thursday [ON] status - ... Sunday [OFF] status.
1. Press TIMER button the first time, through the ‚ ‚ button to set the start working time
on Monday, while the display board [ON] and [MON] will be flashing at the
same time. Firstly, set the hour, the first two digital of the tube showing hours, you
can press [+] and [-] button to set the hour.
2. Press TIMER button the second time to set minutes. Ten minutes is consider to be a
unit and you could press [+] and [-] button to adjust minutes (from 10, 20 - 50 -
00 minutes).
3. Press TIMER button the for the third time, you can set the power-off working time
on Monday. The [ON] icon will be disappear and at the same time the [OFF] icon
will flash on. [MON] icon will not disappear. First, you can set hours by pressing
plus and minus button. The first two digit will display hours.
4. Press TIMER button the fourth time to set the minutes, you can adjust the minutes
by pressing plus and minus button. You will finish setting the Monday timer setting
after four time setting operation.
5 Press the TIMER button again you can setting the on-off situation on Tuesday. The
operation method is same as Monday.
Note: When you finish to set the whole week, the digital tube will show the ambient
temperature. This indicate the setting have been finished.
Содержание 10032527
Страница 2: ......
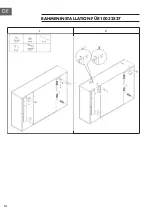
Страница 14: ...14 DE RAHMENINSTALLATION FÜR 10032527 1 2 ...
Страница 26: ...26 EN FRAME INSTALLATION FOR 10032527 1 2 ...
Страница 38: ...38 ES MONTAJE DEL MARCO POR 10032527 1 2 ...
Страница 50: ...50 FR INSTALLATION DU CADRE POUR 10032527 1 2 ...
Страница 62: ...62 IT INSTALLAZIONE TELAIO PER 10032527 1 2 ...
Страница 63: ......
Страница 64: ......


